Light Makes the Photograph. Literally.
Photography is, quite literally, drawing with light. The word comes from the Greek phōs (light) and graphē (drawing or writing). Without light, you have nothing. No exposure. No color. No texture. No dramatic bear emerging from the mist. Just a very expensive black rectangle and an awkward conversation about why you woke everyone up at 4:30 in the morning.
And yet, wildlife photographers have a remarkable ability to forget this the second an animal appears. There’s a particular kind of madness that takes hold when someone sees a bear. Suddenly nothing else matters. Not the background. Not the composition. Certainly not where the sun is. There is a bear, therefore we must photograph the bear.
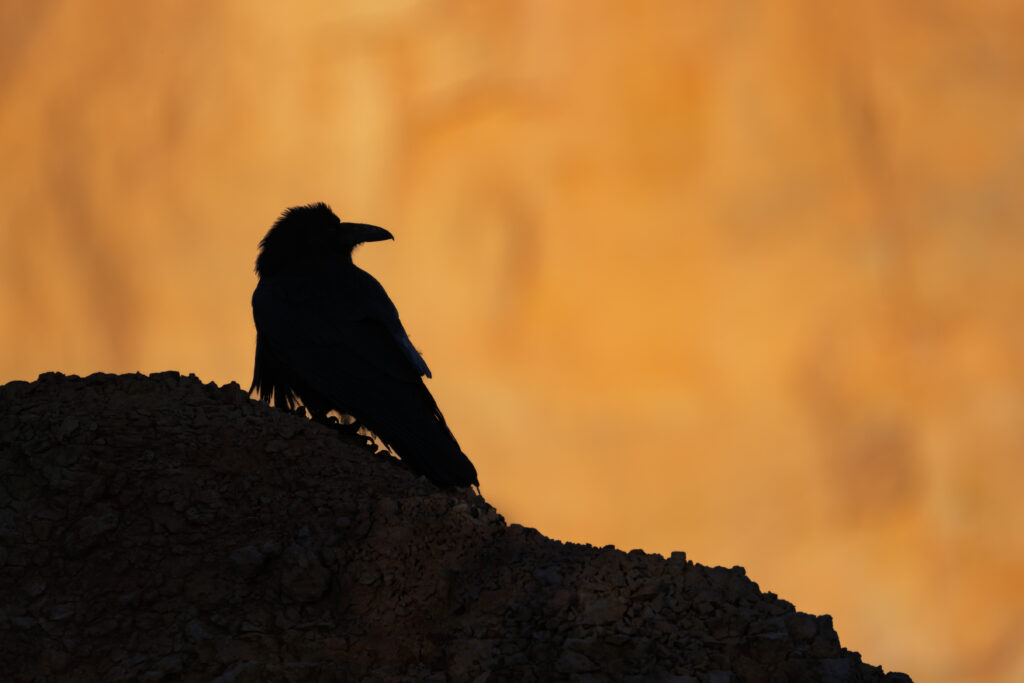
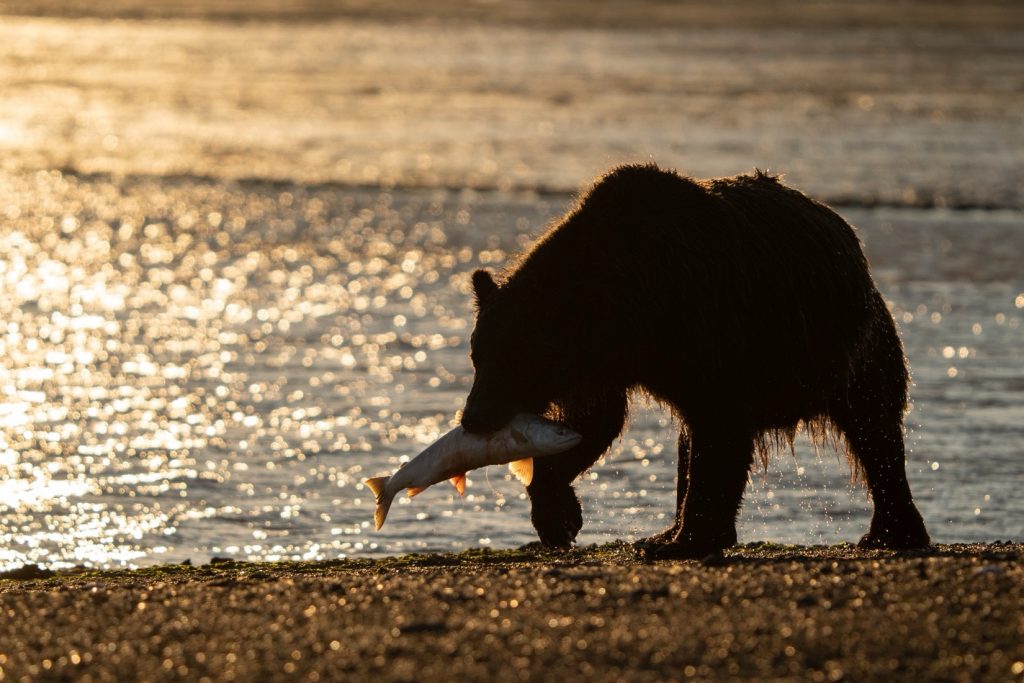
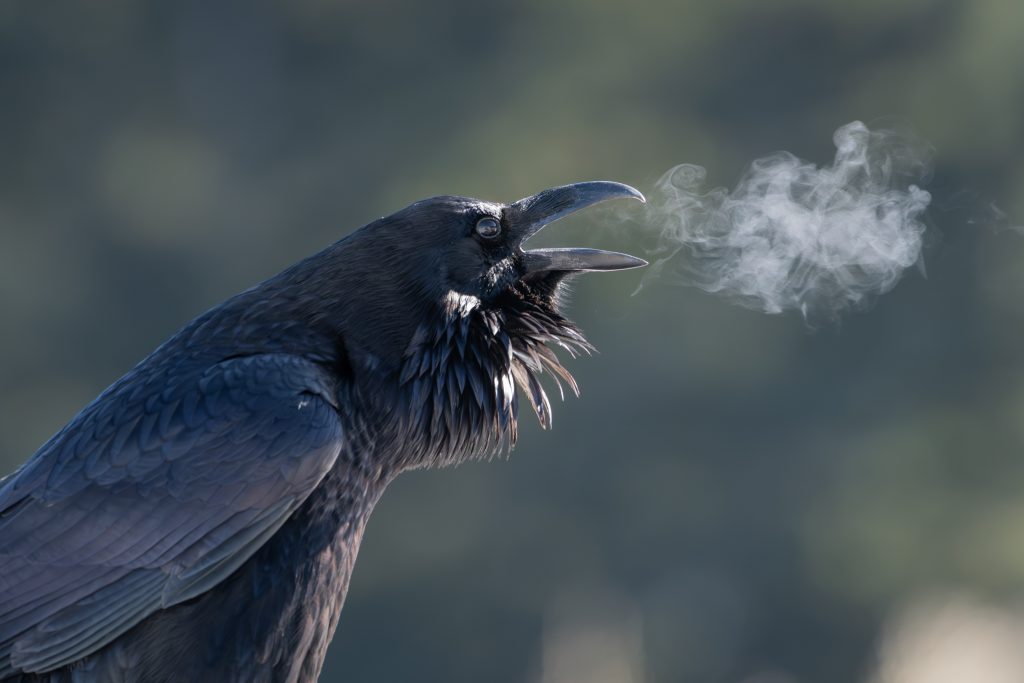
I understand. I’ve been there. But the animal is only part of the equation. Light determines how we actually see that animal. It creates shape and depth. It reveals (or conceals) fur and feathers. It changes color. It separates a subject from the background. It can make a raven’s breath glow in the freezing air or reduce a 500-pound brown bear to a powerful black silhouette against shimmering water.
Most importantly, beautiful light does not simply mean golden light. Yes, sunrise and sunset are lovely. Photographers adore golden hour so much that we’re willing to crawl out of a warm bed at hours normally reserved for bakers, insomniacs and questionable airport departures.
But golden light is only one tool. Soft overcast light can reveal incredible detail. Side light can carve an animal out of the landscape. Backlight can turn fur, feathers, dust and breath into something luminous. Hard midday sun can create graphic shadows and striking monochrome images. Even darkness can become part of the photograph.
The question, then, isn’t simply: Is this good light?”
A much more useful question is: “What kind of photograph can I draw with the light I have?”
Because you can’t control the sun, clouds or weather any more than you can tell a polar bear where to stand. But you can learn to see what the light is giving you. And that’s when things get interesting.
Direction Matters: Where Is This Stuff Coming From?
Before worrying about whether light is “good,” figure out where it is coming from. Changing the direction of light relative to your subject can completely change what the viewer sees.
Front Light: Show Me What You’ve Got
Front light occurs when the light is coming from roughly behind the photographer and falling directly onto the subject. It’s straightforward. Dependable. The khaki pants of photographic lighting.
Front light reveals color and detail beautifully because most of the visible subject is evenly illuminated. For wildlife portraits, identification shots and colorful subjects, that can be exactly what you want. Front illumination gives us feathers, eyes, markings and color without forcing us to dig through deep shadows.
The downside is that front light can flatten a subject. With fewer shadows, there are fewer visual clues showing depth and shape.
Useful? Absolutely. Dramatic? Sometimes. Sexy? Let’s not get carried away.
Side Light: Welcome to the Third Dimension
Move the light around to the side and suddenly things get interesting.
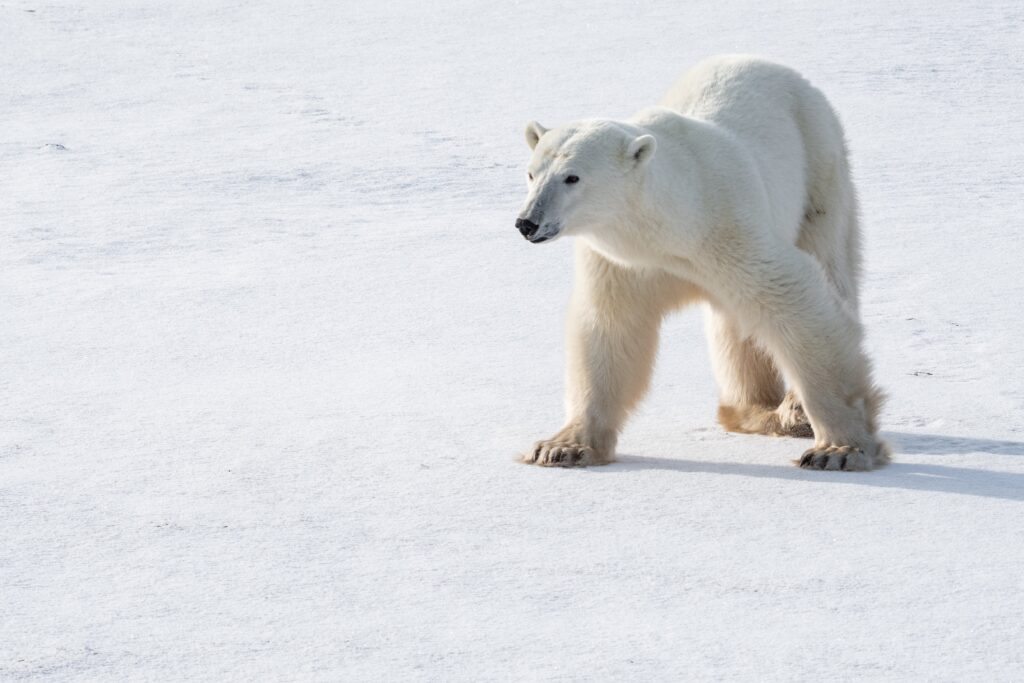
Side light creates shadows across the subject, and those shadows reveal shape and texture. Fur becomes furrier. Feathers gain structure. Muscles, wrinkles and contours become visible. Look at the polar bear walking across the snow. The directional light creates subtle differences between the illuminated and shaded sides of the animal. Instead of simply showing us what a polar bear looks like, the light helps us feel its physical presence.
Side light is particularly effective when texture is part of the story: shaggy bears, elephant skin, layered feathers, antlers, reptile scales, windswept landscapes. Shadows aren’t necessarily something to eliminate. Sometimes they’re doing half the work.
Backlight: Break the Rules & Make Something Interesting
Backlight is where photographers either get excited or start complaining that the sun is in the wrong place.
I recommend option one.
With the light behind your subject, you can illuminate translucent materials: fur, feathers, vegetation, dust, spray and breath. That glowing edge around an animal is called rim light, and under the right conditions it can beautifully separate your subject from its surroundings.
Backlight is also silhouette territory. The Alaskan bear example above works because I stopped trying to expose the bear normally and instead embraced its shape. With silhouettes, recognizable form becomes critical. A bear photographed head-on may look like a furry potato. Broadside, with the legs, head and ears separated, suddenly the viewer immediately understands the subject. You’re no longer photographing fur detail. You’re photographing shape.
Quality Control: Beautiful Light Isn’t Always Pretty Light
Direction tells you where light comes from. Quality describes what that light feels like. And this is where the idea of “good light” gets wonderfully messy.
Golden Hour: Yes, It’s Lovely. Calm Down.
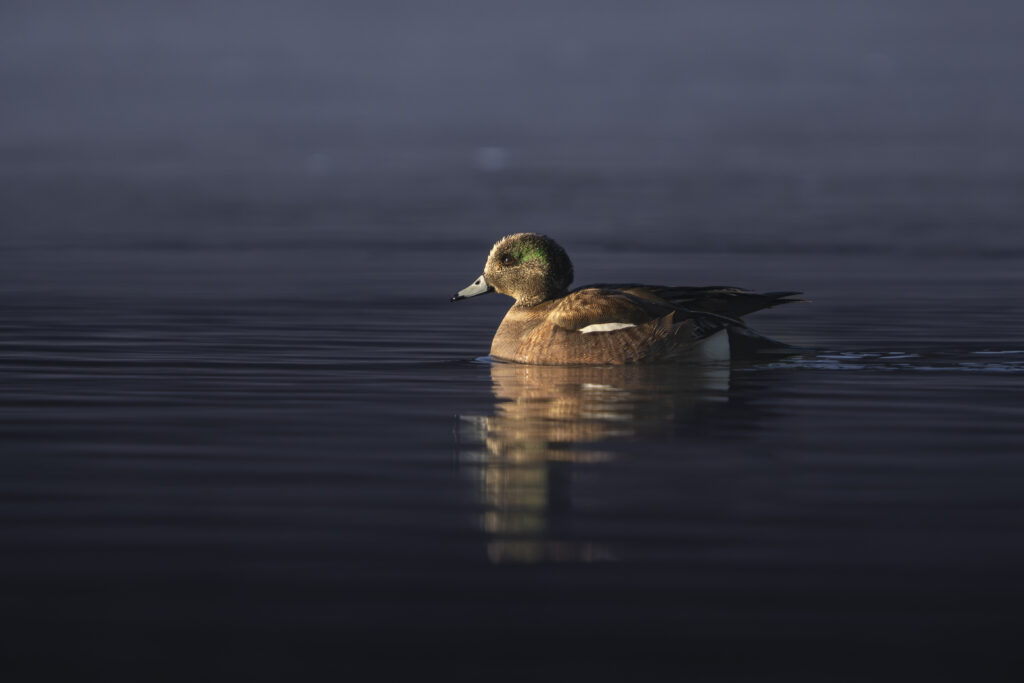
Golden hour gets its reputation honestly. When the sun sits low near the horizon, the light becomes warmer and directional. Long shadows create depth. Mountains glow. Fur catches warm highlights. Entire landscapes suddenly look like someone turned the saturation slider up without committing a felony. The American Wigeon in the river above shows exactly why photographers chase this stuff.
But golden light isn’t automatically good light. Warm sunlight hitting the wrong side of your animal can still create an ugly photograph. A gorgeous sunset behind a wildlife subject can produce impossible contrast. And beautiful warm light falling on a terrible background remains beautiful warm light on a terrible background.
Golden hour is an opportunity, not a guarantee.
Diffused Light: Nature’s Giant Softbox
Overcast skies are criminally underrated. Clouds essentially turn the sky into one enormous softbox, reducing harsh shadows and spreading light more evenly across your subject. For wildlife, this can be fantastic.
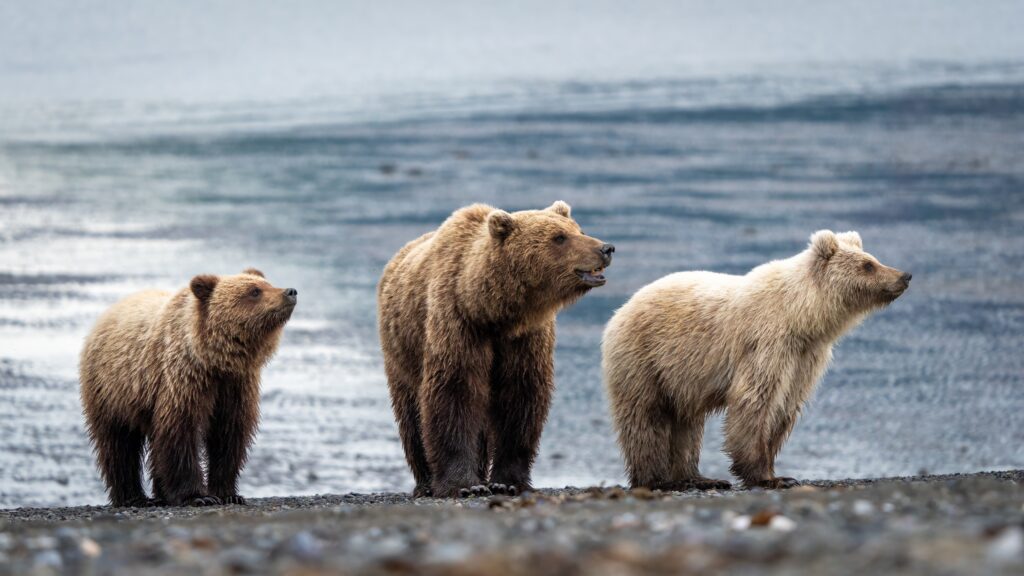
Look at the brown bear and cubs in the diffuse-light example above. Detail remains visible across the fur, there are no nuclear-bright highlights demanding attention, and the softer contrast allows expression and interaction to carry the image.
I’ve found this especially useful with dark wildlife. Bears, moose and other dark subjects can lose detail quickly under hard sunlight. Soft conditions give you much more tonal information to work with, something I’ve also emphasized when photographing Alaska’s brown bears.
So when the clouds roll in, don’t automatically mourn your missing sunset. Your giant free softbox just arrived.
Low Light: Moody Is a Feature, Not a Bug
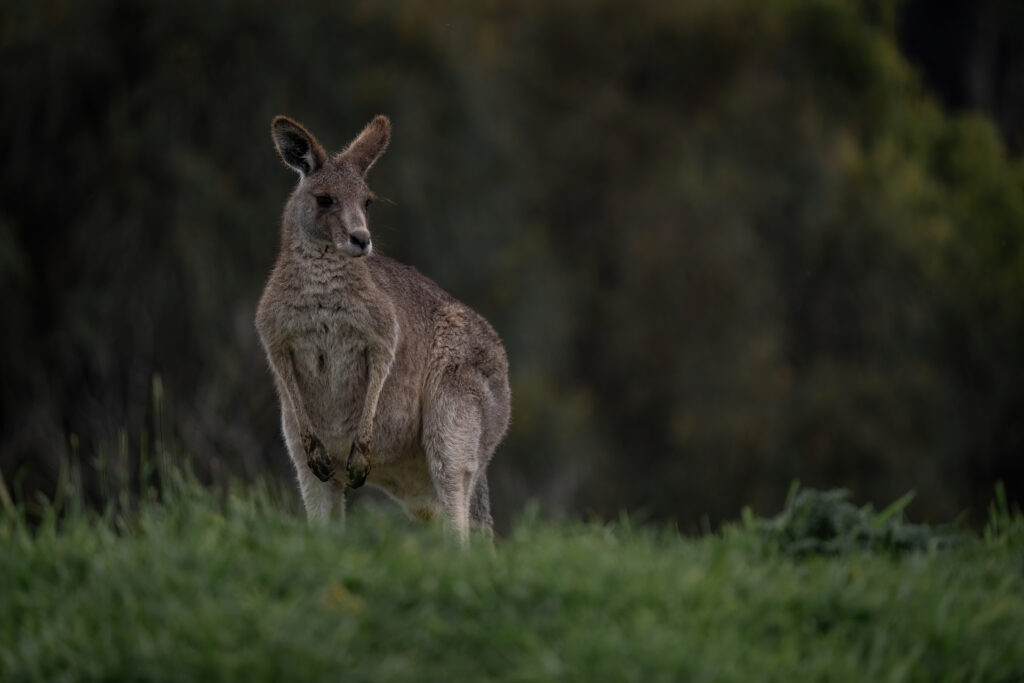
Photographers sometimes treat low light like an equipment failure. It isn’t. Look at the kangaroo sitting in that dark landscape. The image works because the darkness is part of the atmosphere. The light isn’t trying to reveal everything. It is revealing enough. Low light, fog, storms, mist and other atmospheric conditions can simplify a photograph and establish mood in ways bright sunshine simply can’t.
The technical price may be a higher ISO. Feel free to pay it.
Dappled Light: Chaos With Potential
Forests specialize in dappled light: bright patches punching through foliage surrounded by deep shadow. This can be an exposure nightmare. It can also be spectacular.
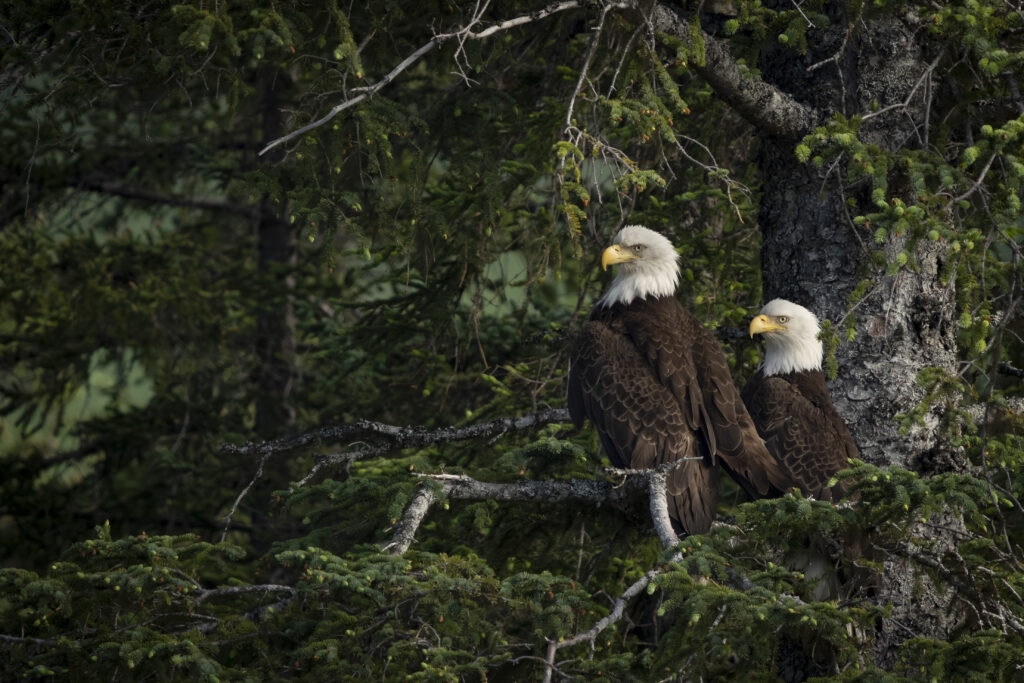
Look at the eagle example. The trick isn’t trying to make every part of the scene equally bright. Instead, use the patches of illumination intentionally. Wait for the animal’s face or eye to move through light while the surroundings remain darker. Suddenly the forest becomes a stage and the sunlight becomes the spotlight.
Just remember that bright areas pull the viewer’s eye aggressively. If the brightest patch in the frame is an irrelevant leaf three feet behind your animal, congratulations—you’ve made an excellent photograph of a leaf.
Midday Light: The Alleged Villain
Hard midday light has terrible public relations. Photographers are routinely told to avoid it because overhead sun creates hard shadows, high contrast and washed-out colors. Fair enough.
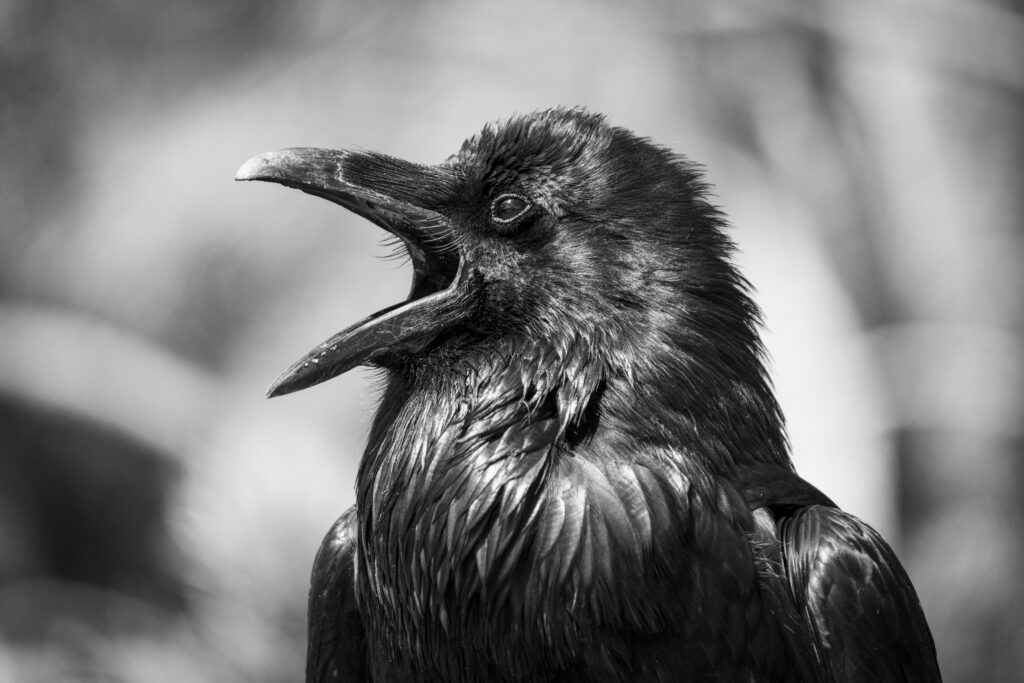
But “difficult” does not mean “useless.” The monochrome raven above is a great example of changing the photographic goal rather than whining about the conditions. Hard light can emphasize graphic shapes, textures and contrast. When color isn’t helping, black & white may allow those tonal contrasts to become the photograph.
That same idea applies to other scenes with little meaningful color, silhouettes, dramatic clouds and high-contrast subjects. Removing color can shift attention toward form, texture and emotion instead. Sometimes terrible color light is excellent black-and-white light.

Color: Light’s Favorite Practical Joke
Color isn’t simply something an animal possesses. It changes with light. Warm light exaggerates yellows, oranges and reds. Open shade can feel cooler. Overcast conditions may produce softer, subtler colors. Hard sunlight can create enormous differences in saturation between illuminated and shadowed areas.
Look at the blue-footed booby examples above. Same species. Same famously ridiculous blue feet. Different light, different photograph. This is one reason I don’t decide that an image “must” be color simply because the animal itself is colorful. Ask whether the color is actually helping tell the story. If it is, protect it.
If it isn’t, murder it without remorse and see what monochrome gives you.
The Best Wildlife Photographers Sometimes Wait for Empty Space
One of the most useful habits you can develop is learning to recognize good light before the animal gets there. This sounds backwards because wildlife photography usually goes like this:
- Animal appears.
- Photographer experiences adrenaline dump.
- Photographer follows animal.
- Photographer takes 700 photographs.
- Photographer later discovers 693 of them have terrible backgrounds and weird light.
Instead, start paying attention to the stage:
- Where is the best light?
- Where are the shadows?
- Where is there a clean background?
- Where is the animal likely to move?
- And what happens if you position yourself for that possibility?
I’ve written before about doing essentially the same thing with backgrounds: find the stage first and wait for the actor to arrive. It is also an extension of previsualization; thinking about the photograph before simply reacting to whatever wanders in front of the lens.
Maybe there’s a shaft of sunlight crossing a forest trail. Maybe there’s a glowing patch of water where a bear is fishing. Maybe cold Yellowstone air and low backlight could illuminate the breath of a calling raven.
Find that light. Then wait. Wildlife photography becomes considerably more interesting when you stop following animals around and start anticipating where a photograph might happen.
Exposure: Your Camera Is Offering an Opinion
Your meter is useful. It is not Moses descending from Mount Sinai with the correct exposure engraved on stone tablets. Your camera is looking at reflected light and trying to make a mathematically sensible decision. Sometimes that’s exactly what you want. Sometimes it absolutely isn’t.
- Bright backgrounds such as snow can fool the meter into making an image too dark. Dark backgrounds can push it in the opposite direction. Exposure compensation allows you to tell the camera, politely or otherwise, that you have a different idea.
- With bright scenes, watch your highlights carefully. Once important highlight detail is blown out, recovery becomes difficult or impossible.
- For silhouettes, expose for the bright background and allow the animal to go dark.
- For low-key, moody photographs, deliberately underexposing can suppress distracting information and concentrate attention on the illuminated subject.
- And when fading light forces your ISO upward, remember what you’re actually trying to accomplish. Technical perfection is not the goal. The photograph is the goal. If ISO 6400 gives you the shutter speed needed to capture the moment, use ISO 6400. Nobody has ever looked at an incredible wildlife photograph and said, “What a shame. I detect luminance noise at 200 percent.” Well, somebody probably has. Don’t travel with that person.
The Light at the End of the Viewfinder
The more I photograph wildlife, the less interested I become in finding universally “good” light. There isn’t any. There is only light that works (or doesn’t work) for the photograph you’re trying to make.
- Front light can reveal color.
- Side light can sculpt.
- Backlight can turn fur, feathers and breath into glowing edges.
- Clouds can soften.
- Golden hour can warm.
- Darkness can create mystery.
- Dappled light can isolate.
- Midday sun can produce bold contrast.
And sometimes conditions that look absolutely terrible for the photograph you planned are perfect for a photograph you haven’t thought of yet. That’s one of the great pleasures of photographing wild places. On a Nat Hab photo expedition, whether you’re watching brown bears in Alaska, polar bears crossing the Arctic snow, ravens calling into Yellowstone’s winter air or bizarre Australian birds wandering through rainforest shadows, you don’t control where the animal goes and you certainly don’t control the sun.
And I’m glad; otherwise we’d all come home with exactly the same pictures.
Learn to see the light you actually have rather than mourning the light you wanted. Decide what that light does well. Position yourself accordingly. Set the exposure to support the idea. Then wait for something wild to walk into it.
Happy photographing,


Leave a reply