Geothermal Photography: How to Photograph Yellowstone’s Hot Mess
Yellowstone is famous for wolves, bears, bison and the occasional tourist attempting something profoundly stupid near all three. But beneath the wildlife drama is another photographic subject that is every bit as dynamic: the park’s geothermal landscape.
Yellowstone contains more than 10,000 hydrothermal features, including over 500 geysers. In fact, it wasn’t the wildlife that earned Yellowstone’s “World’s First National Park” designation; no it was the incredibly unique geology that was deemed worth protecting. Hot springs glow with improbable colors, mud pots belch like poorly maintained cauldrons, fumaroles fill valleys with steam and geysers launch thousands of gallons of water into the air. The park essentially offers landscape, abstract and action photography in one geologically unstable package.
Nat Hab’s Hidden Yellowstone & Grand Teton Photo Expedition explores the park during the warmer months, when open roads provide access to Yellowstone’s diverse wildlife, landscapes and geothermal basins. It is an ideal opportunity to photograph the famous features, then turn around and discover dozens of smaller details most visitors walk right past.
Hot Springs: Photograph the Landscape, Then Look Closer
Hot springs provide some of Yellowstone’s most colorful photographic opportunities. The blue water, orange microbial mats, white mineral deposits and rising steam can create compositions that look extraterrestrial.
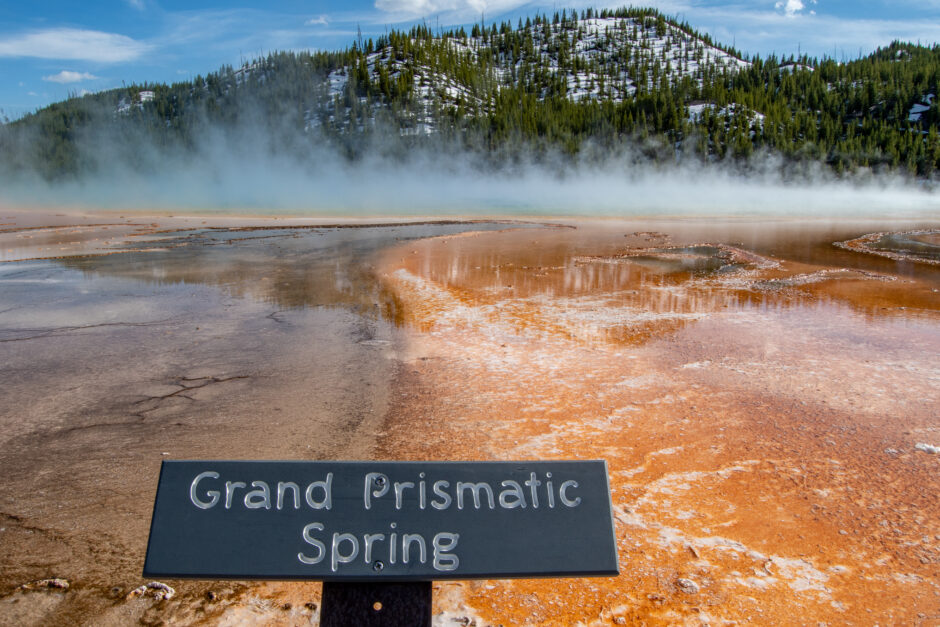
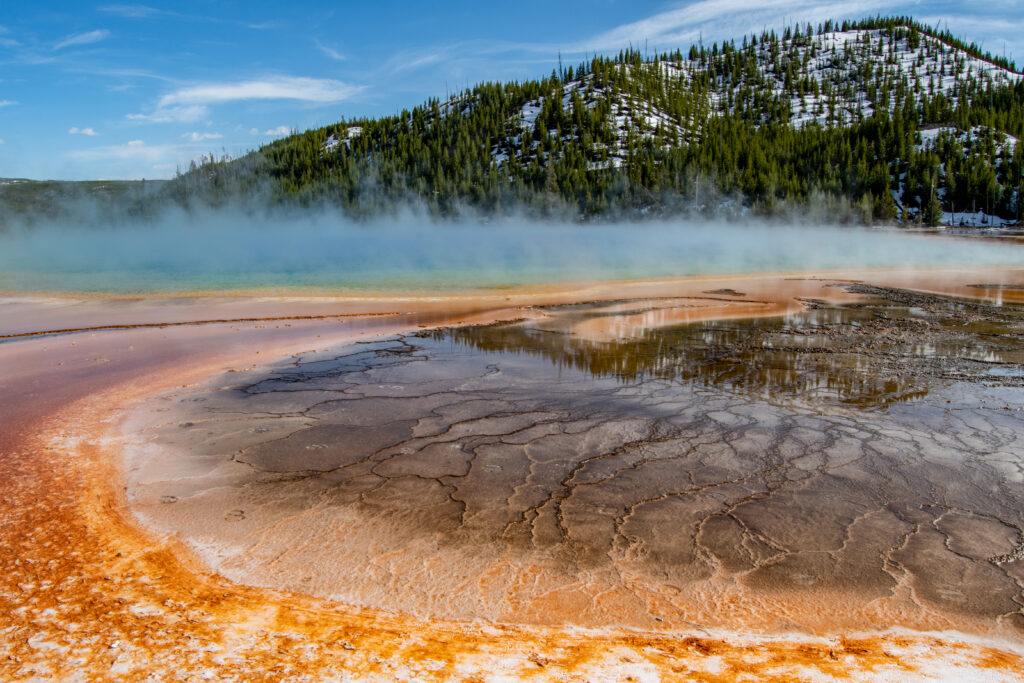
Grand Prismatic Spring, located in Midway Geyser Basin approximately six miles north of Old Faithful, is Yellowstone’s largest hot spring. It measures roughly 370 feet across and is more than 121 feet deep. The classic landscape approach is to use a wide-angle or standard zoom lens and include several layers within the frame. Look for mineral crust in the foreground, colorful water through the middle and trees or mountains in the background. These layers help establish depth and show that the spring is part of a larger landscape rather than a blue puddle surrounded by several hundred strangers.
For the Grand Prismatic photograph featured here, I used:
- ISO 200
- 55mm
- f/7.1
- 1/640 sec
The relatively fast shutter speed kept the image sharp while I photographed handheld. An aperture of f/7.1 provided enough depth of field for the foreground textures, spring and distant hillside without forcing the ISO unnecessarily high.
Steam will constantly change the composition. Instead of treating it as an obstruction, wait for openings that briefly reveal portions of the spring. The moving steam can separate the foreground from the background and create a much stronger sense of depth. Take plenty of frames because the scene can change completely within seconds.
A polarizing filter can reduce glare and reveal more color beneath the water’s surface, but rotate it while watching the effect through the viewfinder. Maximum polarization is not always best. Removing every reflection can make water appear flat, and ultra-wide lenses may produce uneven polarization across a blue sky.
Editing Hot Spring Landscapes
Hot spring colors are naturally intense, so you do not need to drag every saturation slider into another zip code. Start by correcting the white balance, recovering highlights in the steam and adding a modest amount of contrast.
Use selective masks to work on different parts of the image independently. You might add texture and clarity to the mineral crust while using less clarity on the steam so it remains soft. A slight boost to vibrance can help the colors, but watch the orange and yellow channels carefully. If the microbial mats begin glowing like molten cheese, you have probably gone too far.
Look for Hot Spring Abstracts
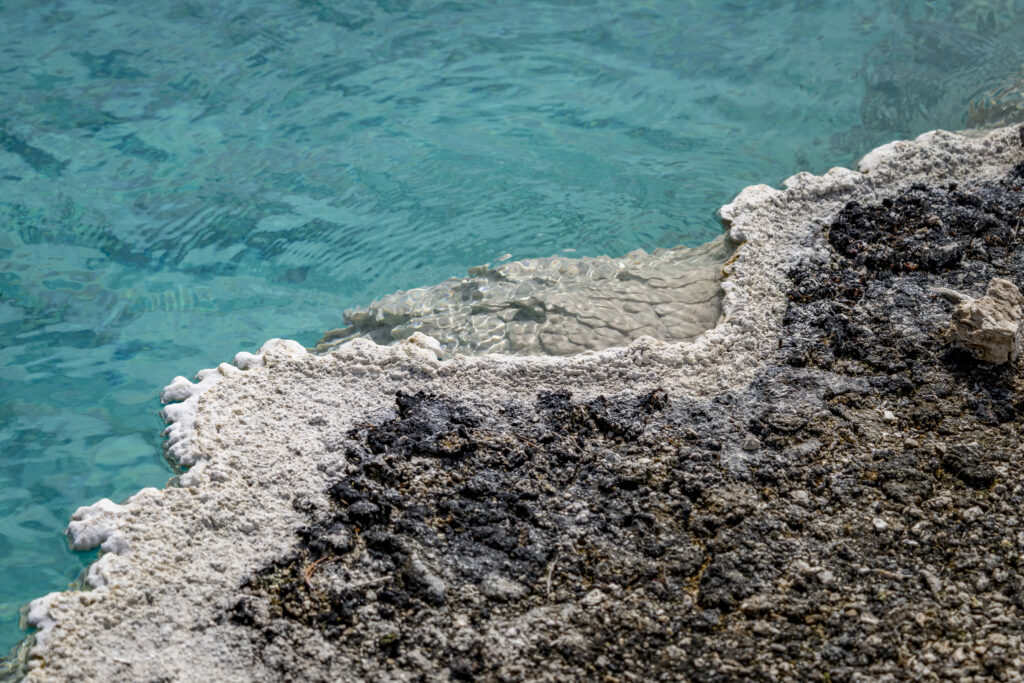
After capturing the obvious landscape, change lenses or zoom in. The edges of hot springs are filled with colors, textures, cracks, ripples and mineral formations that can become abstract compositions.
West Thumb Geyser Basin, located beside Yellowstone Lake in the southern part of the park, is especially useful for this style. Its hot springs are bordered by white mineral crust, dark volcanic material and intensely blue water.
Remove the horizon and any visual clues that reveal scale. Frame only the transition between blue water and textured earth. Instead of asking, “What is this a picture of?” the viewer begins responding to shape, color and pattern. Telephoto lenses are useful here because the boardwalk may keep you well away from the feature. A focal length between approximately 100mm and 400mm can isolate small sections of the landscape without requiring you to lean over railings or test whether your camera is heat-resistant.
For editing, concentrate on local contrast and color separation. The goal is to clarify the natural pattern, not make the image look like a failed tie-dye experiment. Use the HSL controls to adjust individual colors, and check the brightest mineral deposits for lost highlight detail.
Try a Zoom Pull
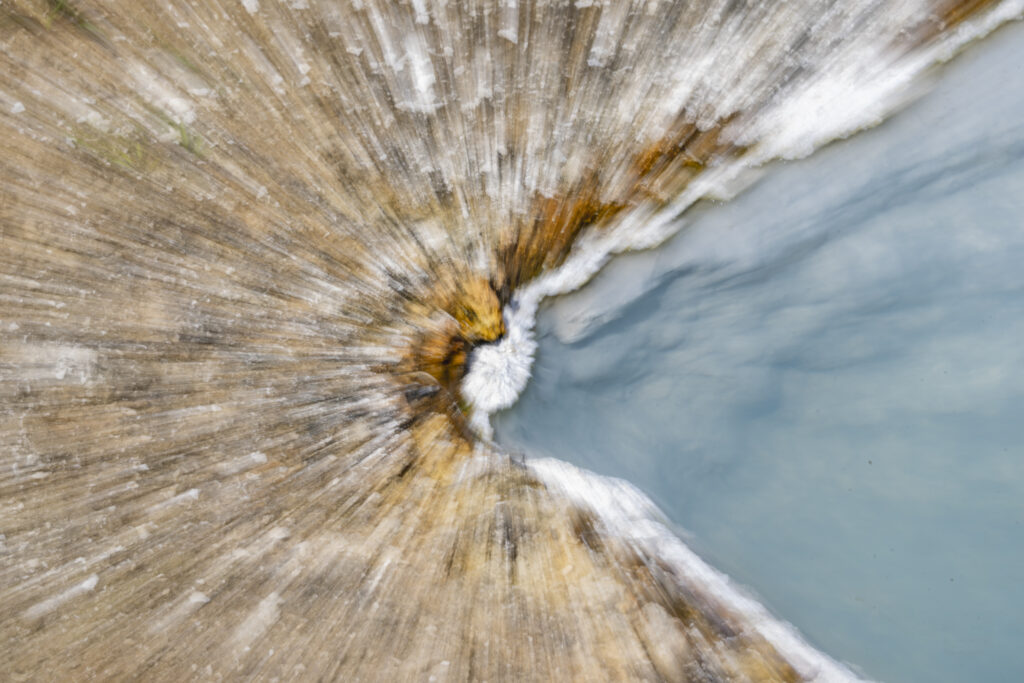
Hot springs also provide excellent subjects for experimental techniques. A zoom pull involves changing the focal length during a relatively slow exposure, causing lines and textures to stretch outward from the center.
For the included zoom-pull image, I used:
- ISO 50
- 200–600mm lens
- f/32
- 1/6 sec
This was photographed in broad daylight, which explains the ISO 50 and tiny f/32 aperture. Both settings reduced the amount of light reaching the sensor enough to reach a 1/6-second shutter speed.
Start by placing a high-contrast detail near the middle of the frame. Press the shutter and smoothly rotate the zoom ring outward during the exposure. The exact timing will take practice, and the majority of your attempts may be terrible. That is normal. Abstract photography is partly creative experimentation and partly generating enough failures that one image eventually looks intentional.
Take many photographs while varying the speed of the zoom. A fast twist creates longer, more chaotic streaks, while a slower movement preserves more recognizable detail. You can also pause briefly at the beginning of the exposure before zooming, which may leave a sharper center surrounded by motion.
In editing, crop carefully around the strongest center point and increase contrast enough to separate the streaks. Avoid excessive sharpening because much of the image is supposed to be blurred.
Mud Pots: Prepare for the Splatter
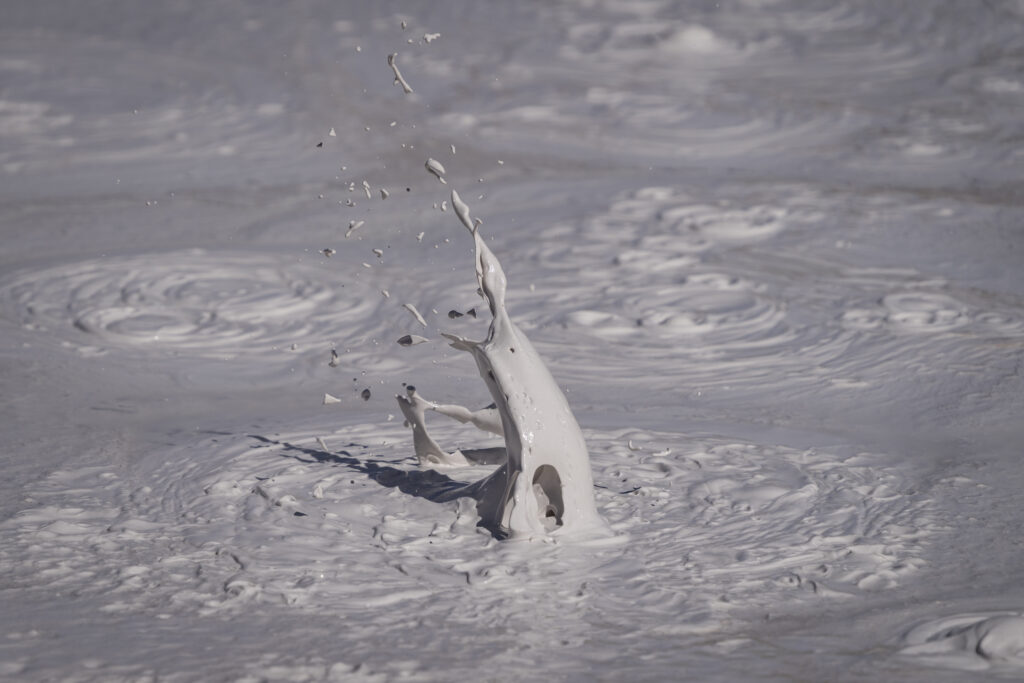
Mud pots may lack the brilliant colors of hot springs, but they make up for it by behaving like the earth has developed indigestion. These features form where acidic water breaks surrounding rock down into clay. Gas bubbles rise through the thick mud, briefly creating cones, folds and flying globs before everything collapses back into the pot. Fountain Paint Pot, located eight miles north of Old Faithful and two miles north of Midway Geyser Basin, offers visitors a chance to see mud pots along with hot springs, fumaroles and geysers in one compact area. The Mud Volcano area near Hayden Valley is another productive location.
The best mud-pot images capture the exact instant a bubble bursts. Unfortunately, the mud does not care about your timing. Use a telephoto lens to isolate the action and keep your shutter speed fast. For the included photograph, my settings were:
- ISO 100
- 600mm
- f/8
- 1/1600 sec
The 1/1600-second shutter speed froze the mud in midair, while 600mm filled the frame with a relatively small section of the feature. Set your camera to continuous high-speed shooting and focus on an area where bubbles are repeatedly forming. Watch the surface carefully. You may begin noticing slight swelling immediately before a burst. Then hold down the shutter and accept that your memory card is about to contain several hundred photographs of wet gray nothing.
During editing, compare the entire sequence and look for a clean, recognizable shape. A slight crop may strengthen the composition, while texture and clarity can help define the mud. Be cautious with contrast because bright mud can lose subtle tonal detail surprisingly quickly.
Fumaroles: Photographing Steam
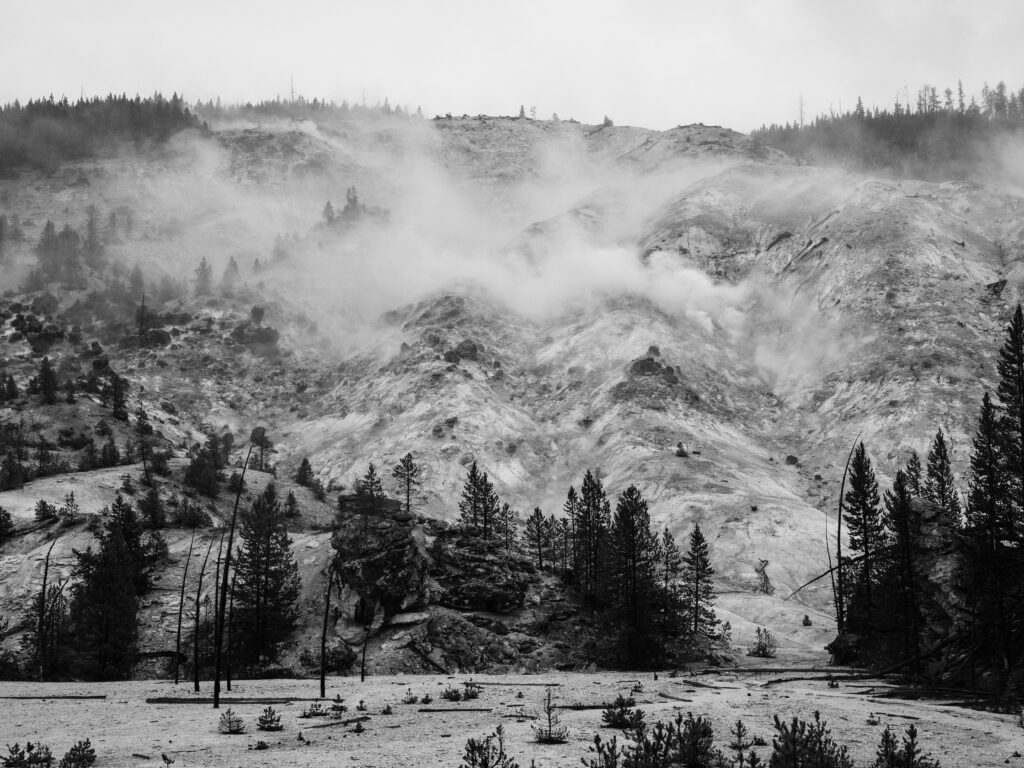
Fumaroles are Yellowstone’s steam vents. Unlike hot springs and geysers, they contain too little water to form a visible pool. Instead, underground water flashes into steam and escapes through openings in the earth. Roaring Mountain, north of Norris, is one of the easiest fumarole-dominated landscapes to observe. Norris Geyser Basin itself is Yellowstone’s hottest and most dynamic thermal area, with extensive steam, mineral deposits and geothermal activity.
Steam is most visible when it is backlit or side-lit. Position yourself so the sun shines through the vapor rather than directly onto its front. This reveals layers and gives the steam a glowing edge. A dark background also helps. White steam against a pale, overcast sky disappears, while the same steam against a forested hillside becomes clearly defined. Telephoto lenses can compress these layers, making multiple vents appear closer together and creating a more dramatic scene.
For a moodier interpretation, consider black and white. Removing color emphasizes shape, texture and tonal contrast. It can also make Yellowstone look appropriately primordial, as though something with too many teeth is about to emerge from behind the ridge.
When editing fumarole images, reduce highlights to retain detail in the steam, then add contrast selectively. Dehaze can reveal structure, but use it sparingly. Too much will turn soft vapor into dirty gray smoke.
Geysers: Anticipate the Eruption
Geysers combine landscape photography with action photography. Your subject is stationary right up until it very much is not. Old Faithful and Castle Geyser are located in the Upper Geyser Basin, which contains at least 150 hydrothermal features within one square mile. Several major geysers there are regularly predicted by Yellowstone’s naturalist staff, including Castle, Grand, Daisy, Riverside and Old Faithful.
Check predicted eruption times at the Old Faithful Visitor Education Center or through official park information, then arrive early enough to choose a composition. Predictions are estimates, so do not wander off for a pretzel three minutes before the suggested eruption.
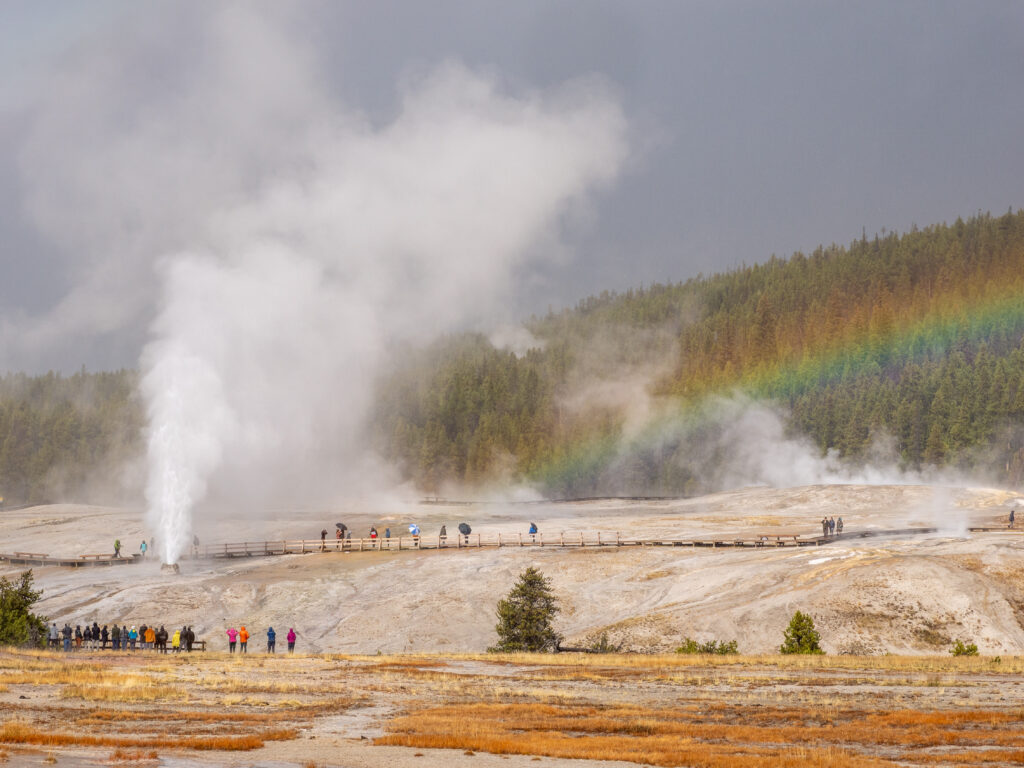
Before the geyser erupts, decide whether you want to freeze individual droplets or allow some movement. A shutter speed around 1/1000 second will stop most of the action, while a moderately slower speed can add texture to the water. For my Beehive geyser and rainbow photograph, I used:
- ISO 250
- 90mm
- f/10
- 1/800 sec
The 90mm focal length included the geyser, boardwalk and rainbow while still compressing the scene slightly. The f/10 aperture provided depth of field, and 1/800 second kept the eruption crisp.
Rainbows appear when sunlight passes through the airborne water droplets. Keep the sun behind you or slightly over your shoulder and watch the mist surrounding the eruption. A polarizing filter may intensify or completely remove the rainbow depending on its rotation, so adjust it carefully.
During editing, recover highlights in the white water and steam before increasing contrast. Mask the rainbow separately and add only a small amount of saturation or dehaze. If the rainbow starts resembling the logo of a children’s cereal company, back off.
A Brief Note on Geothermal Safety
Remain on designated boardwalks and trails. Thermal crust can appear solid while concealing dangerously hot water underneath. Yellowstone’s hydrothermal environments are fragile, unpredictable and considerably less forgiving than your camera warranty.
Protect your equipment as well. When walking through dense geothermal fog, cover the front of your lens or point the camera downward. Moisture and mineral residue can collect on the glass surprisingly quickly. Carry a clean microfiber cloth and check the lens frequently. Avoid standing downwind of geyser spray when possible. The airborne water may contain minerals that leave spots on lenses and camera bodies. After exposure to heavy spray, wipe the exterior of the camera with a lightly dampened cloth once you return to a safe, dry location. Do not change lenses in dense steam or blowing spray unless absolutely necessary. Moisture entering the camera body is a poor souvenir.
Winter Geothermal Photography
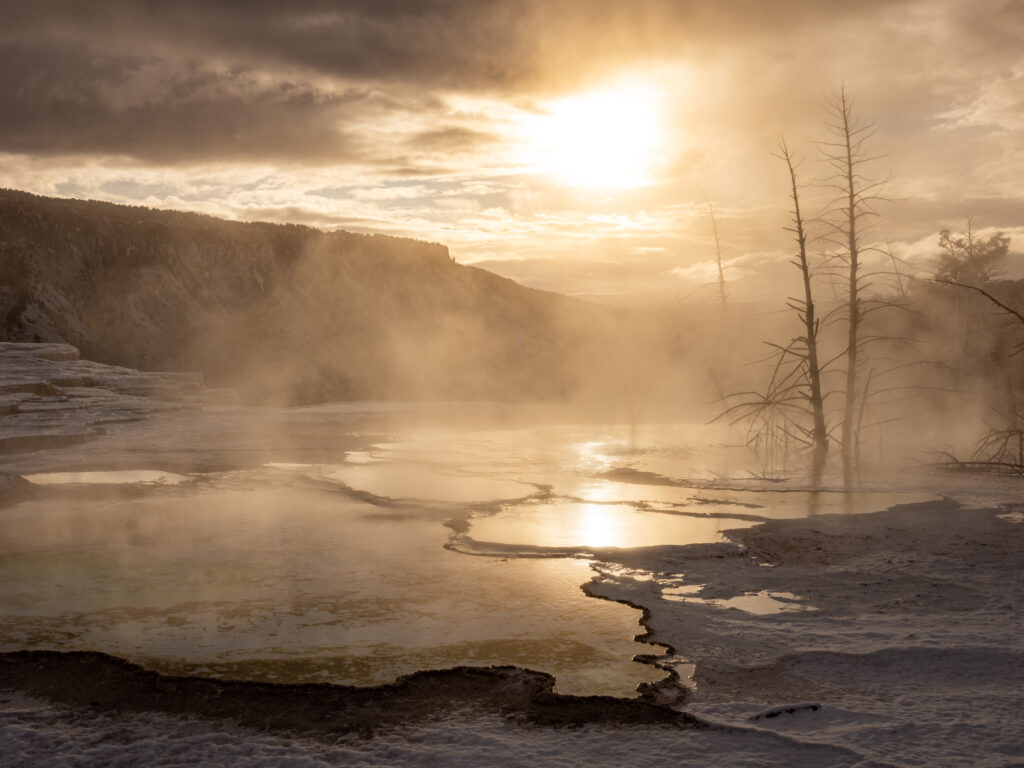
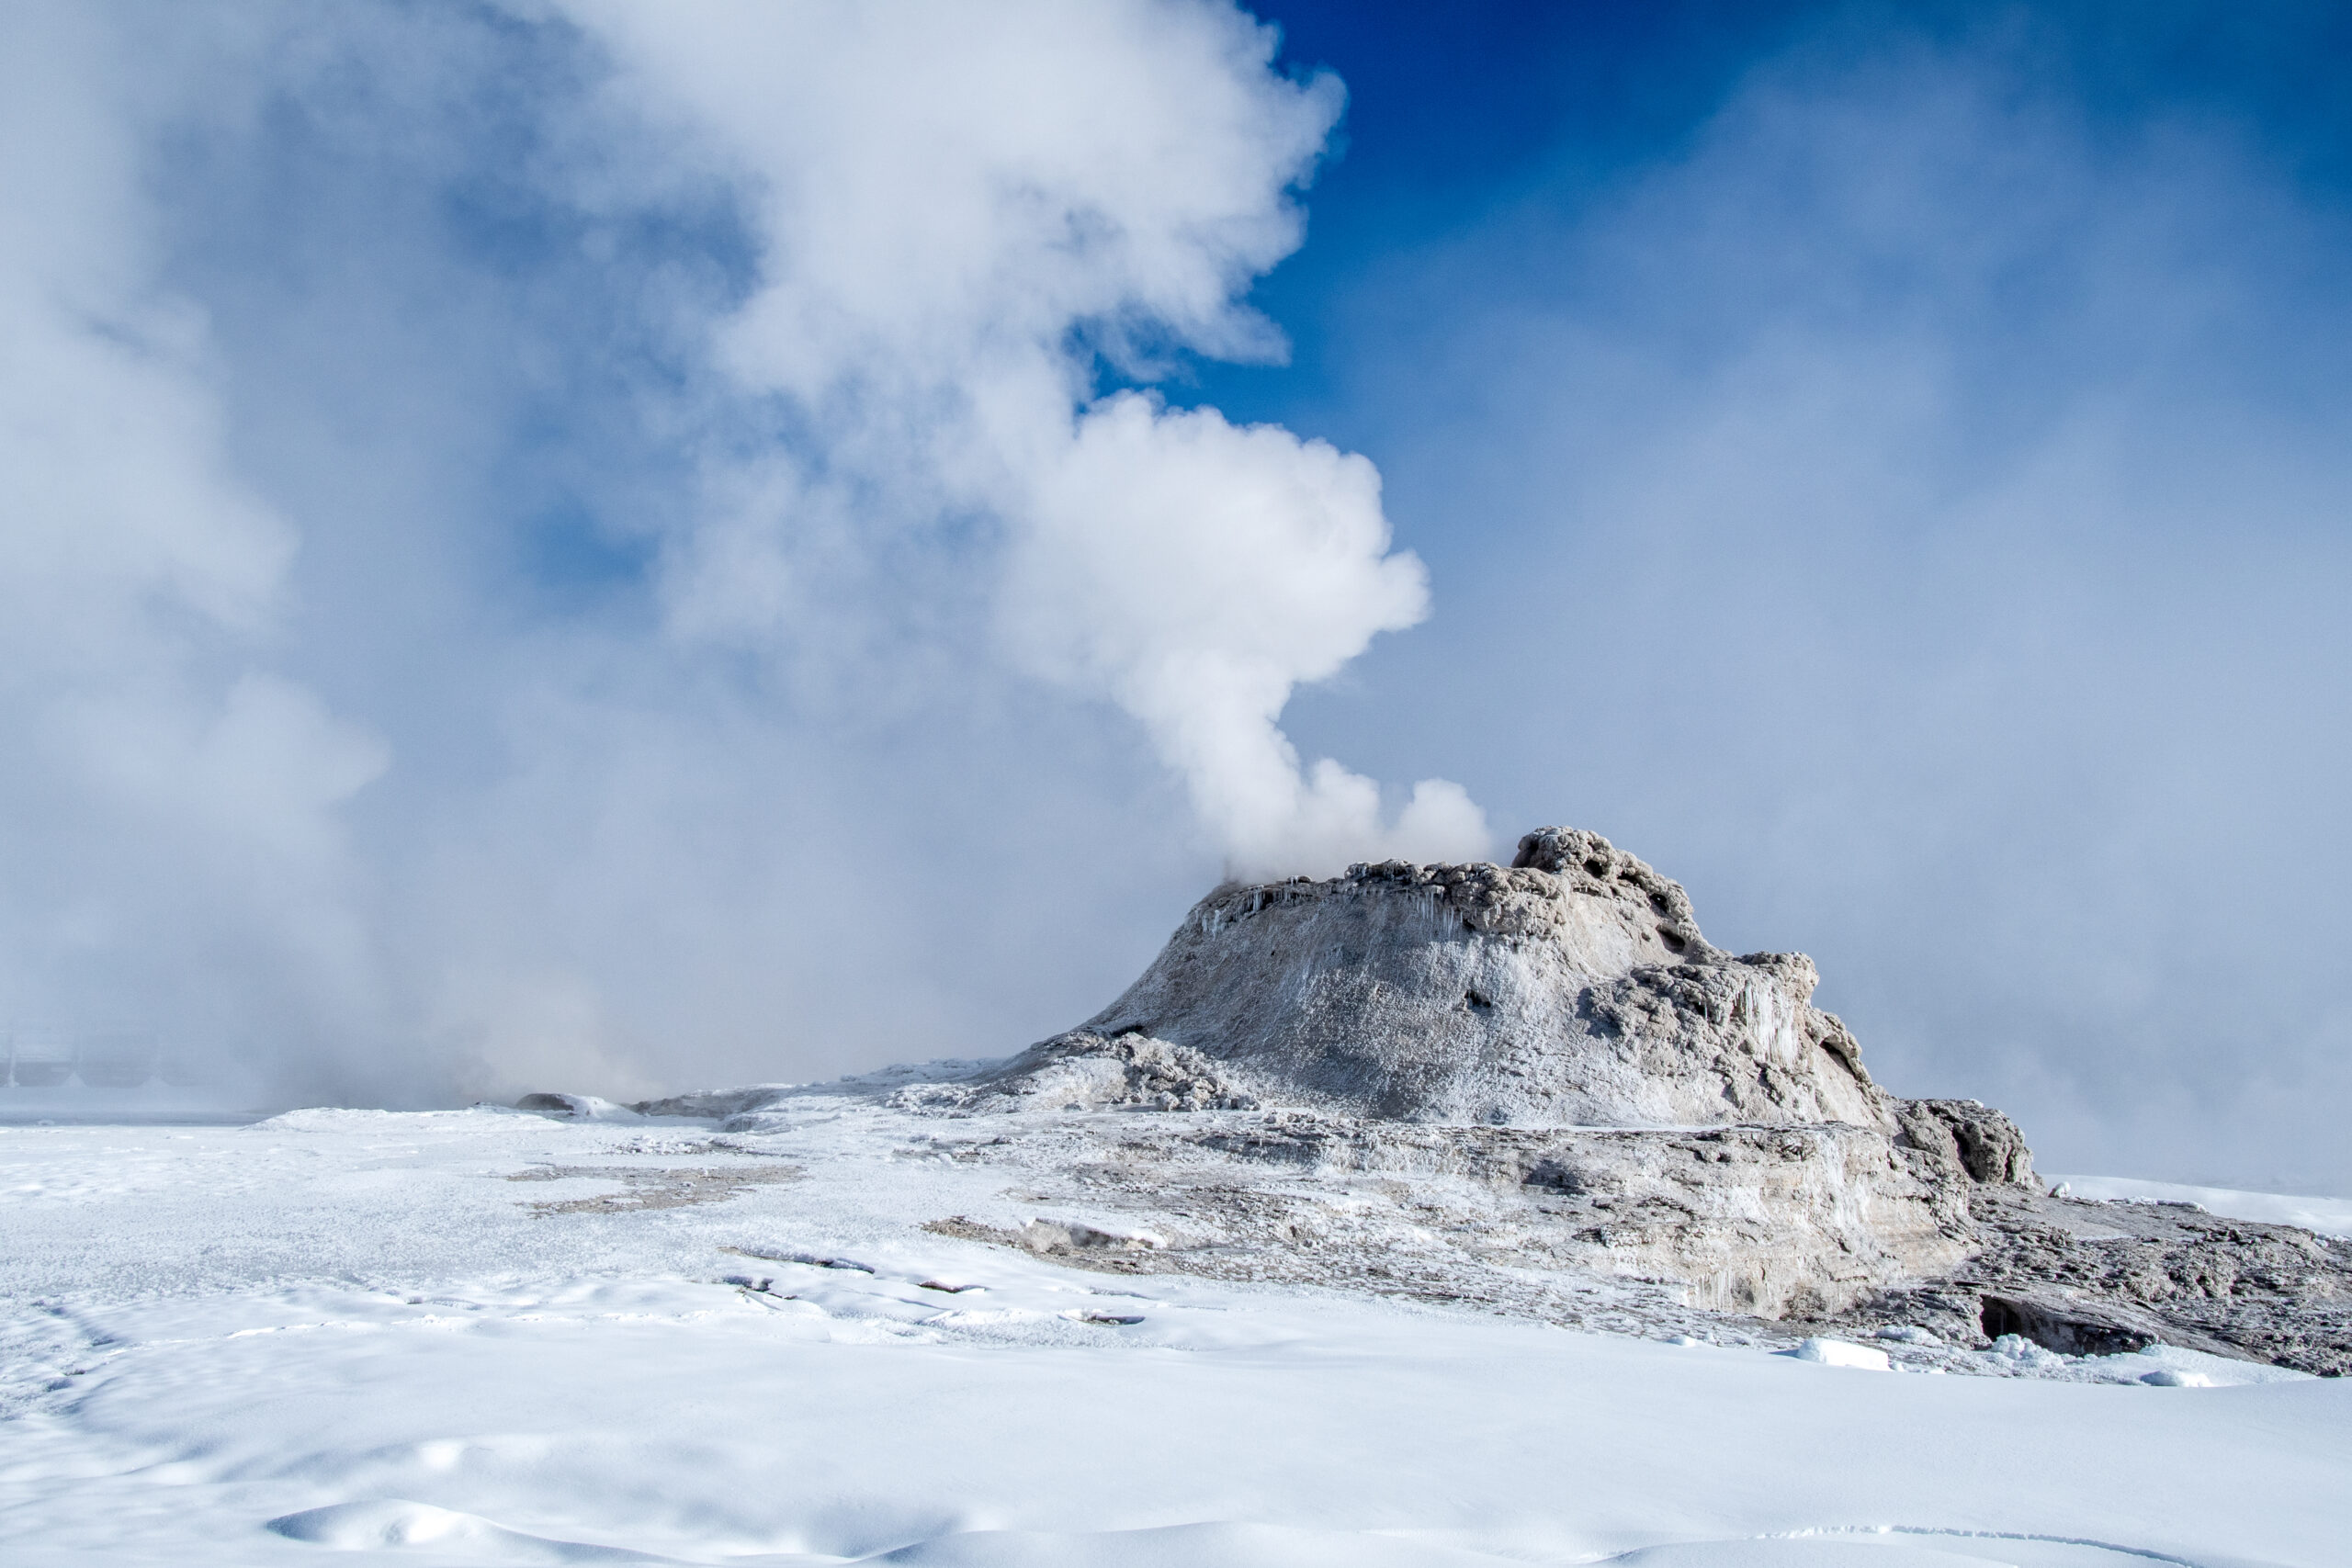
Winter transforms Yellowstone’s geothermal areas. Snow simplifies the landscape, dark streams cut through white basins and rising steam becomes far more visible in the cold air. Geysers that can blend into a busy summer background suddenly stand against forests coated in snow.
The increased contrast can also become technically challenging. Snow may fool your camera’s meter into underexposing the scene, turning clean snow gray. Use positive exposure compensation when necessary and monitor the histogram to keep the image bright without clipping highlights in the steam.
White balance can be equally tricky. Shaded snow often turns blue, which can either enhance the cold atmosphere or make the entire image appear unnaturally cyan. Correct it selectively rather than removing every trace of blue. Snow in shade really is cooler in color than snow under direct sunlight.
Cold conditions also drain batteries more quickly. Carry spares inside an inner pocket where your body heat can keep them warmer, and avoid breathing directly onto the viewfinder or lens because the condensation may freeze.
Most importantly, look for contrast between geothermal heat and winter cold. Flowing water surrounded by snow, frost-covered trees behind an eruption and warm light passing through steam all communicate the environment in ways that a geyser isolated against an empty sky cannot.
In Conclusion
Yellowstone’s geothermal features reward photographers who move beyond the obvious record shot. Begin with the grand landscape, then isolate the colors, textures and patterns within it. Use fast shutter speeds to catch airborne mud, experiment with slower exposures and zoom pulls, watch how light passes through steam and arrive early enough to plan a geyser composition before the earth starts firing water into the sky.
Winter provides an entirely different creative opportunity. On Nat Hab’s Yellowstone: Ultimate Wolf & Wildlife Photo Expedition, photographers travel into the park’s quiet snowy interior by vehicle and snowcoach, with chances to photograph wolves, bison, frozen landscapes and geothermal features surrounded by snow. The contrast between boiling water and subzero air creates some of the most atmospheric conditions Yellowstone can offer.
It is a place where the landscape bubbles, hisses, erupts and occasionally smells like an egg left in the sun. In other words, it is a photographer’s paradise.
Happy Photographing,


Leave a reply