Learn Astrophotography in 10 Minutes
What a fun skillset to have in your quiver when it comes to capturing and showcasing the beauty of our world. Well, in a way, this goes beyond our world!
Astrophotography is just a fancy way of saying star photography, and it has a reputation for being quite difficult. However, through this simple tutorial, I am going to teach you exactly what you need to know in just a few minutes.
Being able to photograph the night sky is so fun and add such a special dimension to photo trips around the world, where dark skies reign!
Step 1 – Get yourself under some dark skies
This is a no-brainer, but indeed a key element. While you can photograph the night sky under truly any conditions, light pollution is a real thing and can come from being too close to cities and whatnot. That little bit of light, which you may only barely be able to see, will become quite pronounced in photos.
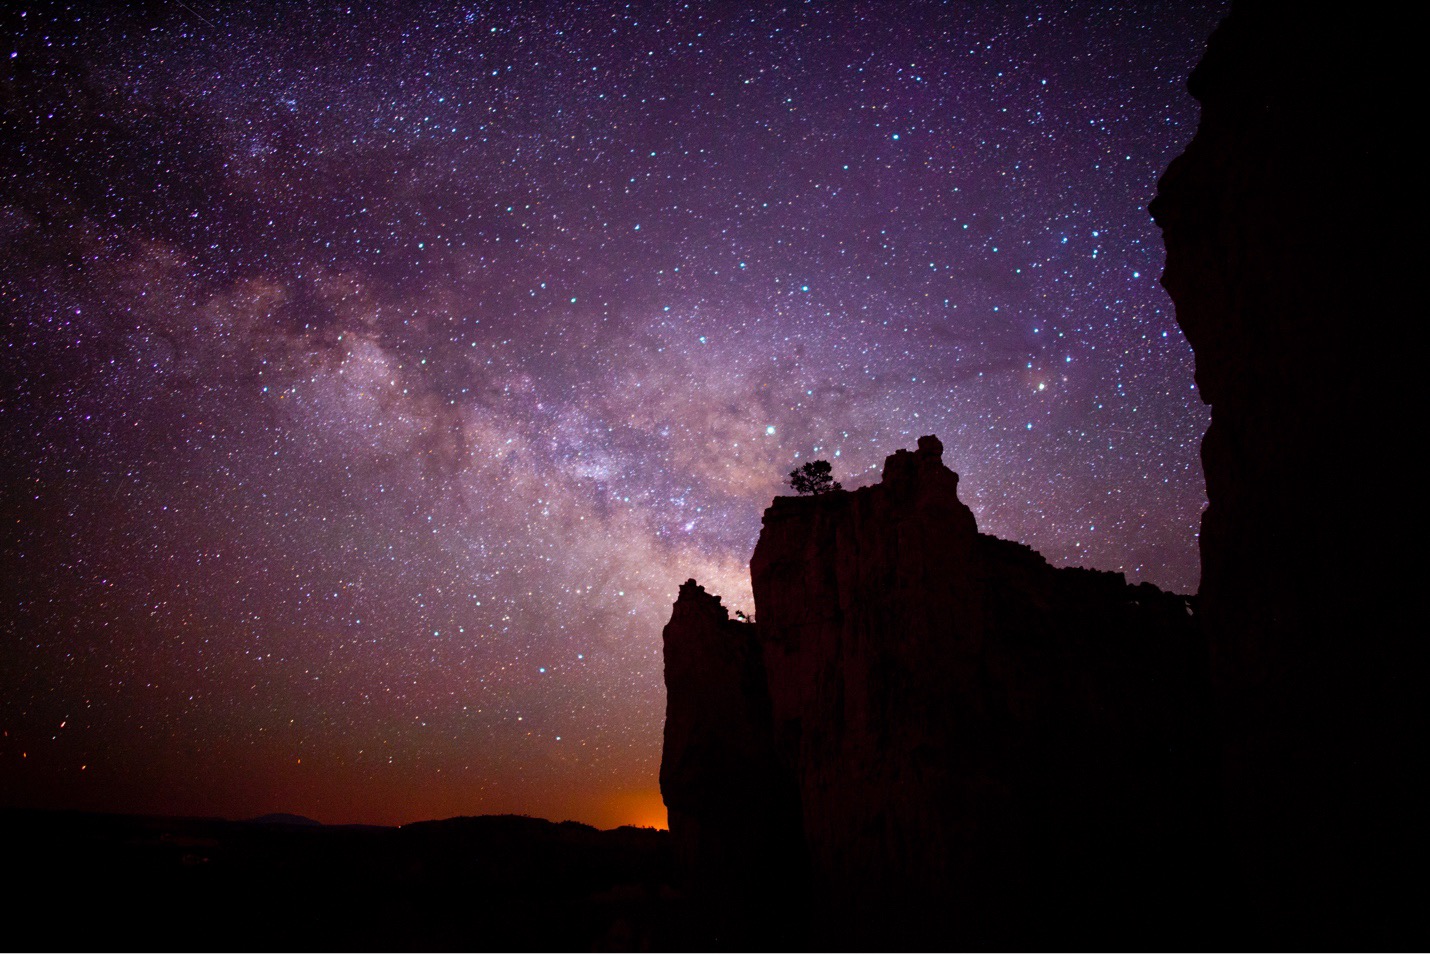
Fortunately, there are many places around the world, perhaps even in your own metaphorical backyard, where skies are dark and stars are gorgeous. Some classic examples include the canyons area of the American Southwest, like Bryce and Grand Canyon.
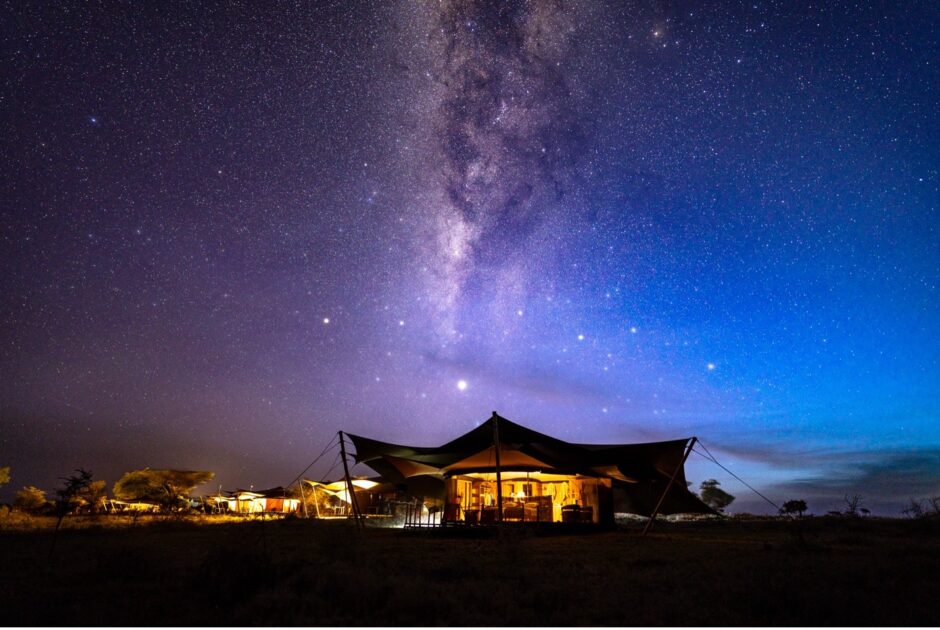
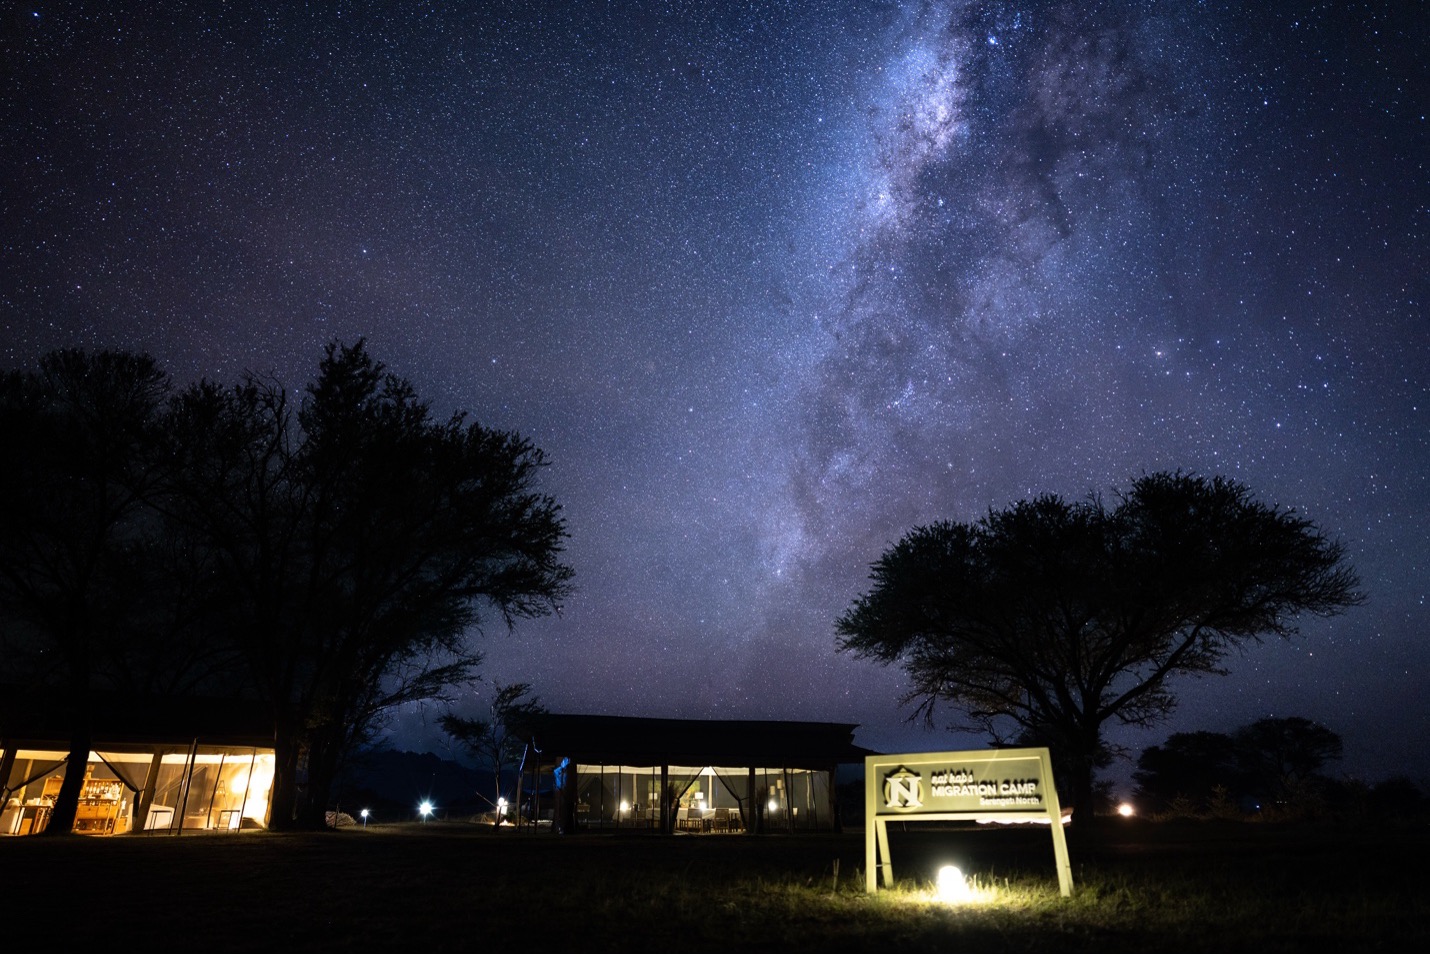
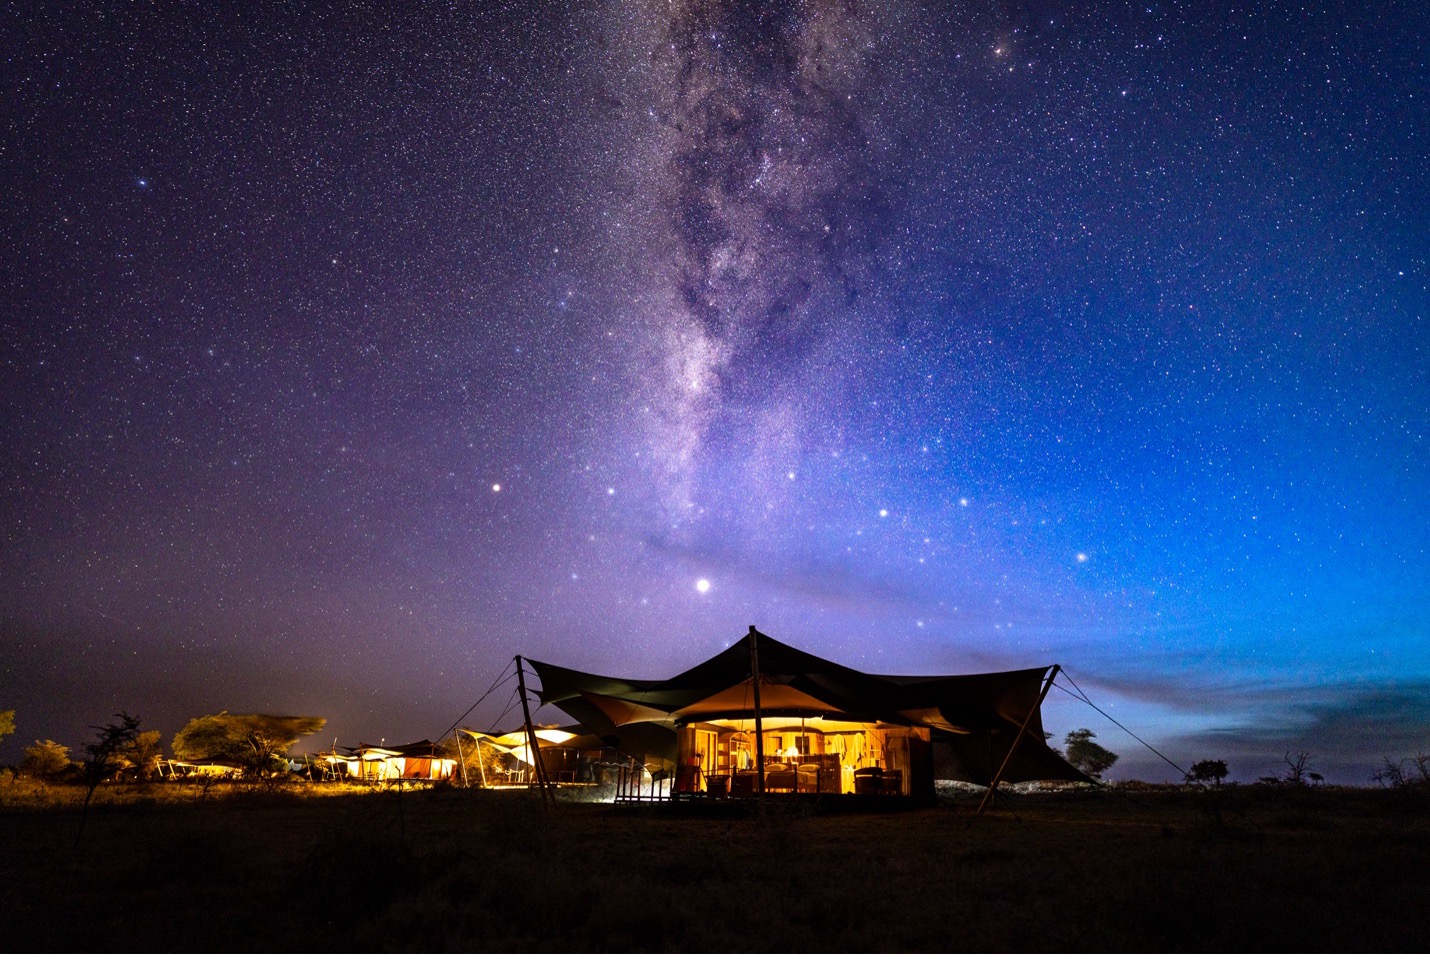
Other less obvious choices are far flung destinations like East Africa, Madagascar, and Namibia.
There are three key ingredients to stellar night skies. 1) Away from light pollution, 2) at some elevation (ideally above 4,000 feet) and 3) in a dry climate. The last two are less obvious, but are critical in avoiding the lower level humidity that can obscure stars from being their brightest.
Step 2 – Get a tripod and a wide-angle lens
There are a few pieces of gear that are quite essential for star photography, but none is as important as a tripod. We’ll be going over the long exposure formula, and you’ll see that you simply cannot hand hold for 15+ seconds.
The other piece of gear that is quite important is a “fast” wide angle lens. When I say fast, I’m talking about the lenses maximum aperture (aka, smallest f/number). While you can get shots with a kit lens, like an 18mm f/3.5 (crop frame) or a 24mm f/4 (full frame), they won’t do nearly as good as if you had at an 11mm f/2.8 (crop) or 16mm f/2.8 (full). You need to let in LOTS of light, so the smaller the f/number the better.
The ideal lens is a combination of very wide and very fast.
For those that can spring for it, there are a few lenses out there now that give you better than f/2.8, like the full frame 14mm f/1.8 class of lenses. This is as good as it gets. However, if you don’t have this or don’t wish to purchase one, don’t fret. Start with whatever is your widest lens and if you fall in love with this style of photography, there is always time to level-up gear-wise.
Step 3 – Find a foreground element and set up before dark
Having something in your frame, likely silhouetted, other than the stars is rather important. It gives context and pizzaz to your photo. You could shoot only the stars, but the best star photos are those that feature a landmark, or structure, or tree, or anything with the stars overhead.
Next, you’ll do a heck of a lot better if you scout out your location prior to it becoming pitch black outside.
To do so, it’s quite helpful to use an app that allows you to forecast where star clusters and/or the milky way will be. I use Sun Surveyor and find it incredible helpful, as I can literally hold my phone in front of the tree I want to photograph, swipe to 9pm, and find out exactly where in the sky the dense milky way will appear. It might even help me realize that I need to pick a different area if things just aren’t lining up where and when I need them to be.
Step 4 – The Settings and Technique
Even if you’ve never shot on full manual before (including manual focus) it’s essential for star photography. But don’t worry, I’m going to give you the exact settings you need to dial in.
You’ll want to start off with the lowest f/number possible for your lens (aka biggest aperture) and a 25 second exposure. Ideally, you want to have a low ISO, like ISO 400, but you may need to adjust based on your lens (faster apertures allow you to have lower ISOs). But let’s start with 400.
Then, you’ll want to put your lens into manual focusing mode and use your LCD screen to “zoom in” to a star. If the moon is out, that’s ok to use, too. Basically, you just need to get something super far away. If you are setting up before the stars are out, finding a distant building or mountain ridge will work, too.
Ok, so here’s where we focus.
Most cameras will allow you to zoom in on your LCD screen to 10 or 15x magnification. We’re not talking about your lens zooming here—this is just the digital screen. Once you find a star (or moon, or distant mountain) you will rotate your focusing ring back and forth, noticing that the star oscillates from being a diffuse orb to a small pinpoint. You’ll want to stop focusing and leave it once the star becomes the smallest pinpoint noticable.
If you are focusing on an object, you’ll of course want to stop adjusting once the object is in focus.
Now, don’t touch your focusing ring at all and let’s move on to the next step.

Step 5 – Set a timer, compose your shot, and be ready to adjust
I find that most cameras’ two-second shot timer works really well in these scenarios. This allows your camera to settle and not be moving as you hit the shutter button. If you do not do this, you may find that the slight movement you inject into your camera from pushing the button blurs your photo slightly—you definitely want to avoid this.
If you have a remote trigger for your camera, those are handy, too, but not necessary if you don’t want to invest in more gear. The two-second timer is just fine.
Next, you’ll want to compose your shot. Hopefully by this time nighttime has come and you are seeing stars. Or better yet, you can see the milky way in full glory!
Stick with traditional rules of composition, but err on the side of featuring more sky. In other words, if you do have a tree, or a tent in your photo, you may want to place it further down in your frame so that you, for instance, have 4/5s sky and 1/5 tree and earth.
However, this is your time to be creative—try different positions, as it’s hard to know what will look best when it’s all said and done. Experimentation is key.
The other thing to experiment with is how much light you let into your camera. As I mentioned earlier, a low ISO is supremely helpful, as it will allow you to perform more editing to your shot, and ultimately yield a cleaner, more aesthetic photo. However, if you do not have a fast lens, you may need to bump your ISO from 400 to 800, maybe even to 1600 or 3200. Going from 400 to 3200 ISO is like going from an f/8 lens to an f/2.8 lens, so it’s going to multiply the amount of light by 8 times!
The key thing here is that you’ll want to try several different configurations of settings, especially if you are new to astrophotography.
I personally find that I like to have a darker shot and a lower ISO, and then brighten the shot in photoshop. Thus, I don’t plan on getting the perfect shot in my camera, and I rely on the low ISO to allow for editing (especially brightness).
The other adjustment you may wish to make is a slightly faster shutter speed. You don’t want to go longer than 25 seconds, as the earth’s rotation will actually blur the stars slightly. (yes, the earth is actually rotating that fast!)
Going down to 20 seconds could actually make your stars sharper, because you’re lessening the impacts of that earth-rotation element.
Nerd alert: technically, there is a rule called the 500 rule, where if you divide 500 by your focal length, you get the maximum number of seconds your shutter should be open. For instance, if you’re on a 24mm (full frame equivalent), that would be 500/24, which is about 20 seconds. If you have a 16mm, that increases to almost 30. However, in my experience, this isn’t always perfect, so I try and stick to around 20-25 seconds max no matter the lens.
Step 6: Editing for success
As I mentioned above, don’t plan on getting the shot perfectly exposed in camera, as editing does a lot of the magic. Being able to brighten just the sky, and/or create masks over the milky way itself to lighten it, dehaze it, or brighten only parts of the scene is a game-changer. Similarly, you can adjust white balance in photoshop to bring out more blues or yellows to taste. I personally find that a cooler white balance is more like what my eyes see, but again, this is subjective and a key piece of the artistic vision.

The above photo is from a warm summer night in the American Southwest, and the warm, orange and amber vibe was exactly what I was going for—but a lot of this came out in the edit!
And there you have it—a quick but thorough tutorial on astrophotography! Remember, practice makes perfect, and while I hope this tutorial has shed light on the topic, it’s still can be challenging, especially if you are new to this technique. Give yourself multiple chances to get it right, whether it’s in a single evening, or on several different shoots. When you get it all right, I am confident that your photographs will be some of your most cherished nature photos from this planet (and beyond!).
Best,
Court
Leave a reply