How I Got This Shot: Lilac-breasted Roller in Africa
One may not think of birds at first as the ‘dream photo’ while on an African safari. However, the extraordinary diversity and sheer numbers of mammals, like lions, hippos, elephants, and more, is mirrored by the numbers and diversity of birds. And wow, are there some beautiful birds to be seen! You definitely don’t have to be a birder or bird photographer to have photos of these majestic, winged critters on your wish list.
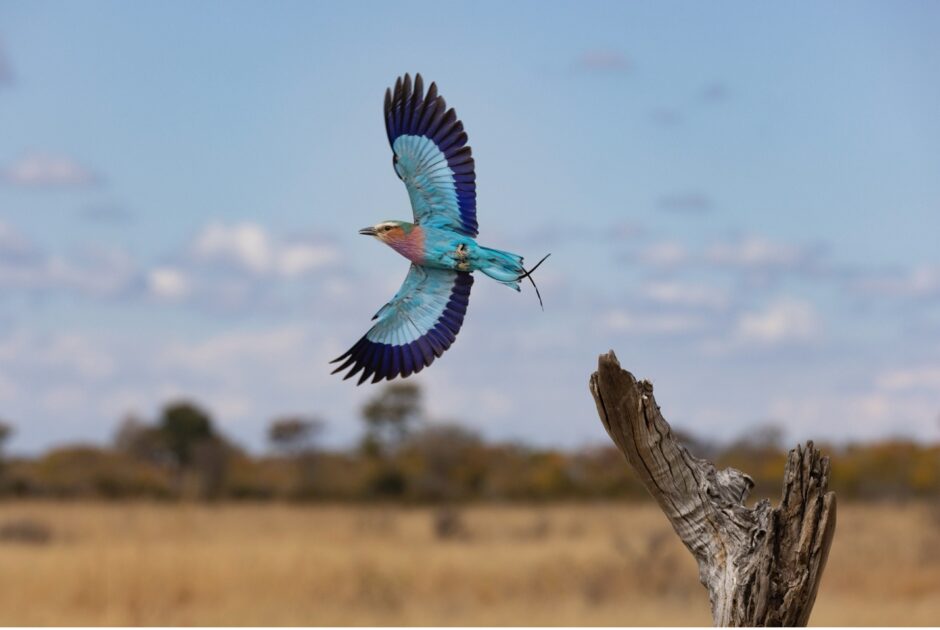
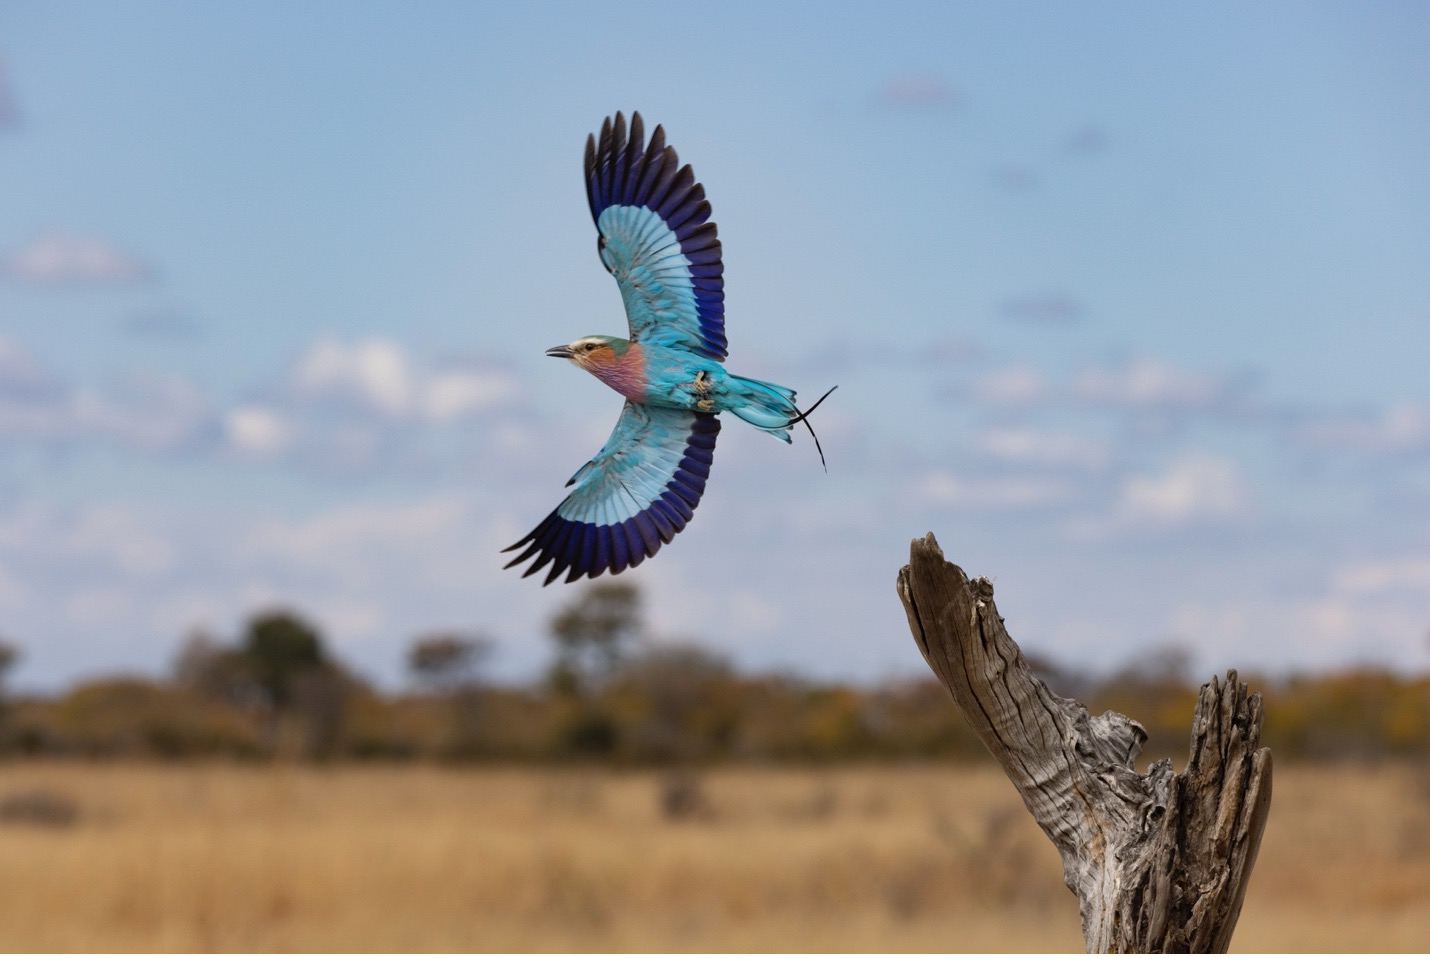
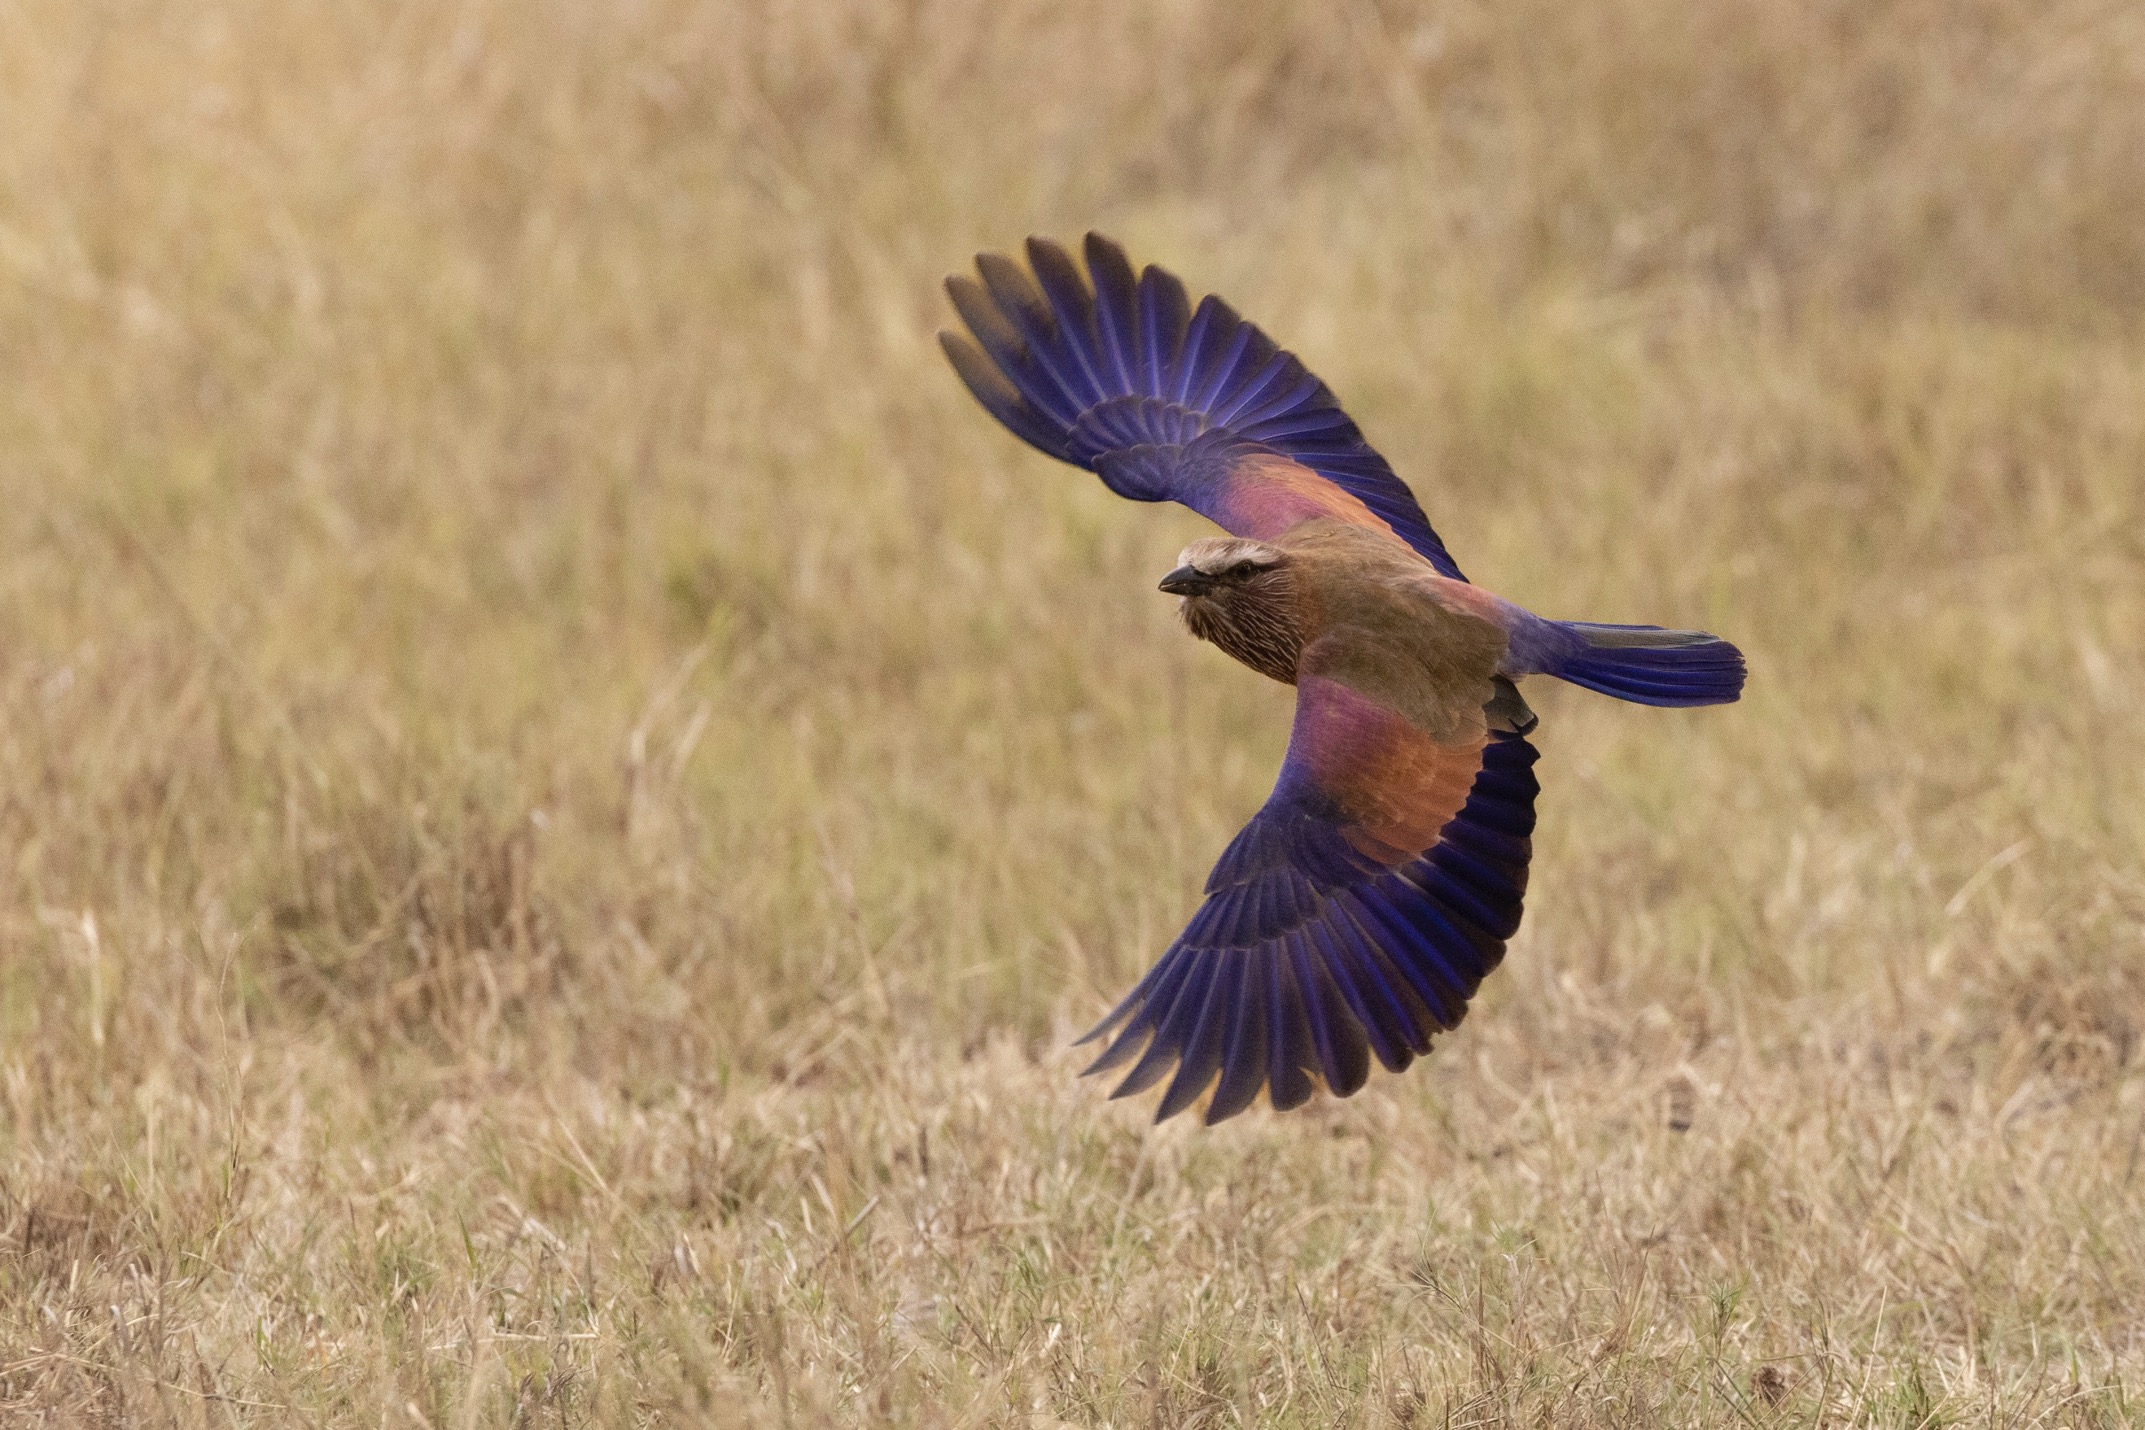
The lilac-breasted roller is one that you are almost sure to see, and likely at close range. Mix their beauty with their abundance and proximity, and you’ve got an amazing photographic opportunity awaiting you!
While I can’t guarantee you’ll see them perch and fly multiple times over the course of a wildlife photo safari in Africa, the chances are very high. Follow these tips to capture them in a unique and spectacular way on your next adventure in Africa!
Getting Yourself into the Right Place
Lilac-breasted rollers, or LBRs, as your guide will often start calling them, are both strikingly beautiful and surprisingly common and abundant! They are typically found in open areas of the African savanna, in countries like Botswana, Kenya, Tanzania and Zimbabwe. Like most birds, their peak activity is in the early and later parts in the day, but they also tend to break these ‘rules’ more than other birds. Thus, if you are in Africa and spend time in open vehicles at any time of day, you are likely to encounter them. The trick is to know the settings in order to quickly dial them in so that when the opportunity strikes, which can happen very spontaneously, you are only moments from being ready.
Camera Settings
Shutter speed is going to be the most important thing for getting tack-sharp focus. If the bird is out of focus, it doesn’t matter what aperture, ISO, or even focus settings you have dialed in (although we’ll quickly move on to focus settings next, as that’s a big part of the game here).
To freeze motion of a flying bird, I rarely recommend anything slower than 1/1600th of a second for your shutter speed. I generally start here, and depending on how much light there is, I am ready to dial that faster to 1/2000th of a second if possible.
As I mentioned, aperture and ISO aren’t nearly as important, but for the sake of advising, something like f/5.6 or f/8 is a good starting point. If you have low light and a lens capable of f/4, that is a great choice, too, but generally a moderate aperture of f/5.6 is the sweet spot to get a solid depth of field, while ensuring you can get a fast shutter speed without sending your ISO into the stratosphere.
If you’re like me, you’ll shoot on manual+autoISO, such that you can set the aperture and shutter speed, and let your camera choose the ISO. However, if you are setting ISO manually, I recommend starting with something relatively high, so that you can really prioritize that fast shutter (remember, the higher the ISO, the more light your sensor perceives, thus allowing you a faster and faster shutter speed while keeping everything the same). Something like ISO 800 or 1600 should do the trick, but light can be fickle…you may find that you can go lower, which makes for a better photo, or need to go higher, which comes at a cost of incremental photo degradation by adding in ‘grain’ or ‘noise’ into your shots.
Focus Settings
Nailing focus is the real trick. Yes, the camera settings are important, but tracking your subject with advanced autofocus is the game-changer here.
My top recommendation is to enable something called ‘autofocus tracking’ on your camera. You’ll need to do a little homework ahead of the trip to locate this in your camera’s autofocus settings, but it will essentially track your subject automatically as it moves in the frame, while you continuously hold the shutter button halfway (or back button focus).
Next, you’ll want to set your camera to ‘continuous autofocus’ instead of single shot. Different camera manufacturers call this setting different things, but it usually revolves around this verbiage and idea that as you press the shutter halfway (and while the camera automatically tracks your subject) it will continuously focus on the thing that is in focus. This is in contrast to single-point autofocus, where it locks focus once you press the shutter halfway and won’t adjust it. There are indeed advantages to this in other types of wildlife photography, but here we really need to have continuous autofocus, as you won’t really know if the bird is going to fly toward, away from, or parallel to you—all things that greatly impact how the camera focuses.
If you do not have autofocus tracking on your camera (e.g., more intro models, or cameras older than, say, 5 or 6 years), the work gets harder, but it’s not impossible.
In this case, you will have to do a couple of steps to somewhat mimic the tracking feature. You’ll still set continuous autofocus set, but you’ll also set your camera’s focusing range to the full screen instead of just the small square in the middle. Again, having one fixed focal spot in your camera is a great way to go for most wildlife photography. But, allowing the camera to choose the focal point is key here. Because the bird will often be positioned in front of an otherwise uniform landscape, like the sky or grasses, the camera will usually do a good job of picking the focal point. Then through continuous focus, it will instantly adjust focus to where that focal point and subject is found.
Again, though, tracking autofocus is essentially a modern adaptation to this second technique, so if you can, the tracking autofocus method is highly advised.
Drive Motor
The third and final setting you’re going to set is your drive motor, which corresponds to how many photos you allow your camera to take per second. Most cameras default to a mid-range level, like 3 or 5 photos per second, but cameras in the last 5 to 10 years are clocking in at anywhere from 10 to 20 to even 30 frames a second these days! This is an extraordinary advantage to getting multiple shots of very quick action.
In this case, a split second will change everything. The wings will look different, the head will be pointed one way or another, and you will no doubt find that in the 5 or 10 photos you’re able to snap in the split second the bird is off its roost, there will be one or two real winners.

Another Consideration
One thing that can be tricky, especially with the super zoom telephoto lenses on our cameras these days (both with point and shoots or interchangeable lens systems, is keeping the bird in the frame while it’s flying away.
To abate this, I recommend shooting wider than you normally would. In other words, zooming out, which will help you move your camera to track the bird. If you are zoomed all the way in, you may find that when it flies left, and you predicted it’d go to the right, you miss the shot. Hedge your bets here and shoot slightly wider, plan to crop later, and you’ll get the bird each and every time.
In Summary
The wonderful thing about this technique is that it applies to really any bird that may take flight! Bee-eaters are another wonderful one, although they are even faster and more challenging to snap quickly. Nevertheless, LBRs are one of my favorite birds in Africa and are just dang beautiful. To get this shot, prioritize a super fast shutter, get your autofocus settings ready, and take as many shots as possible. Oftentimes birds will return to the same roost they just departed from, so if you don’t get the shot at first, practice makes perfect and try, try again!
Go forward and give it a shot!

Court
2 Comments

malaika
August 30, 2025 at 11:13 am

Court Whelan, Ph.D.
September 4, 2025 at 11:17 am
Thank you for sharing this breathtaking behind-the-scenes glimpse! The lilac-breasted roller is already striking, and your guidance on timing its extended wing display—especially during golden hour—really underscores how patience and precision pay off.
I love how you explained the importance of choosing an open vantage point to capture that dramatic silhouette without background clutter. One technique I’ve found helpful in the field: pre-visualize the bird’s likely flight paths and pre-focus on those clear sky zones—it increases the chance of getting tack-sharp wings in action.
Have you noticed whether the roller pauses longer right before launching into its display dive? Timing that subtle hesitation has helped me catch cleaner, more dynamic shots in similar bird behaviors. Thanks again for the inspiring breakdown—I’m adding this to my go-to field strategy checklist!
thanks, Malaika! Excellent ideas on the pre-visualization, and yes! These birds do give you a little indication that they will fly–usually a slight change in posture, looking into the direction it will fly. One of the most cooperative bird species for this style of photo :).