Hoodoo Voodoo: A Photographer’s Guide to Bryce Canyon National Park
I’ve led numerous trips through Utah’s Grand Circle of national parks: Grand Canyon, Zion, and Bryce Canyon. At the end of each trip, I like to ask everyone which park was their favorite. You’d think the Grand Canyon would win by a landslide. It’s the Grand Canyon, for crying out loud. But more often than not, Bryce Canyon steals the show.
Maybe it’s the absurd collection of orange rock spires. Maybe it’s the way the morning light makes the entire landscape appear to be on fire. Or perhaps people just appreciate a national park where the rocks look like an army of petrified garden gnomes. Whatever the reason, Bryce is a photographer’s playground. And while it’s nearly impossible to take a bad photograph here, taking a truly great one requires a little more thought than pointing your camera toward at the nearest rock.
Here’s how I approach photographing one of my favorite landscapes in the American Southwest.
Hoodoo You Think You Are, A Geologist?
Before we start taking pictures, let’s talk about what we’re actually photographing. Bryce Canyon isn’t technically a canyon. Unlike the Grand & Zion Canyons, which were carved primarily by a river, Bryce is a collection of natural amphitheaters eroded into the edge of the Paunsaugunt Plateau. The famous hoodoos began as sediment deposited in ancient lakes roughly 50 million years ago, eventually forming layers of limestone, mudstone, and other sedimentary rocks.
Over millions of years, uplift, rain, and especially freeze-thaw cycles broke apart these layers. Water entered cracks, froze, expanded, and gradually transformed solid cliffs into fins, windows, and eventually free-standing hoodoos. The result? The world’s largest concentration of hoodoos. A geological construction project that’s been going on for millions of years without a single building permit.
Sunrise: The Early Bird Gets the Glowing Rock
If there’s one piece of advice I can give photographers visiting Bryce Canyon, it’s this: get up early. Bryce’s main amphitheaters face east, making sunrise particularly spectacular. As the sun creeps above the horizon, its light catches the upper portions of the hoodoos, transforming pale pink limestone into brilliant orange and red.
The glow is extraordinary. Light reflects between the towering formations, illuminating some of the shadowed areas with a warm, almost supernatural radiance. My favorite sunrise locations include Bryce Point, for its enormous sweeping view, and Sunrise Point, where the layers of hoodoos stretch into the distance. Sunset Point is another excellent morning choice, particularly if you’re interested in photographing Thor’s Hammer.
But don’t arrive exactly at sunrise. Be at the cliffs at least 30–45 minutes earlier. Why? Because blue hour deserves some love too.

Blue Hour vs. Orange Hour: Pick Your Poison
Before direct sunlight reaches the hoodoos, the landscape often takes on cool blue, purple, and magenta tones. It’s softer, moodier, and sometimes more interesting than the explosion of orange that follows. Then the sun appears, and everything changes.
I love photographing the same composition through both lighting conditions. The resulting images can look like completely different locations. Use a tripod during blue hour, keep your ISO relatively low, and let your shutter speed slow down as needed. Once the sunlight arrives, watch your highlights carefully. Bright limestone can become overexposed surprisingly quickly.
And what about sunset?
Here’s the funny thing: Sunset Point isn’t necessarily the best place to photograph sunset. Most overlooks face east, meaning the setting sun is generally behind you. That’s actually excellent for illuminating the canyon walls, but not necessarily for photographing the sun itself.
I particularly like Inspiration Point and Paria View for evening light. Arrive well before sunset, when low-angle light is still raking across the rock formations.
Thor’s Hammer: Time to Nail the Shot
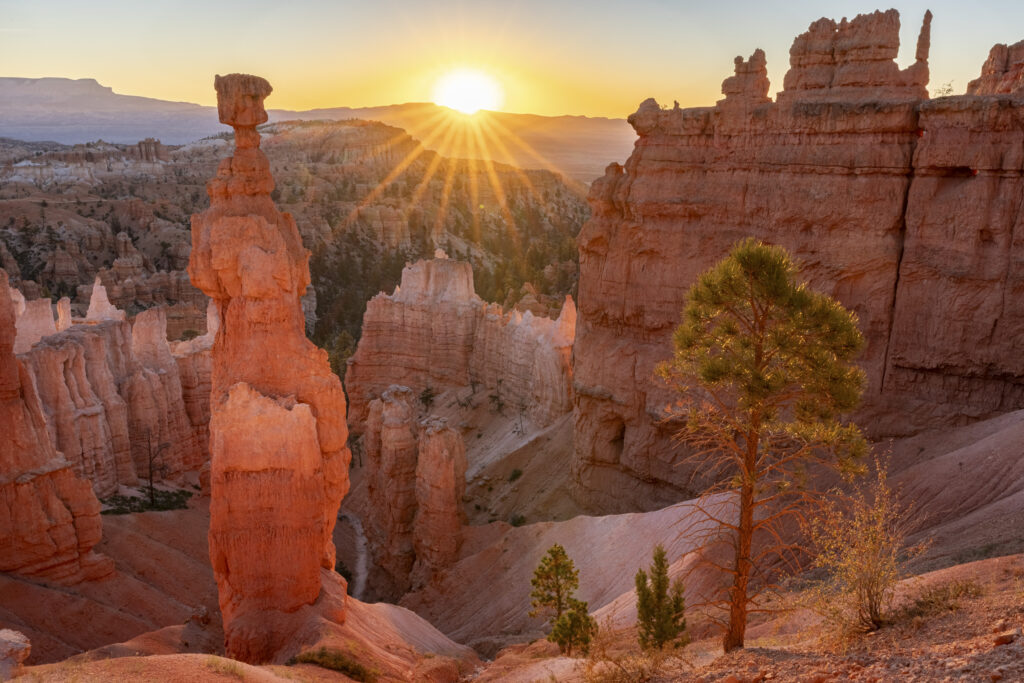
Just about every national park has its celebrity rock formation, and Bryce Canyon’s is Thor’s Hammer. This iconic hoodoo features a large, blocky capstone perched atop a narrow column. It looks like something the Norse god accidentally left behind after a particularly aggressive game of Hammerschlagen.
You’ll find Thor’s Hammer near Sunset Point, visible from the rim or from the upper switchbacks of the Navajo Loop’s Two Bridges side. The temptation is to photograph it dead center, filling the frame. Nothing wrong with that, but try experimenting. A medium telephoto lens can isolate the hammer against distant hoodoos, while a wider lens allows you to incorporate the surrounding canyon and sky.
I especially enjoy including the rising sun in the composition. Positioning the sun partially behind a formation and using a smaller aperture, around f/11–f/16, can produce a beautiful sunstar. Just watch your exposure. A blazing white blob where the sun should be isn’t quite the artistic achievement we’re after.
Go Big or Go Home: Photographing the Amphitheaters
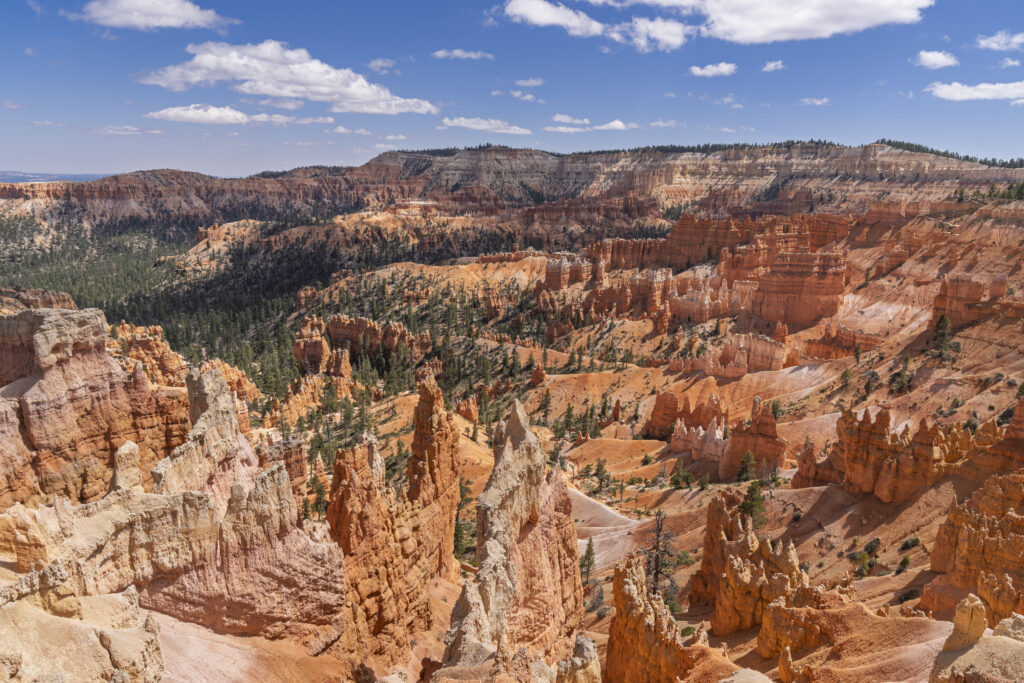
Bryce Canyon’s amphitheaters are enormous, densely packed landscapes. Capturing that sense of scale is surprisingly difficult. A wide-angle lens seems like the obvious choice, but going too wide can make those towering hoodoos look disappointingly small. For sweeping vistas, I often prefer a 24–70mm lens. It provides enough width to capture the larger landscape without shrinking everything into geological confetti.
Bryce Point and Inspiration Point are particularly effective for grand compositions. Look for layers: foreground hoodoos, middle-distance ridges, and distant plateaus. These overlapping elements create depth and help convey just how enormous the landscape really is. Don’t overlook panoramas either. Stitching together several images taken at a moderate focal length can produce a wonderfully detailed photograph that captures the amphitheater without the exaggerated perspective of an ultra-wide lens.
Take a Hike: Let the Trails Do the Composing
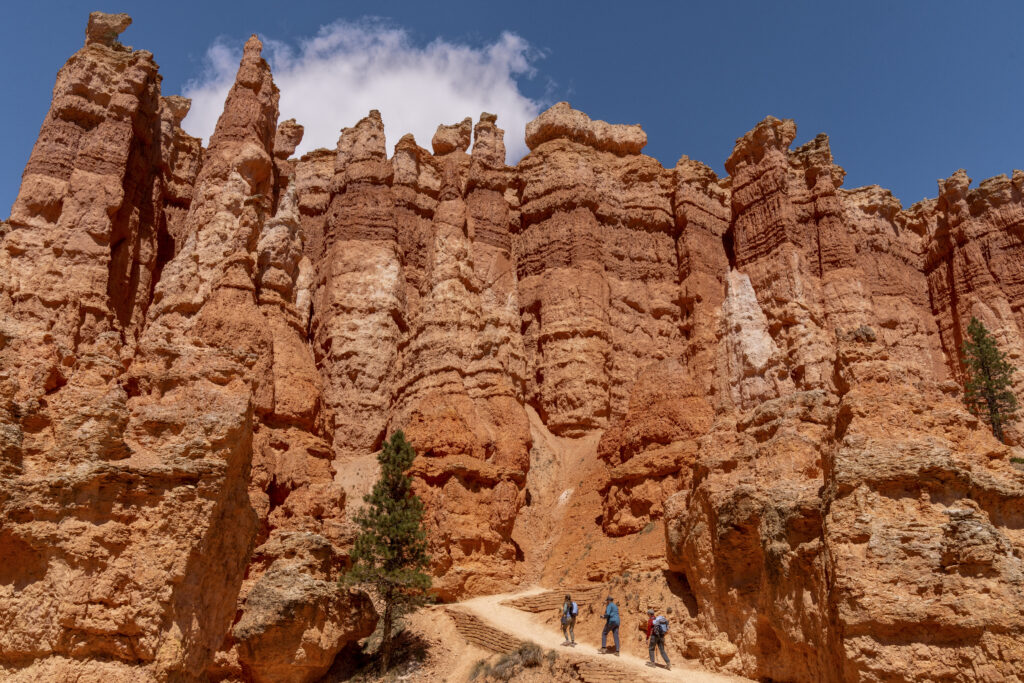
Photographing Bryce exclusively from the rim is like visiting a restaurant and only photographing the menu. Get down into the amphitheater. The Queen’s Garden and Navajo Loop trails offer some of the most dramatic photography opportunities in the park. Winding switchbacks, narrow passages, and towering rock walls create ready-made compositions.
One of my favorite techniques here is using the trails as leading lines. A winding path naturally guides the viewer’s eye deeper into the image. And here’s something landscape photographers sometimes forget: people can actually improve a nature photograph.
I know. Heresy. But a tiny hiker standing beneath a 150-foot rock wall immediately communicates scale in a way an empty landscape cannot. Without that human reference, Bryce’s enormous formations can look like miniature decorations in someone’s backyard. Wait for hikers to become separated from one another, position them along the trail, and let the landscape dominate the frame.
Arches, Windows, and Other Geological Nonsense
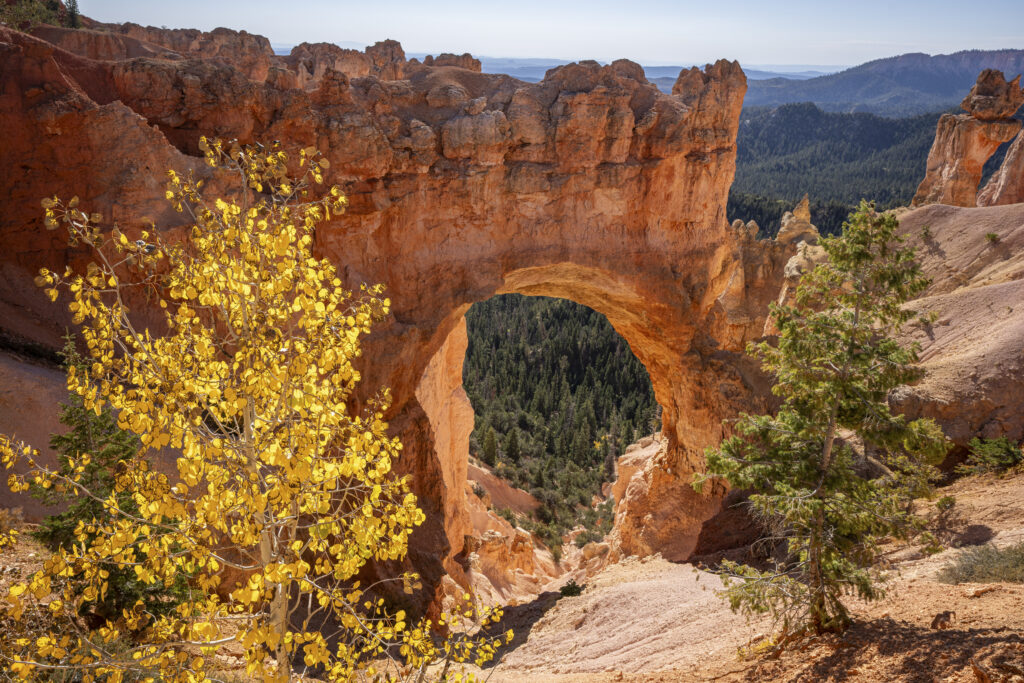
Hoodoos get all the attention, but Bryce Canyon also features an assortment of arches, windows, and unusual rock openings. Natural Bridge, accessible from the park’s scenic drive, is a particularly photogenic example. Despite its name, it’s actually an arch. Apparently, geological accuracy wasn’t high on the naming committee’s agenda. The Fairyland area also rewards photographers willing to explore beyond the busiest overlooks, with sculpted formations and dramatic rock architecture.
When photographing an arch, think about what’s visible through the opening. A distant forest, another rock formation, or a contrasting patch of sky can turn the arch into a natural frame. Seasonal elements can help too. A bright yellow aspen against Bryce’s orange limestone creates a beautiful contrast.
Get Intimate: The Art of Photographing Less
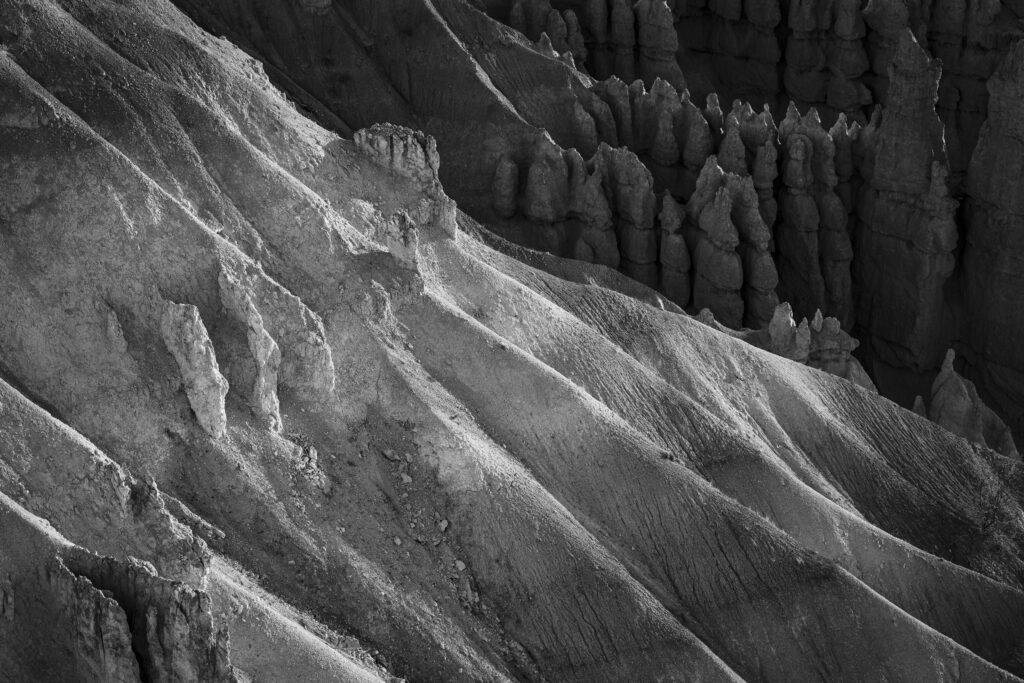
With so much scenery competing for attention, it’s easy to overlook the smaller details. Some of my favorite Bryce images aren’t grand landscapes at all. They’re close-ups of eroded ridges, repeating patterns, and tiny variations in sandstone texture. Pull out a telephoto lens and start isolating shapes. Look for diagonal lines, alternating bands of light and shadow, or a single illuminated hoodoo surrounded by darkness.
Bryce is also an excellent location to experiment with black-and-white photography. Removing the orange forces the viewer to appreciate the shapes, textures, and contrast. And that’s saying something in a place where orange is practically the official state religion.
Editing Bryce: Please Put Down the Saturation Slider
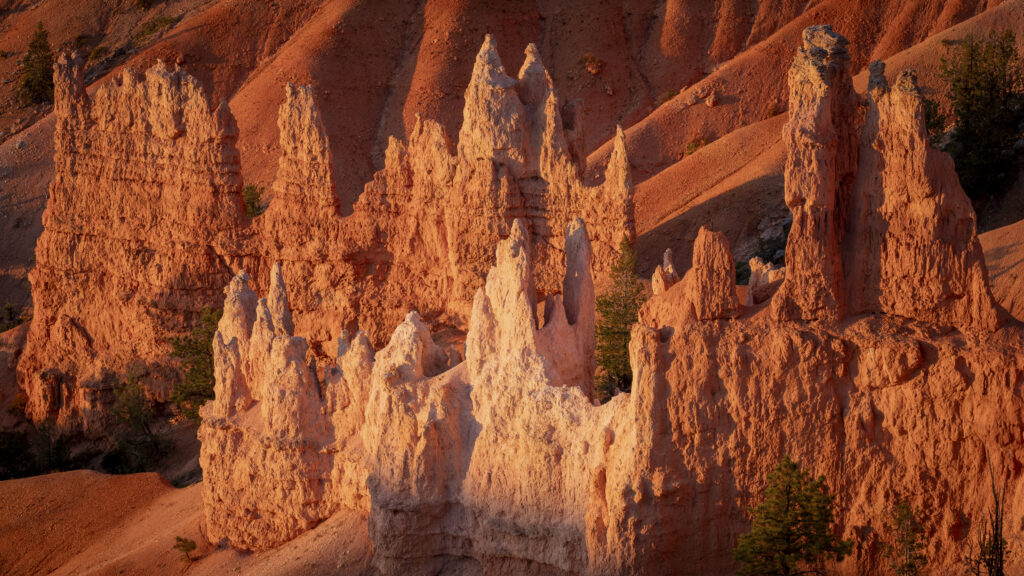
Bryce Canyon presents an unusual editing challenge: the colors are already ridiculous. Those brilliant reds and oranges are real, but even a modest saturation adjustment can transform the scene into something resembling molten cheese. My advice? Start with white balance.
For blue-hour photographs, preserve some of those cooler tones rather than warming everything up. For sunrise images, allow the natural warmth to shine without turning every rock nuclear orange. In Lightroom, pay particular attention to the orange and red channels in the Color Mixer. Adjusting their luminance can reveal detail without dramatically increasing saturation. Also, don’t forget the white and pale limestone layers. They’re important visual contrasts and shouldn’t all become orange.
Finally, consider exposure bracketing for high-contrast sunrise scenes. Combining multiple exposures into a natural-looking HDR image can preserve details in both illuminated hoodoos and deep shadows. The goal is to recreate the incredible light you witnessed, not convince people Bryce Canyon sits approximately three miles from the surface of the sun.
Four Seasons, Four Very Different Bryce Canyons
Bryce is worth photographing throughout the year, but each season brings different opportunities.
Spring: Lingering snow, cool mornings, and fewer crowds can create beautiful contrast between white snow and red rock.
Summer: Long days offer plenty of photographic opportunities, though midday sunlight can be harsh. Afternoon thunderstorms can produce dramatic skies but demand caution near exposed overlooks.
Fall: My personal favorite for comfortable temperatures, golden aspens, crisp air, and beautiful low-angle light.
Winter: Snow-covered hoodoos are spectacular. There’s something magical about bright orange towers poking through a fresh blanket of white. Just remember that icy trails, seasonal closures, and occasional road closures can complicate plans.
At around 8,000 feet in elevation, Bryce is considerably cooler than many visitors expect. Bring warm layers, especially for sunrise, regardless of the season.
Wildlife: Yes, Things Actually Live Here
As a wildlife photographer, I’d be remiss if I didn’t mention Bryce’s less geological residents. Mule deer, pronghorn, Utah prairie dogs, and numerous bird species inhabit the park.
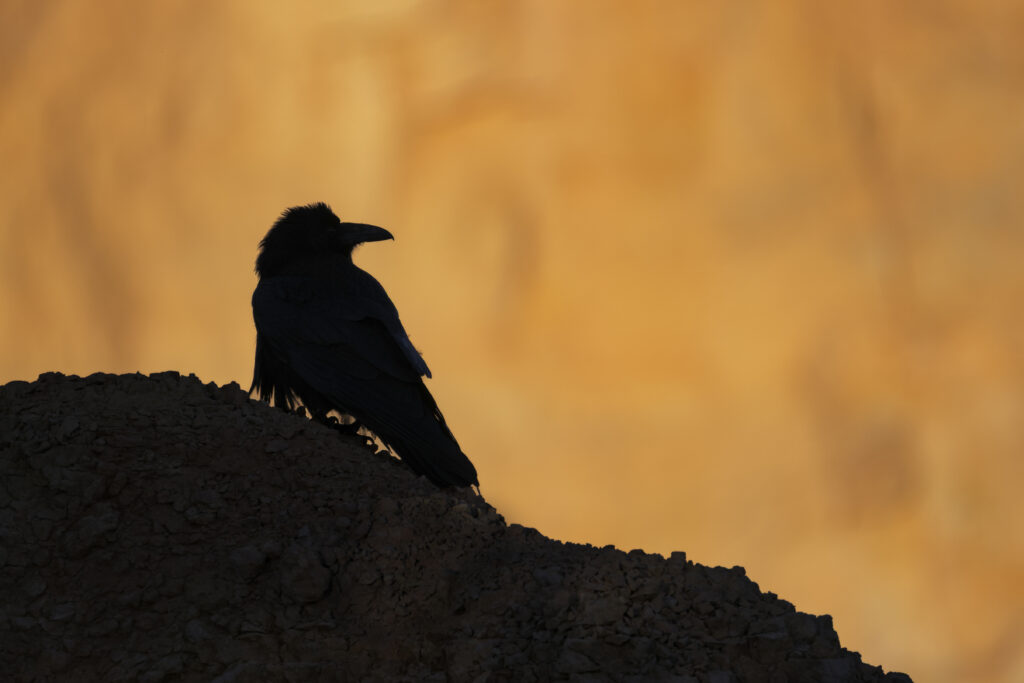
Pronghorn can be especially rewarding in the open grasslands near the park’s entrance & in Bryce Canyon City. Ravens are another favorite of mine, particularly when silhouetted against warm, distant rock formations. Bring a telephoto lens, give wildlife plenty of space, and remember that the animal doesn’t always need to fill the frame. A raven perched against a glowing orange backdrop can tell just as compelling a story as a close-up portrait.
The Final Word: Bryce Is Worth Losing Sleep Over
I’ve photographed remarkable landscapes around the world, but Bryce Canyon continues to surprise me. It’s a place where you can capture an entire amphitheater filled with thousands of hoodoos, then turn around and discover an equally beautiful composition in a single rock formation.
And perhaps that’s why Bryce so often wins the popularity contest on our Southwest adventures. The Grand Canyon overwhelms you with its size. Zion impresses with sheer vertical grandeur. Bryce invites you to explore, experiment, and discover something new around every corner. On Natural Habitat Adventures’ Grand Canyon, Bryce & Zion trip, you get to experience all three extraordinary landscapes. But don’t be surprised if the smallest, strangest member of that trio ends up being your favorite.
Just remember to set your alarm early. Those hoodoos aren’t going to glow themselves.
Happy Photographing,

Mike Hillman
Leave a reply