How to Get this Shot – Desert Dune of Namibia
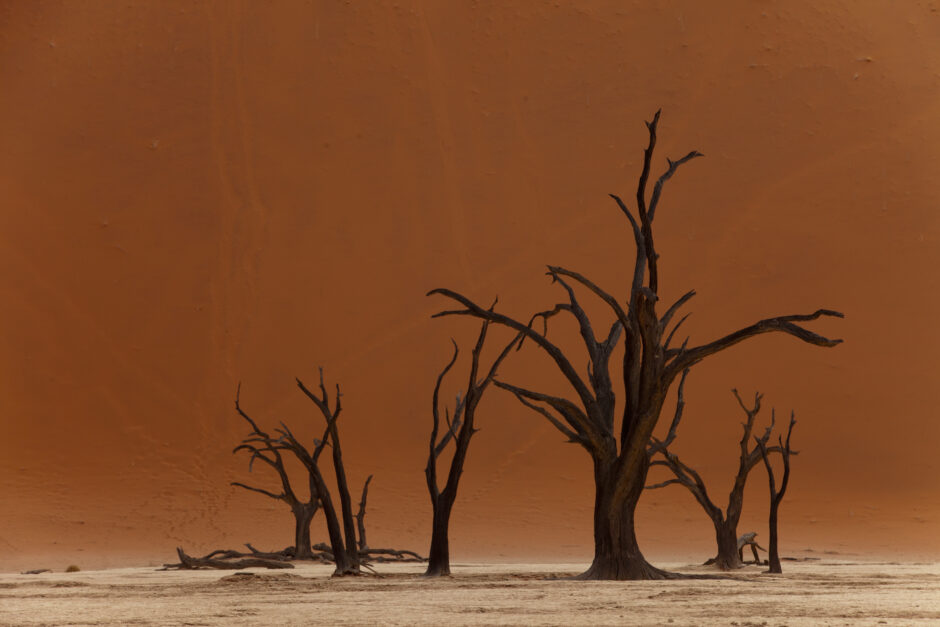
Namibia’s desert ecosystem is typified by color, contrast, and size. But what makes it really stand out is the expanse of the color and contrast that is before you. Massive dunes with rich orange color…skeletons of trees with haunting texture and curvature…all within walkable range such that you can compose different shots for days.
While this ‘filling the frame’ shot may not be the first photo one thinks of first when getting to Namibia’s famous Sossusvlei sand dunes, it has an alluring beauty that is outside of the norm. And when we photographers are thinking of creating unique and aesthetic images, thinking outside the box is always a good thing!
Follow along for a list of ingredients to get a shot like this on your next Namibia photo expedition.
Exploring Sossusvlei
The first thing you’ll need to do of course is get yourself into these ‘dead vleis’ of Namibia, and the most famous and photogenic is no doubt Sossusvlei. A proper photo expedition to Namibia will give you the most photographic opportunities, as the time of day and areas to concentrate your photography are best known by expert photographic guides. However, as with most landscape photography, ample time to walk around, and ensuring you’re there for lower light times of day (aka the morning or evening ‘golden hour’) is key.
Because this type of photo relies on identifying trees at a specific proximity, while ‘walling off’ the background dune, a quick 15 min visit ins’t going to cut it. Plan on spending ample time in this magical area.
Positioning and Lens Choice
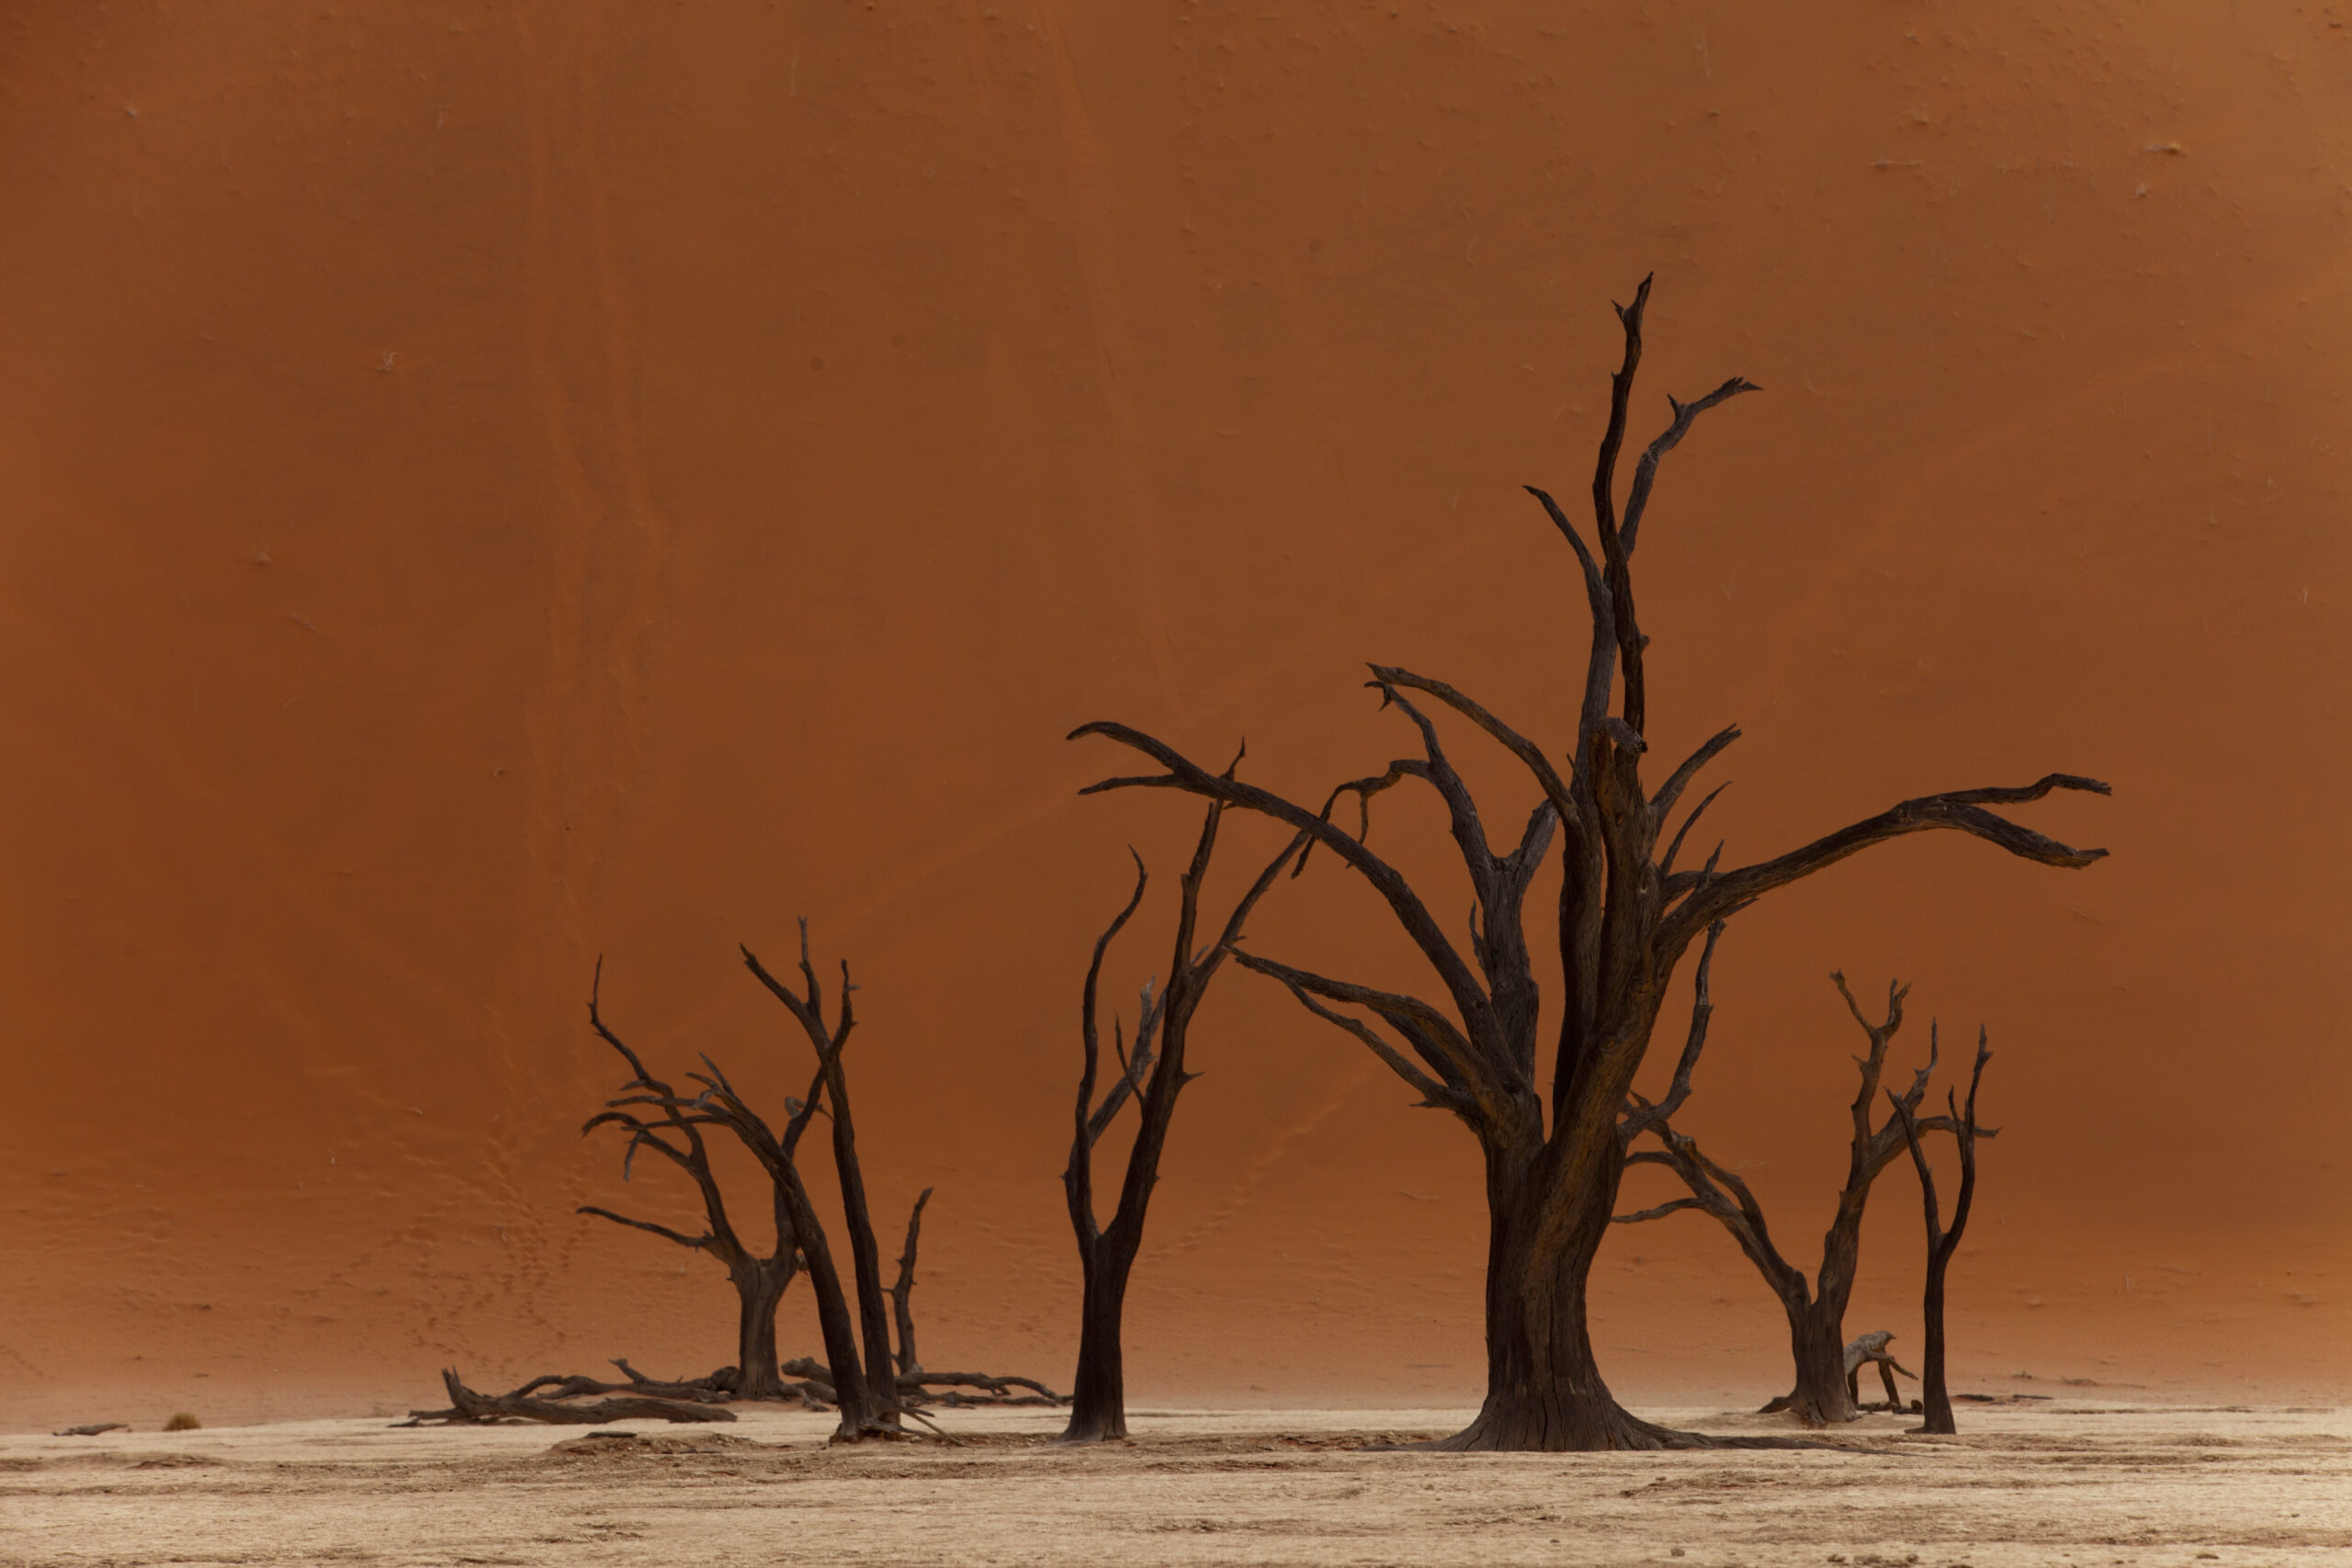
Where you are, compared to the trees, compared to the dune in the background, is paramount. Contrary to what you might be thinking, this photo is not taken physically close to the trees. Instead, I’m using a technique known as ‘zoom compression’ where I am actually quite distant from the trees (probably about 50 to 100 yards), but using a telephoto to zoom in and bring both the trees closer, but most importantly, the background closer and bigger in the frame.
This interesting look of a drastic, orange, dune-filled background can occur via different methods. However, the most fail-safe is to indeed use a telephoto, spot the trees from 50-100+ yards away, and use your telephoto lens to fill the frame with both the trees and background. In fact, your lens should remain parallel to the ground…not pointed up.
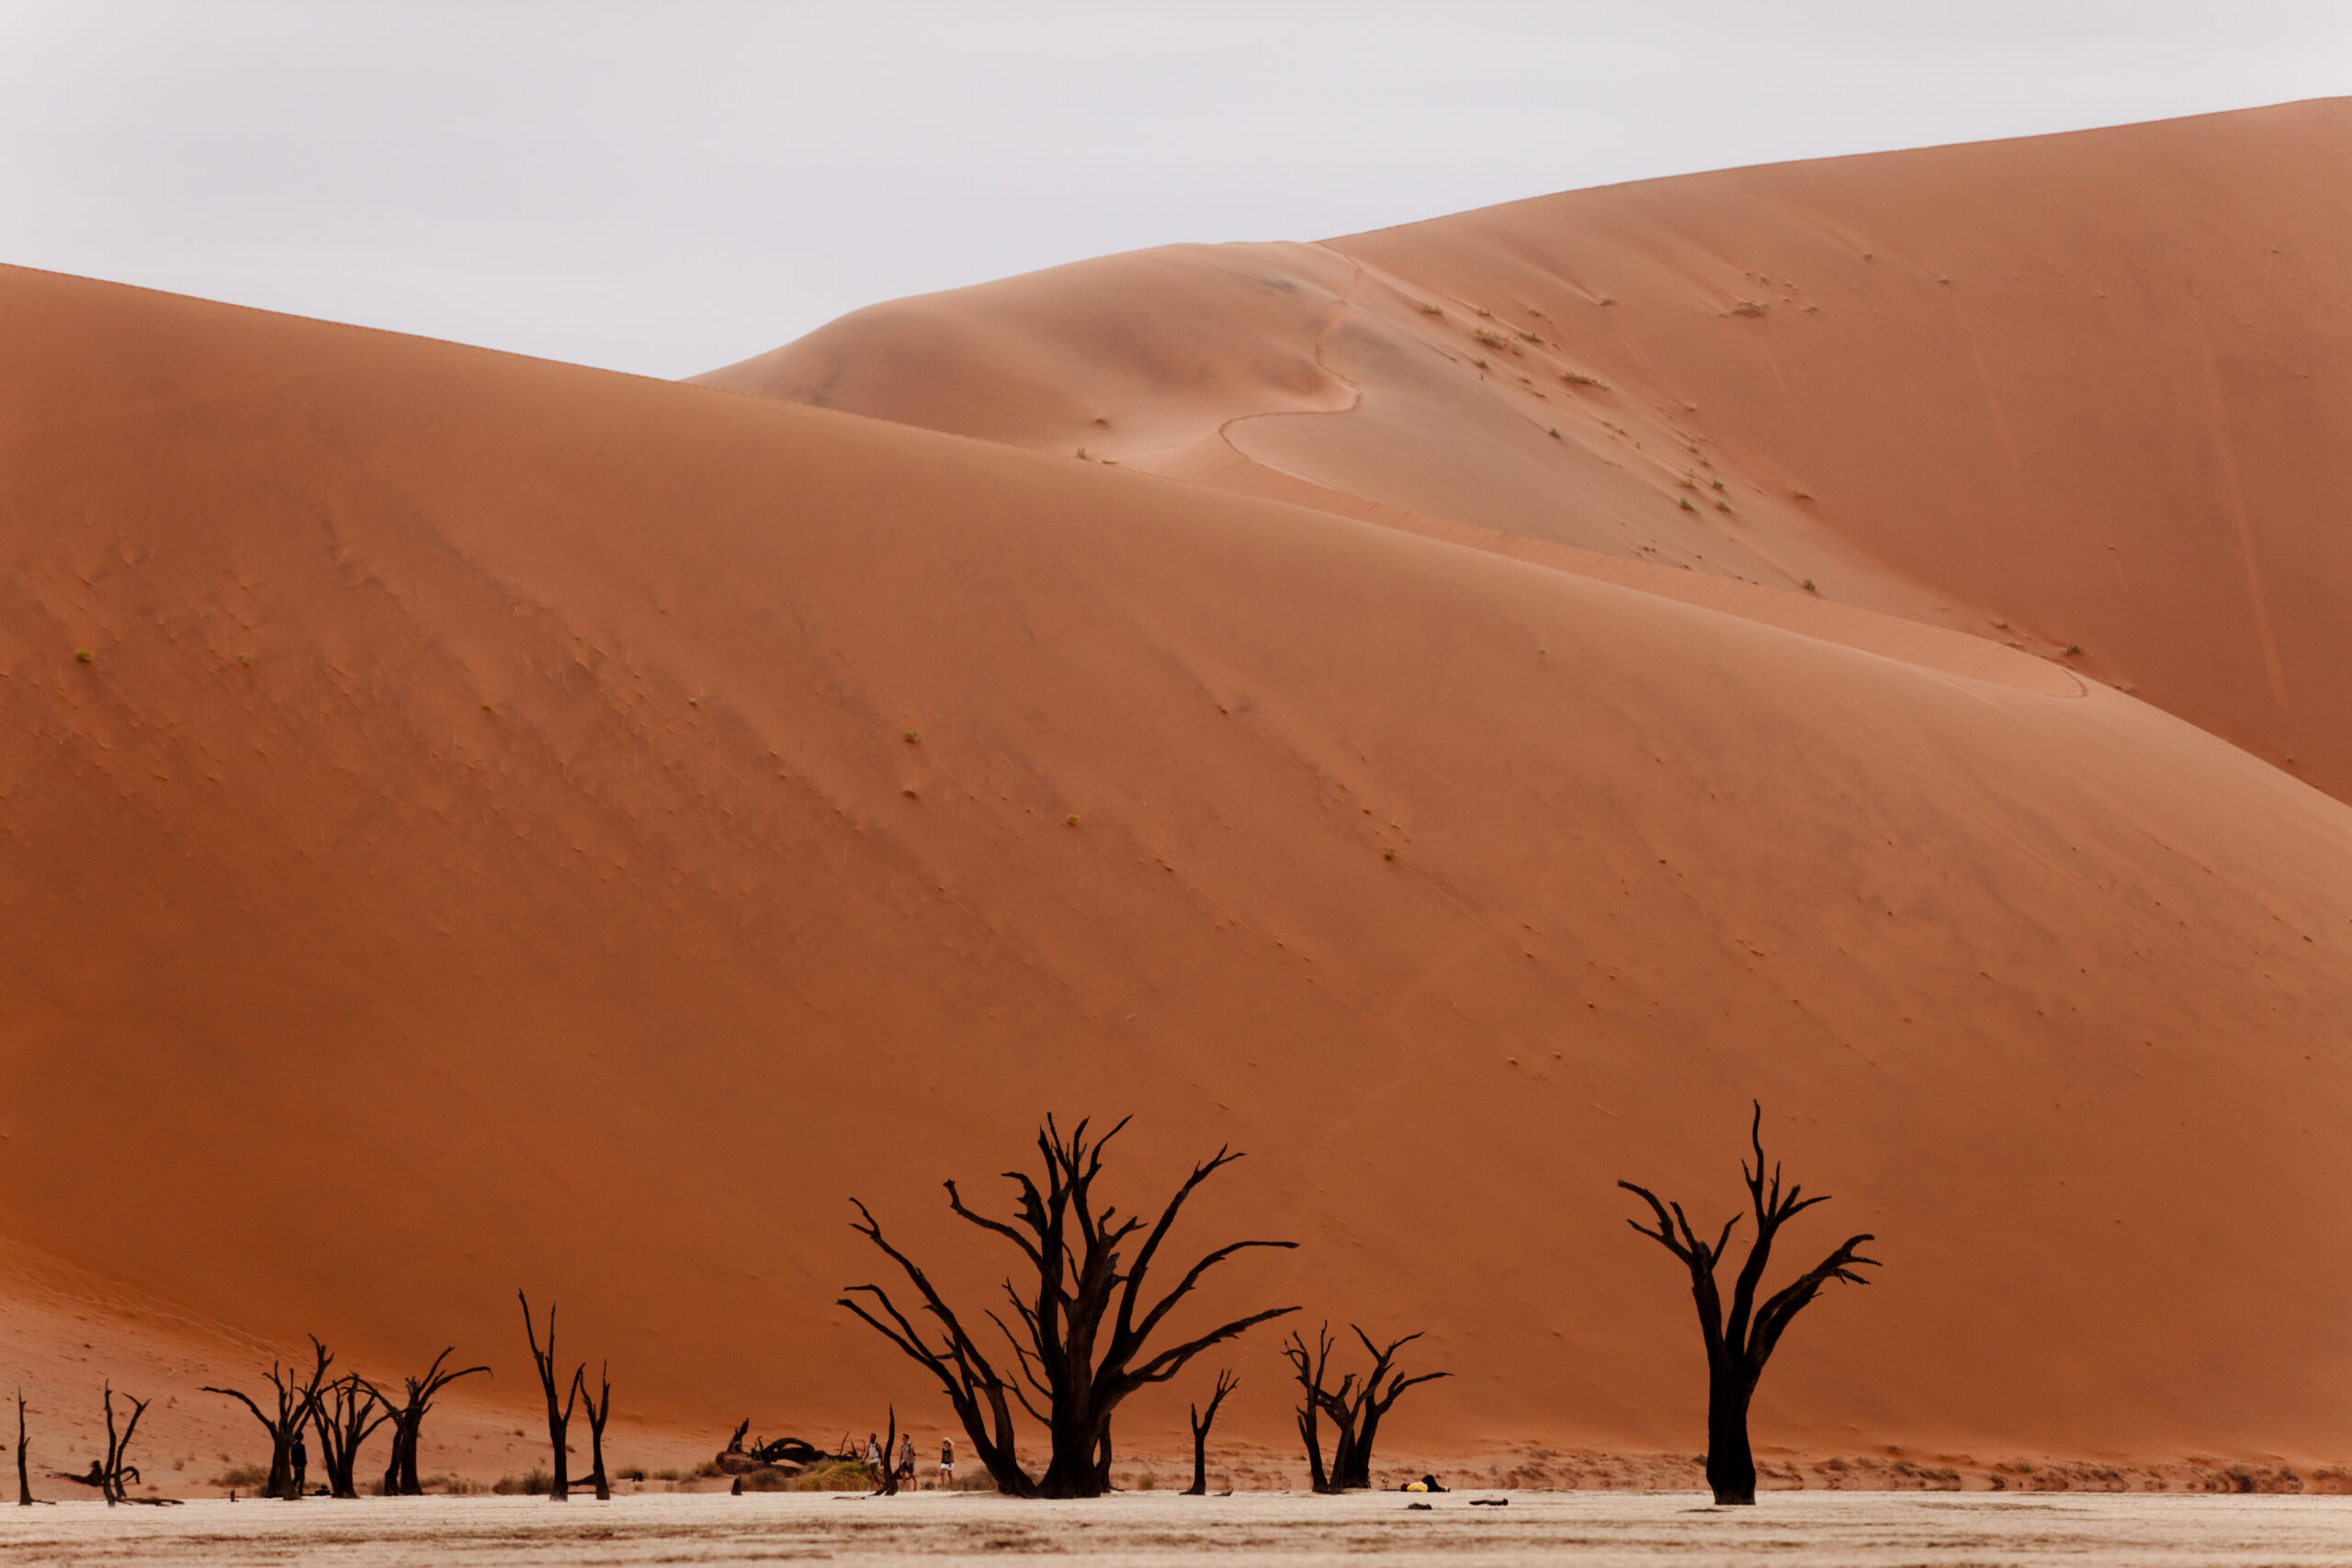
Using a telephoto for landscape photos like this is my secret sauce and I do it often. If I were instead right next to the trees, I’d be hard pressed to make the dunes in the background look as towering and full-frame in composition. In other words, you’d probably get the sky in the shot, which changes the vibe of the image. That’s not a bad thing, but not what we’re going for here.
Notice how in the below photo the sky doesn’t really add much to the shot. The crest of the dunes is cool, but remember–if something doesn’t add to the photo, it subtracts from it. Thus, I preferred to eliminate the sky from the equation (again, though, the below is indeed another shot to get!).
Camera Settings
The great thing here is that you don’t need fancy or extreme settings. Your positioning, use of telephoto, and composition are the most important elements.
Your camera settings can be quite moderate and unremarkable…something like an f/8 and 1/320 shutter speed should be fine. You will have ample light. Remember, though, that for landscape photos a low ISO is best (ideally 100 or 200), so while you want to shoot at a fast enough shutter speed to minimize hand movement, ensure that you’re not shooting too fast, requiring a higher ISO.
Image stabilization works better than ever, so try and push the limits for being hand-held and stick with the 1/focal length rule. This states that to eliminate motion blur from being hand held, shoot at 1/focal length of your lens. If you have image stabilization, in your lens or camera body, you can usually halve that number. For instance, if you are shooting at 200mm, you can probably shoot at 1/100th of a second, while trying to be reasonably still and stable, and get a crisp shot.
Or, better yet, bring a tripod and you can go as slow as you’d like!
A Final Note
As you can see, most of the strategy here is your placement and finding ‘the right set of trees.’ Mix that with a moderate telephoto, like a 70-300mm, and you should be golden. However, as a final bit of advice, pay particular attention to both your white balance and exposure compensation. For white balance, a ‘cloudy’ white balance will bring out a deeper and richer orange coloration, which is fantastic. And because of the uniform and very frame-filling color, you may need to darken your exposure compensation slightly, or else your camera may erroneously over-exposure your image. (This has to do with it trying to ‘average’ the light in varied scenes, and it’s used to the entire frame being a darker color)
If you are headed to Namibia, you are in for a treat! Make sure you are going to these magical dunes, take these lessons with you, and come away with some phenomenal photos of this fascinating place!
Go forward and give it a shot,

Court
Leave a reply