How to Take Stunning Photographs of Orangutans in Borneo
As we seek more authentic wilderness in today’s world, Borneo stands out. It’s a spectacular combination of expansive tropical landscapes and epic wildlife—both large and small.
The orangutan tends to set itself apart from the rest and is often the primary draw to this tropical wilderness. If you’re headed to Borneo on a Photo Expedition to capture photos of these alluring cousins of ours, be sure to study up on the variety of techniques to come away with extraordinary photos that capture the essence of the mighty orangutan.
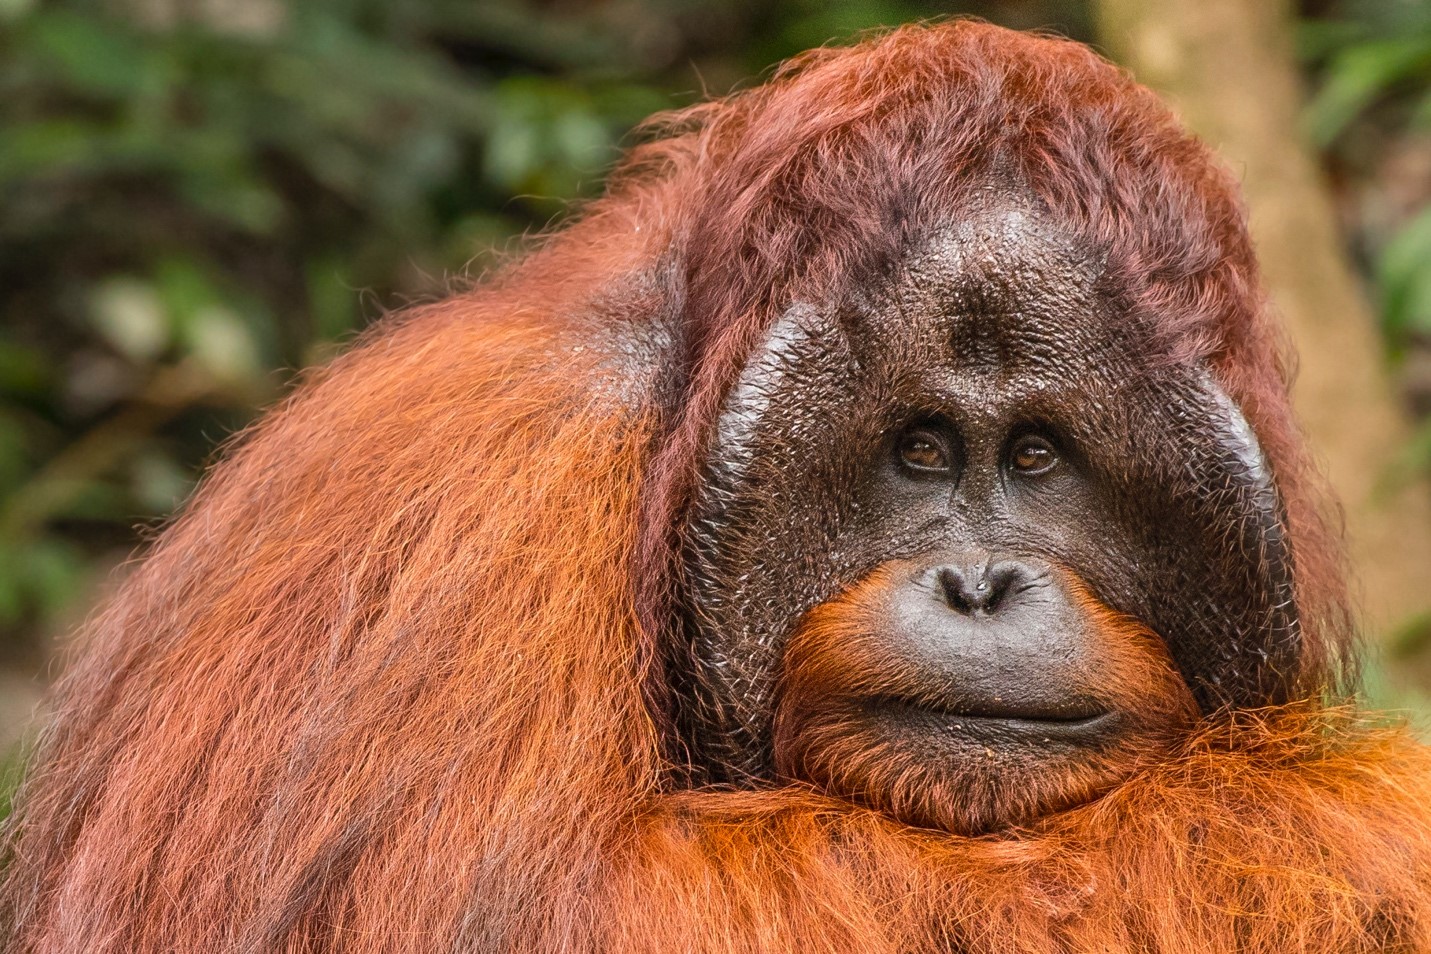
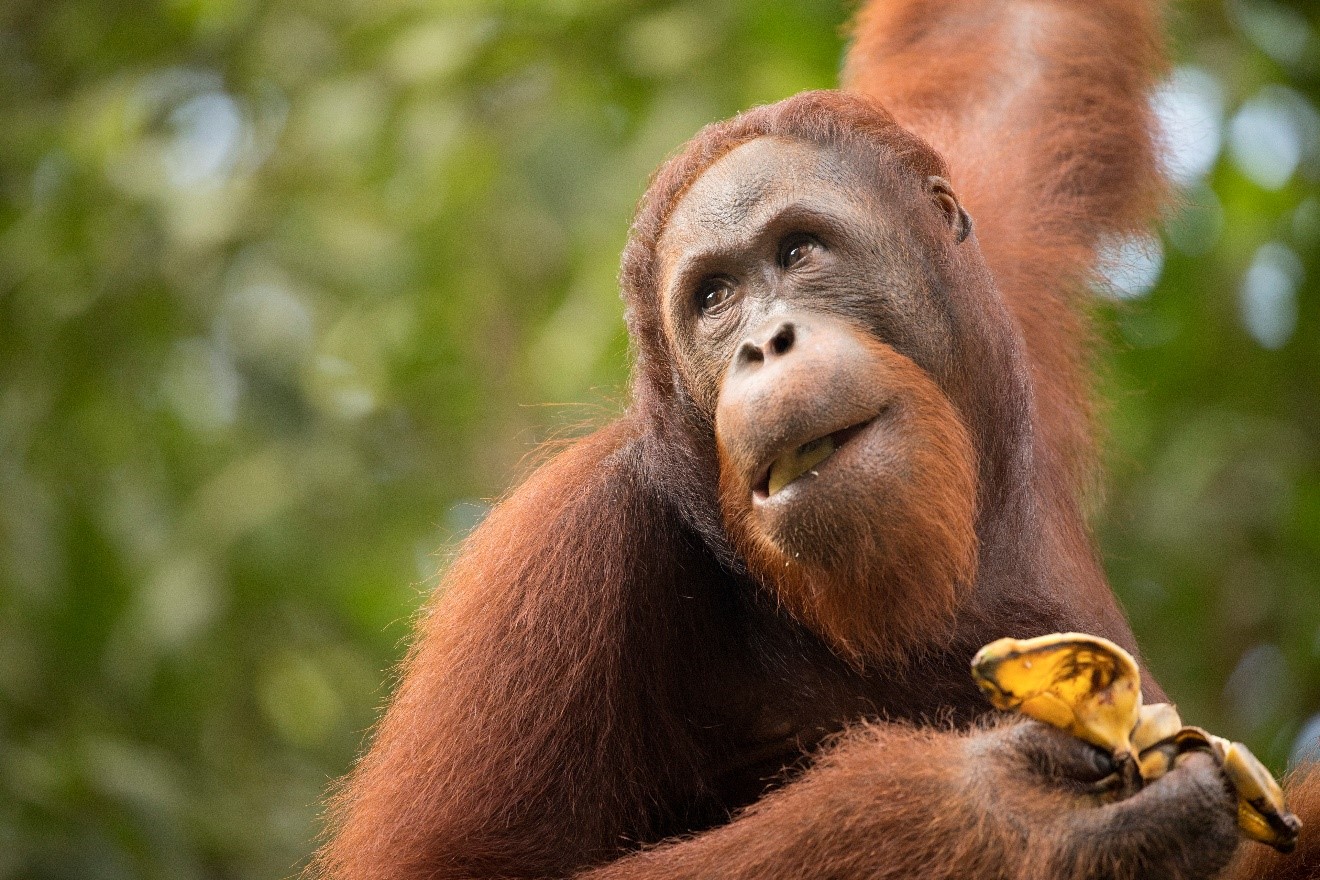
The Classic Fill-the-Frame Shot
This style of photo is likely the one most folks have in mind when dreaming of “the perfect shot” of an orangutan. It’s big, it showcases the animal in an emotional way, it’s sharp, and it makes a profound impact on the viewer.
Of course, to get this shot, you must either be quite close to the orangutan—which is usually possible in the semi-wild orangutan sanctuaries that have made Borneo so famous—or you must have a great telephoto lens. In many cases, it’s a combination of the two that results in such a photo.
To really nail this type of shot, the first thing I do is try to minimize the environment. Although wildlife-in-landscape photos are spectacular (and we’ll get to that next!), in these shots, you want to deliberately minimize or exclude them. This includes the sky, branches, the forest floor, and any other background elements that might detract from the primary objective, which is to show a big, sharp, see-into-their-soul kinda shot.
Next, you’ll want to shoot with a smaller aperture, aka a big f/number. This ensures that the orangutan’s eyes are fully in focus, as well as other features of the face, like the nose, forehead and all the little hairs that protrude from the face. A shallow depth of field wouldn’t necessarily botch this type of shot, but when we want ultimate focus, a deep depth of field is generally preferred.
To achieve this deep depth of field, I usually start at f/8 and work toward f/11 if I have enough light.
Light can be very limited in the tropical rain forests of Borneo, so you’re likely already at a minimum shutter speed and decently high ISO. 1/250 and ISO 3200 are pretty normal, so don’t be afraid to get to these while shooting for these big f/numbers to maximize focus and depth of field.
Finally, don’t shortcut your composition here, even though it’s a singular, zoomed-in subject. Treat the eyes, forehead, nose and other features like you would a landscape photo. Where does the rule of thirds come in, and are there any leading lines, you ask? Although this isn’t as crucial as with large landscape photos, composition considerations are often what send your good photo into the stratosphere and create a really stunning work of art.
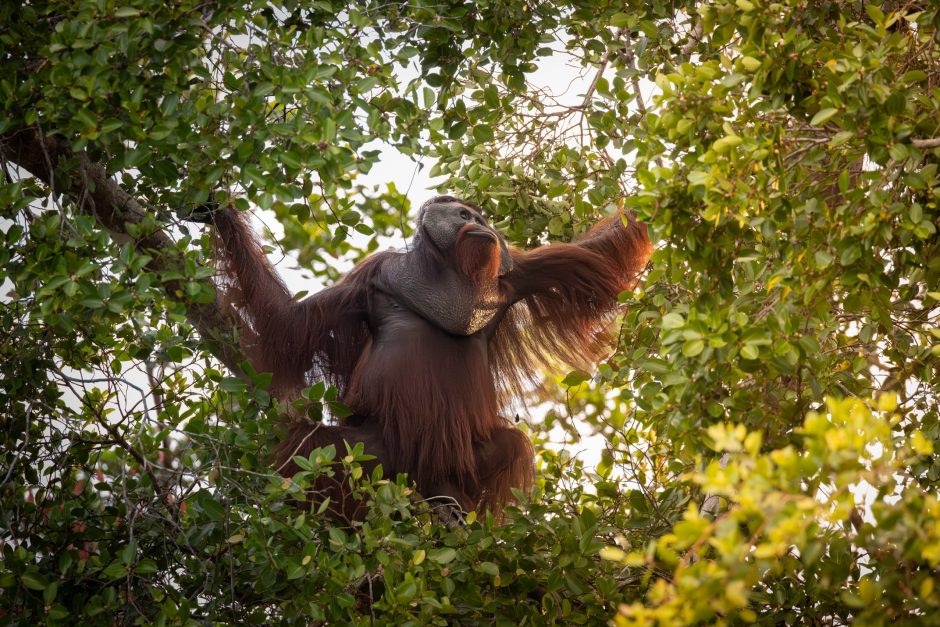
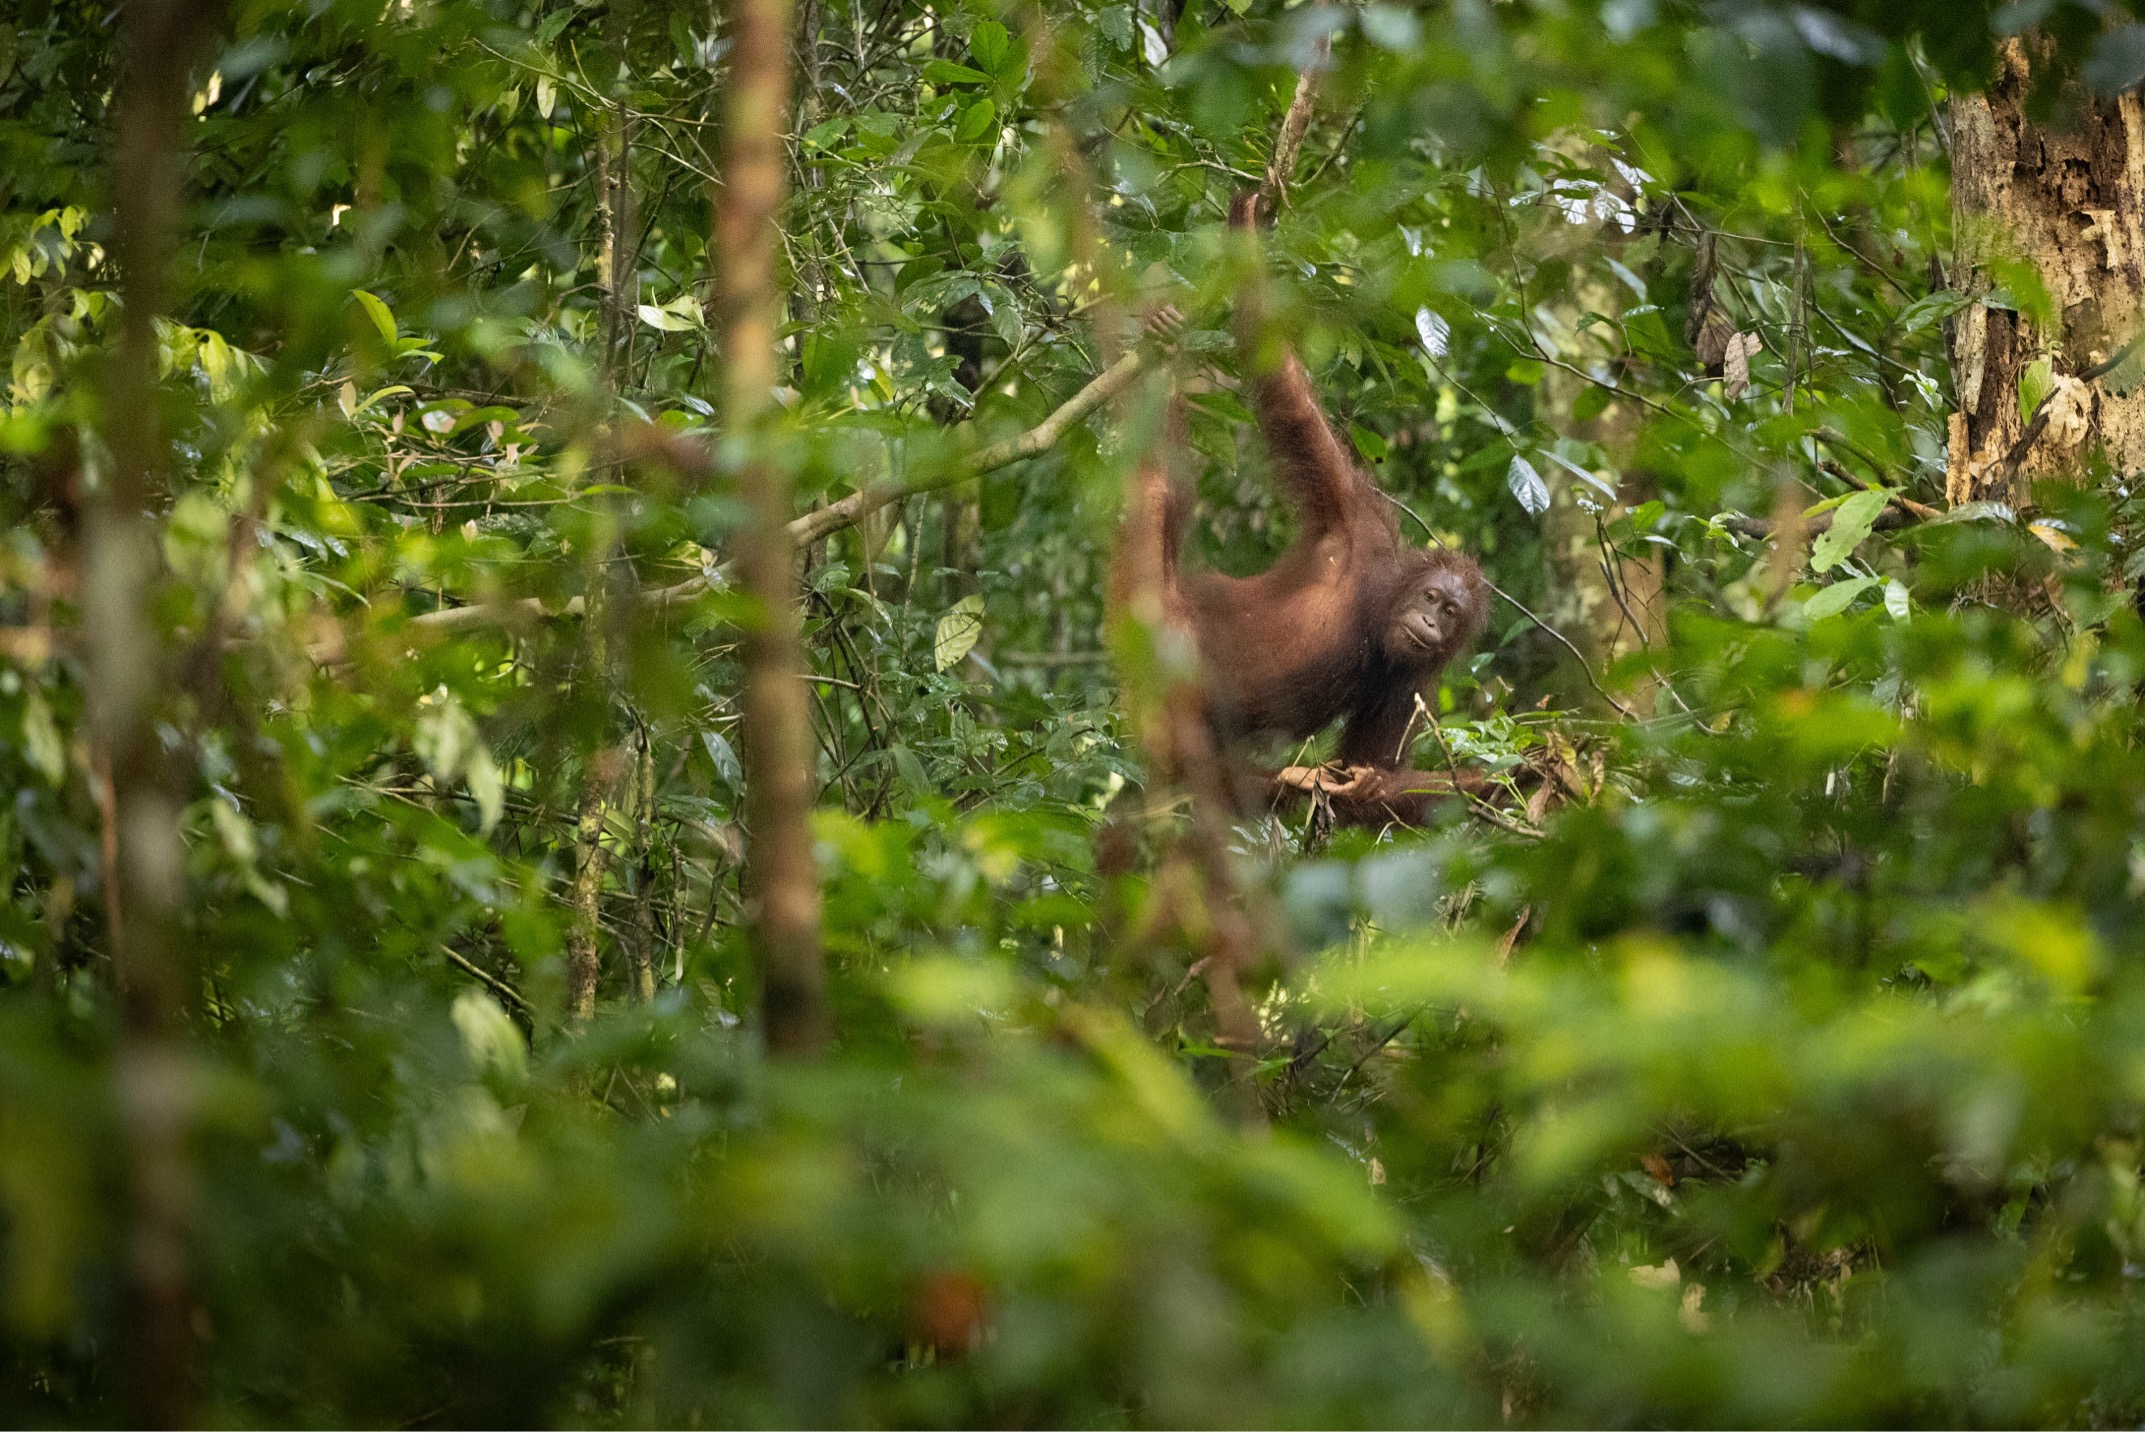
Showcasing the Environment (Wildlife-In-Landscape) Shot
At the extreme other end of the spectrum, I also love the opportunity to place a big animal in an even bigger landscape. The context these types of photos provide can be a game-changer and often result in some of the best photos of your trip.
The first trick to getting these shots is to be cognizant of the opportunity in the first place. To put it another way, when in front of a great ape like the orangutan, we are all tempted to zoom in and fill the frame, as I discussed in the previous section. Those are great photos, but they are not the only photos to take here.
If you are reasonably close to an orangutan, like on Nat Hab’s Borneo Photo Expeditions, it will pay huge dividends to pause for a moment, zoom out, and perhaps even put on a wider lens. This may sound obvious, but having guided oh-so-many Photo Expeditions over the years, I can tell you that in the moment, it’s easy to forget.
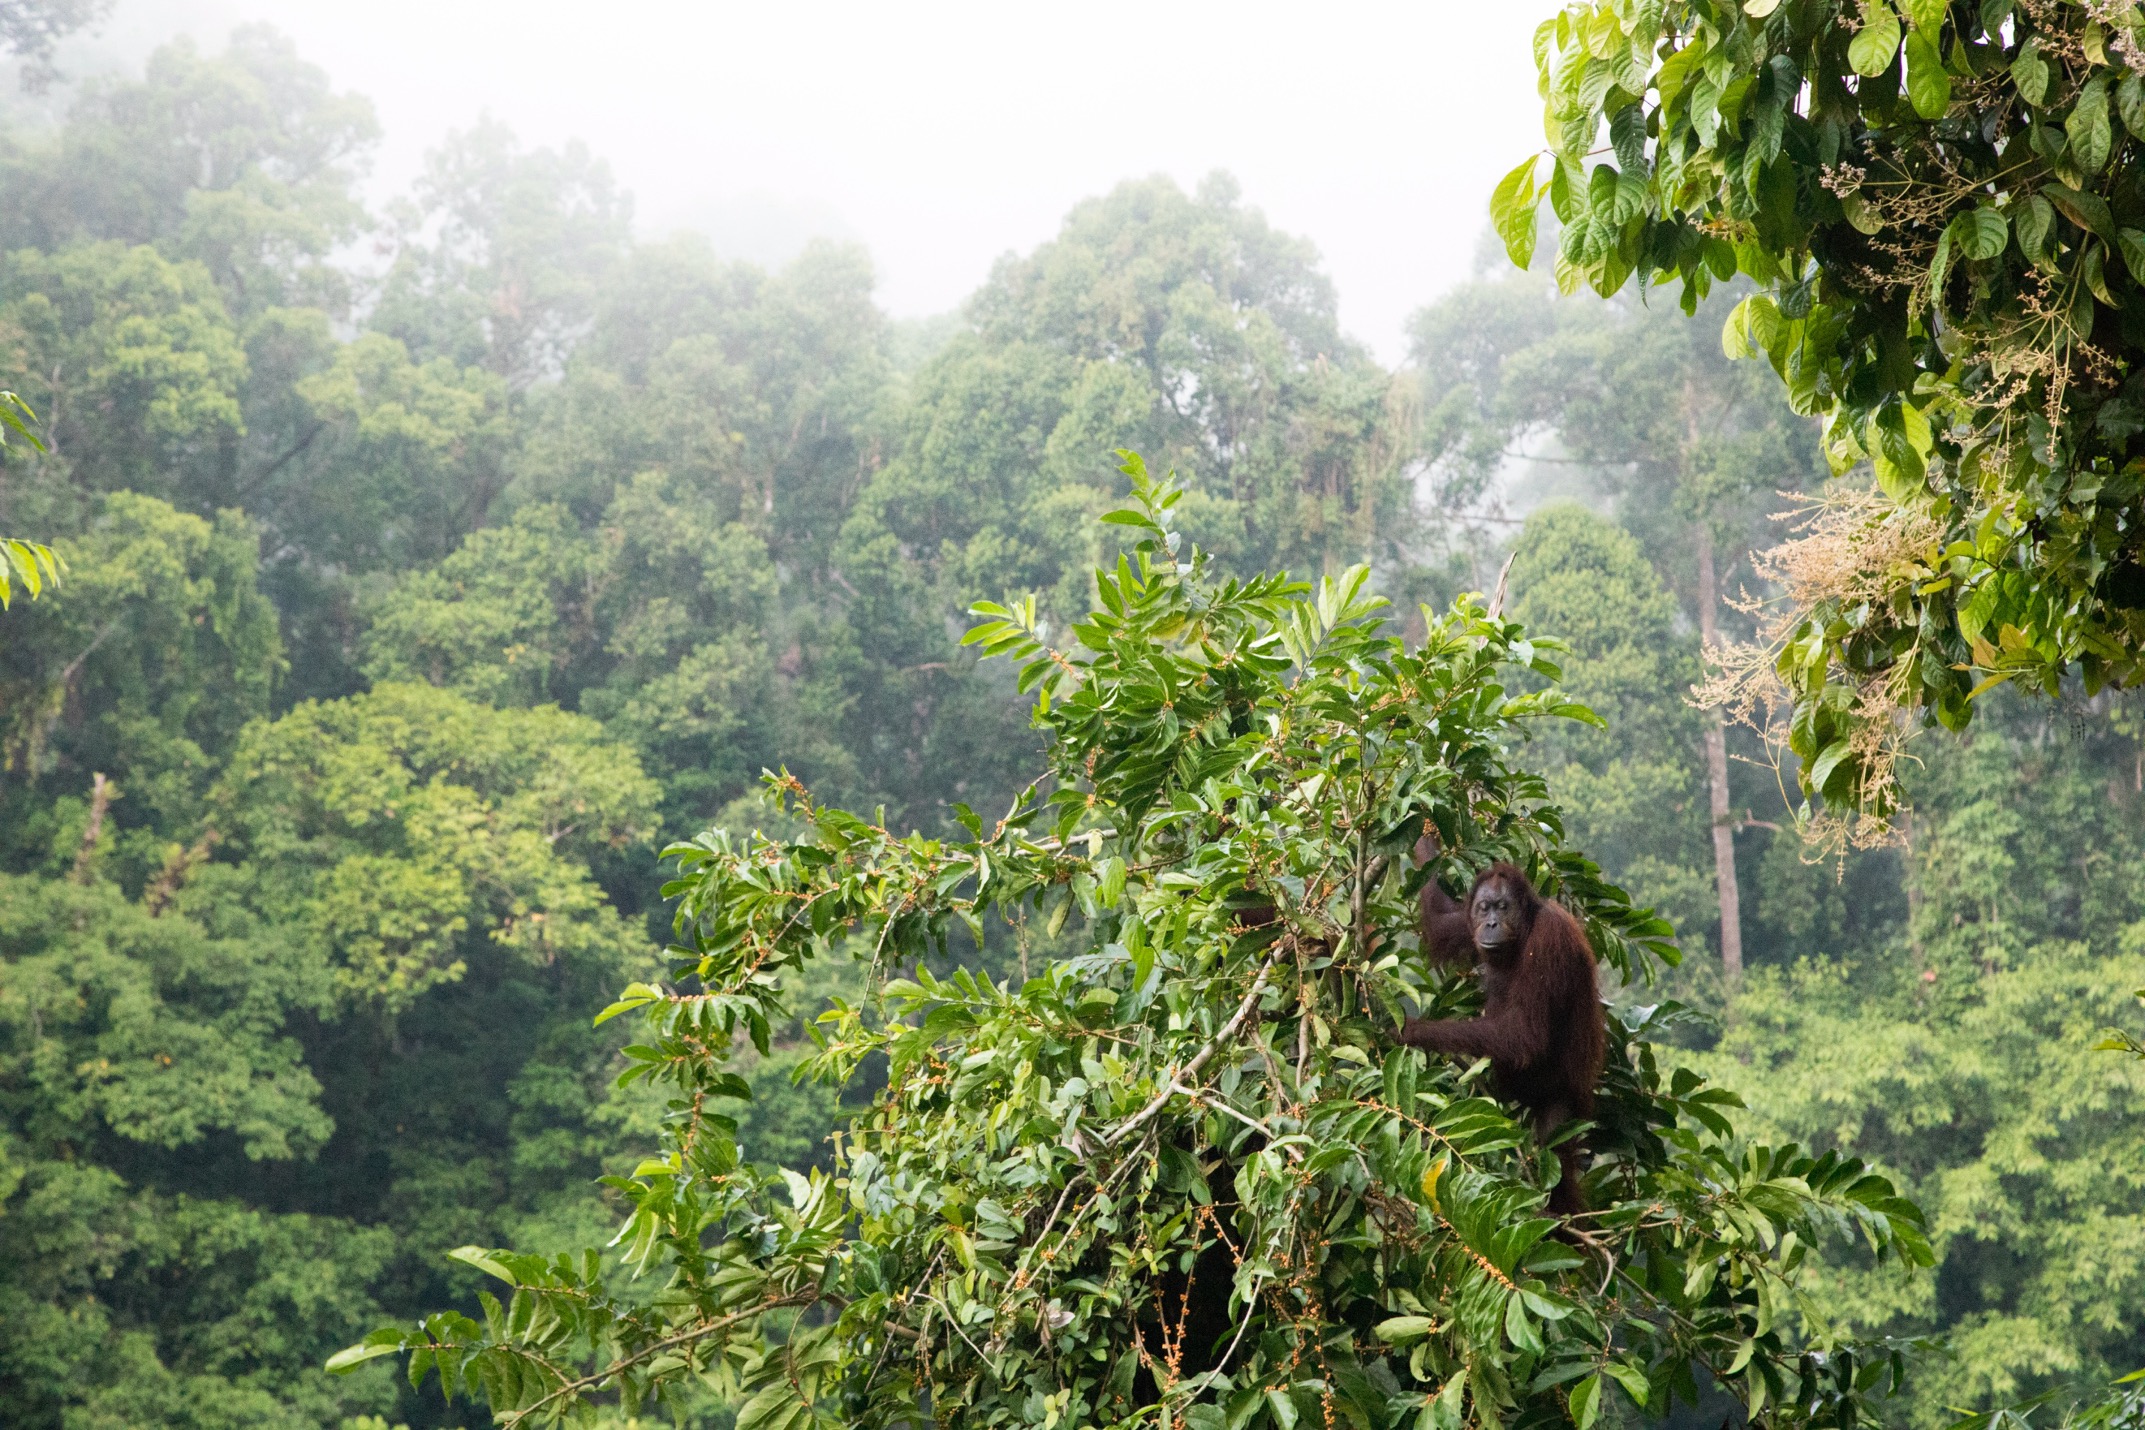
The next thing you want to do is analyze your depth of field wants. The reason I say wants is that this can be subjective and flexible. Some shots are great with deep depths of field where both the orangutan and the background are in focus. However, the best shots that I’ve taken and seen are when the orangutan is in focus but the background is blurred a bit, thus creating a depth and layering effect to the photo.
Essentially, this blur makes the landscape look deep and impressive.
This technique also draws attention to your subject while bolstering perceived sharpness. The animal isn’t necessarily sharper, but in contrast to the blurred background, it appears sharper. This is immensely helpful in helping showcase your subject in context to its environment. Plus, sometimes, when everything is in focus, it can be distracting and cause the viewer to be unsure of where to look first.

These can be some of the more challenging orangutan photos to capture, as they don’t pop up all the time. Sometimes, in order to capture a big, sweeping landscape, you might have structures, people, or other distractions in the way. Or, the environment may just not be that impressive or photogenic. Maybe the lighting is very mottled with sun and shadows. These are all commonplace issues.
The best you can do is try to be aware that these are coveted shots, so anytime you spot your orangutan, start analyzing the environment around the animal. If you notice a deep background with even lighting—snap, snap, snap away! Even if conditions aren’t optimal, I still highly recommend taking these shots, as they really help tell the story, even if the photo isn’t wall-worthy.
It’s essential to remember that what your photo looks like on the back of your camera is not what it will look like on a computer screen, blown up, or even cropped. Stick to the plan and take some great wildlife-in-landscape shots of orangutans to fully stock your portfolio of the trip.
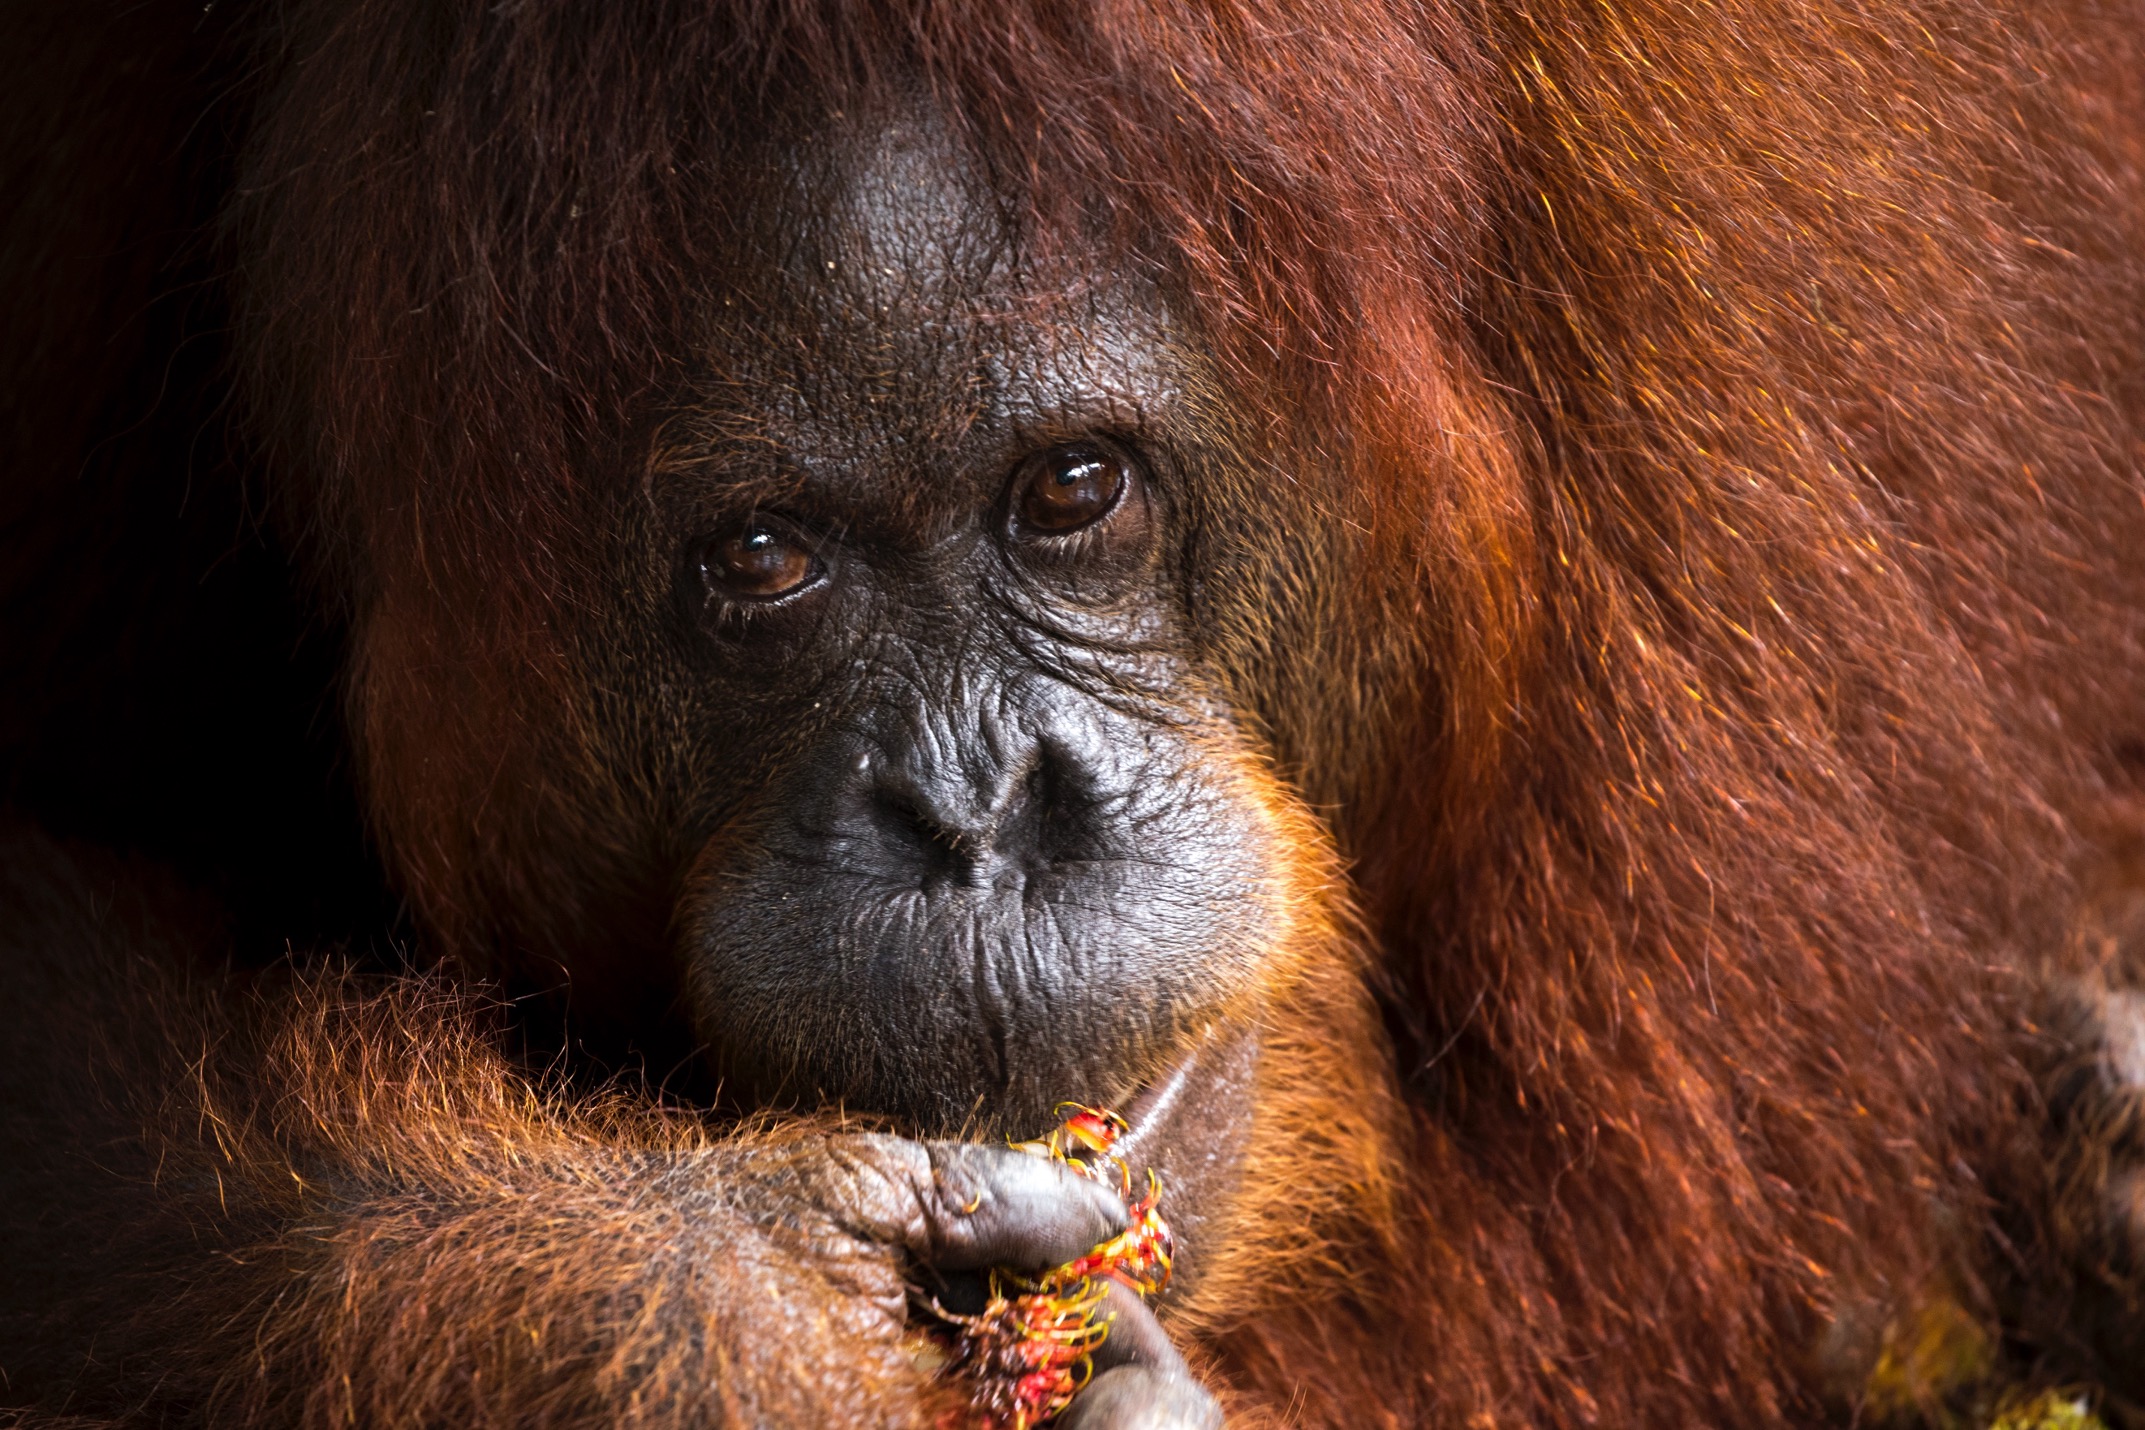
Classic Wildlife Portraiture
Generally, we think of portraiture as photos of people, but our great ape cousins present wonderful opportunities for classic wildlife portraiture.
But what constitutes a wildlife portrait?
Well, as with most art, this is subjective, but in my opinion, it’s when the animal fills roughly half of the total frame area (not 10% like wildlife-in-landscape, nor 80%+ with fill-the-frame shots). Portrait shots leave room for some color and texture in the background, but ultimate focus and sharpness are reserved for the subject itself. In fact, we often shoot at the smallest f/numbers (shallowest depth of field) in order to further isolate the subject and create dominance in the scene.
I also feel that having the subject’s eyes as part of the story is a bonus. They don’t necessarily need to be looking directly into the camera, but they are featured and notable.
The trick with orangutan portraits is that they don’t usually sit on a chair and do what you tell them. Humans are much easier in this case!
Orangutans are almost always moving, and while they don’t necessarily have huge home ranges, they are feeding, swinging, nest-building, or sometimes even walking on the ground. Thus, your portraiture needs to have a certain special consideration, in addition to the usual f/2.8 or f/4 aperture.
You need some speed.
Because portraiture relies on sharpness, motion blur can be disastrous to any portrait attempt. Thus, it’s really critical to shoot fast.
Fortunately, the shallow depth of field you’re aiming for correlates to a small f/number, which lets in the maximum amount of light.
However, you must gauge the animal’s movement and be ready to set a fast shutter speed, sometimes even in the 1/1000 or faster range. If the animal is swinging quickly through the trees, 1/1600 isn’t crazy!
Just be ready to use a high ISO like 2000, 3200, or even 6400 to ensure the speed you need for the sharpness we all crave. I’d rather have a grainy photo that is sharp and focused 100% of the time.
With these types of shots, where you are attempting to predict movement, how you focus comes into question. While newer cameras have advanced autofocus that can track and continually focus on the animal’s eye, they can be inaccurate from time to time, so you are leaving a bit up to chance. Plus, plenty of cameras don’t boast this feature.
Instead, my go-to technique is to use center-point autofocus, so that the focus box always stays in the middle of the screen. Then, I typically use continuous autofocus so that as the subject moves, whatever is in the focus box continuously refocuses as I halfway press the shutter button (or back button focus, depending on your style).
But there is something wrong with this technique—any ideas?

By doing this, you are setting yourself up to have your animal in the center of your photo each and every time. And knowing the rule of thirds, we want to generally offset the animal so that it’s on one side of the frame or the other, ideally looking into the open part of the frame. The above photo happens to be an exception, as the mother’s body covers the right third, with a soft green background in the left third. Thus, having the subject smack in the middle works OK.
To solve for this issue the rest of the time, I simply zoom out slightly and plan to crop my photo in order to adhere to the rule of thirds. This also helps greatly with tracking the animal and keeping it in your frame, which can be challenging if you’re zoomed all the way in.
The small bit of pixels I “throw away” by cropping slightly is worth it for the ease of the technique. Plus, I’m sure I’ve gotten photos this way that I would have otherwise missed if zoomed in all the way while taking each photo.
The other way to deal with this off-of-center goal is to wait for the movement to stop briefly and use single shot autofocus to lock focus in while the orangutan is in the center, hold the shutter, and then recompose. I engage this technique often, too, but the risk is that you won’t get the pause in movement you were hoping for, or movement resumes in the split second that you are recomposing the shot. Nevertheless, this is also a viable and well-used technique.

There are few things more thrilling than photographing the great apes of the world, and the orangutan tends to be one of the less common subjects. For this reason, you’ll want to photograph orangutans in all the ways possible when on a Borneo Photo Expedition.
It’s a natural progression to start with the fill-the-frame shot and work backwards. It’s absolutely fine to try and capture those highly desired “big shots” first and then zoom out. However, oftentimes we can start with wildlife-in-landscape shots as we wait for orangutans to get closer, or if we safely and considerately approach them when in the wild.
The key point is to be aware of these three composition techniques so that you are thinking of them throughout these special photo moments and opportunities in Borneo.
If you have additional techniques for capturing wall-worthy photos of orangutans in Borneo, please feel free to comment below!
All the best,

Court
1 Comment

Tina Schreiner
August 10, 2024 at 3:43 am
All the new articles and photographs are wonderful!