How to Get Perfect Portraits of Tigers
Photographing tigers in the wild is of course challenging, but the challenge-factor actually makes it all the more rewarding when you nail the photo. Part of this challenge is truly finding these wild felines, but you can absolutely stack the deck in your favor by heading to places and countries where tigers are more readily seen. But once in front of these amazing animals, what do you do to make sure you capture them in the way you had hoped?
This article is dedicated to practical and creative tips for making the most of a tiger photo safari and ensuring you come home with extraordinary photos.
Having Reach for the Perfect Portrait
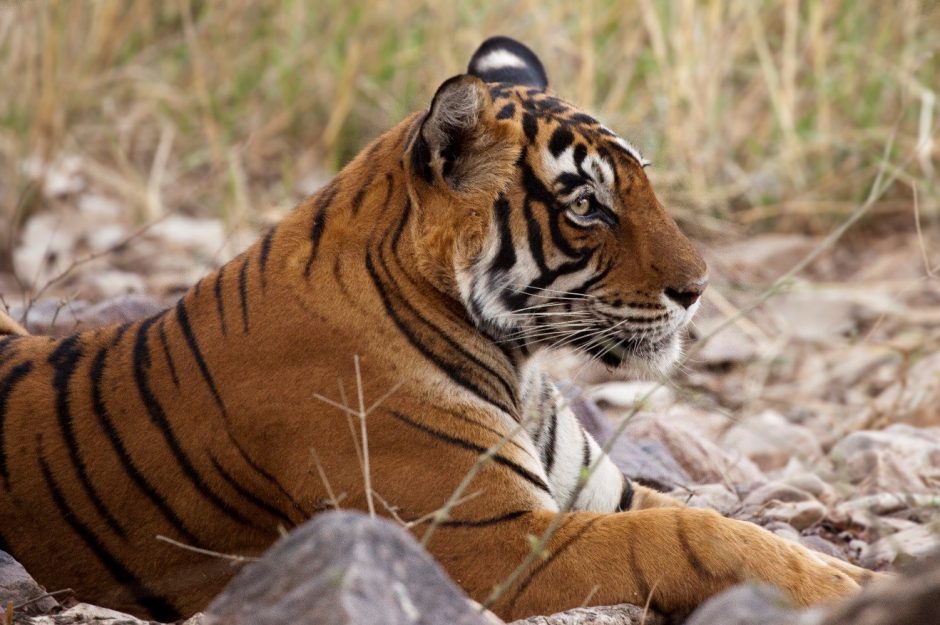
Wildlife portraiture can mean a lot different things, but the first thing that comes to mind for me, when capturing tiger portraits, is showcasing the animal and having it fill a sizable portion of your frame. It doesn’t have to be edge-to-edge composition, necessarily, but to really showcase the animal is front of mind. I’m talking about the fur, the patterns, the textures, face and eyes of the animal being unmistakable focal points of the shot.

To do this, you must have a camera and lens to allow you to ‘get close’ even if the tiger itself may be 10, 20, 40 yards (meters) away. It would be dreamy, of course, if each and every wildlife encounter was up close and personal, allowing the use of a 70-200mm lens, but to hedge our bets, we need something beefier. To be frank, the more telephoto power the better. However, this can come at a cost. In addition to a lens with great reach, I’m also looking for versatility. In other words, how much variability (i.e., zoom) does it have. While a 600mm prime lens might be good for some scenarios, a big lens like this might be too much for all tiger encounters.
Thus, I highly recommend considering a zoom telephoto–one that gives you a range of 100-400mm, 100-500mm, or 200-600mm. Each lens and camera manufacturer will have slightly different versions, which equate to different ranges, but the key thing is to have an upper range of at least 400mm (600mm is of course better) and a lower range of 100 or 200mm.
New lenses coming out from Canon, Sony, and Nikon give even further zoom ranges like the new 200-800mm (Canon) and 400-800mm (Sony). The more reach you have, the more versatile you are in any conditions. But don’t forget about the lower end, as tigers can be close, and sometimes when they are more distant they can be obscured by brush and vegetation, meaning the best shots will be when they approach closer anyways.
Background Separation
One of the hallmarks of portraiture of any kind is what we call “background separation.” This is when the subject is tack sharp but the background melts away and is nicely blurred. This can be achieved in three ways.

The first way has to do with your positioning relative to your subject (the tiger) and its background. Regardless of settings and telephoto length, if you are much closer to the tiger than the tiger is to what’s behind it, the background will have some nice blur. This also applies to foreground features, like in the below shot. The more exaggerated this ratio, the more pleasing and smooth the blur will be.
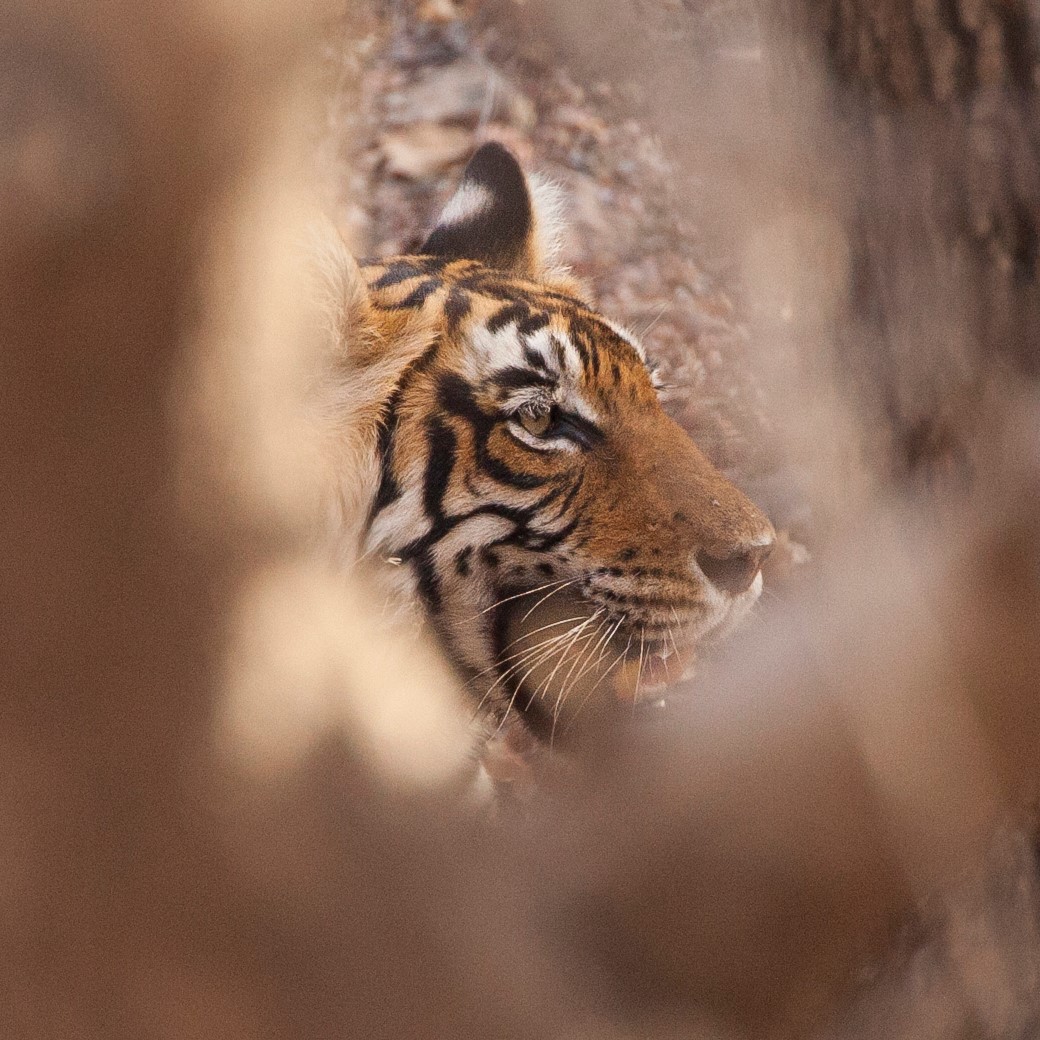
For example, if you are 20 yards from a tiger, but the background is 120 yards behind it, you’ll get that awesome background separation we all love. However, the opposite can also occur, where the tiger is 40 yards away, and the background is only a few yards behind it (like, if it were sitting next to a bush). In this scenario, you will almost never get a pronounced background separation and the bush will be nearly as-in-focus as the tiger. This ins’t necessarily bad, but background separation is the key to outstanding portrait photography.
Ok, so what do you do about this?
Here is where positioning of your safari vehicle is paramount. If you are headed on a proper tiger photography expedition, you’ll have trained drivers and photo guides to help you position yourself to maximize that background depth. It may be that the vehicle needs to drive a bit forward or backward, giving you a different angle circling around the bush so that the background is no longer the leafy vegetation, but is instead a field (with distance) behind the tiger.
The other technique for added background separation is to use a shallow depth of field, aka low f/number or ‘big aperture.’ The smaller the f/number that you dial in on your camera and lens, the less will be in focus. Thus, if you are at, say, f/8 and find that your subject is sharp, but the background does not have that pleasing blur, consider dropping your f/number to f/5.6. You’ll notice a difference immediately.
The maximum aperture of your lens (i.e., smallest f/number it’s capable of) is very dependent on the quality of your lens (size, cost), as well as its zoom range. So, referring to earlier, where I say that a zoom range is desirable, it does come at a cost–especially with less expensive lenses. For instance, Canon’s 100-500mm, which I love, has a maximum aperture at 500mm of f/7.1. I simply cannot go to a smaller f/number, so I have to settle with trying to reposition myself/my vehicle to add that background distance.
Pro Tip: here is where the ‘big primes’ really are worth their money…the venerable 400mm f/2.8 and 600mm f/4 can go to extremely low f/numbers, giving you a dramatically better ability to separate the background. However, they lack zoom, so you may need to either change lenses on the fly, or have a second camera with a wider lens.
The third way to maximize background separation has to do with your telephoto power, i.e., your focal length. The longer the focal length or bigger your ‘zoom’ the more background separation you’ll get at equal f/numbers.
Thus, another tactic to increase background separation is to ‘zoom in’ more, which exaggerates the background blur. This is especially helpful if you are ‘stuck’ at f/7.1 but desire more background separation. You may need to zoom in more to achieve the blur you want. This may mean that you are forced to have a different composition to your photo (tighter shot), or you can reposition to actually go further away from the subject, such that you can shoot at 500mm and still get the entire tiger in the shot.
For example, if I were 20 yards from a tiger and shooting at 300mm on my 100-500mm lens, but wanted to really emphasize the background separation, I might ask my driver to move further back so that I get the same framing at 500mm. This technique won’t be as dramatic as the other two I first mentioned, but it is indeed another trick to maximizing background separation.
Focus on the Eyes
You have to focus somewhere, and that somewhere is very specific.
It’s not that you shouldn’t get the entire head in focus, but if you focus on, say, the ears, depending on the distance to the tiger, depth of field, and other factors, you may find that the ears are indeed in focus, but the eyes are slightly out of focus. For 99 times out of 100 this is bad–you want the opposite. You want the eyes tack sharp at the expense of slight blur elsewhere on the animal. There are some times where the artistry and creativity may find you focusing elsewhere, but this usually is the exception and not the rule.
If you find that you need more of the tiger in focus, simply increase your f/number so that your depth of field increases (however, as you can surmise, this will mean less background separation, per the above).
Aim for the Gaze
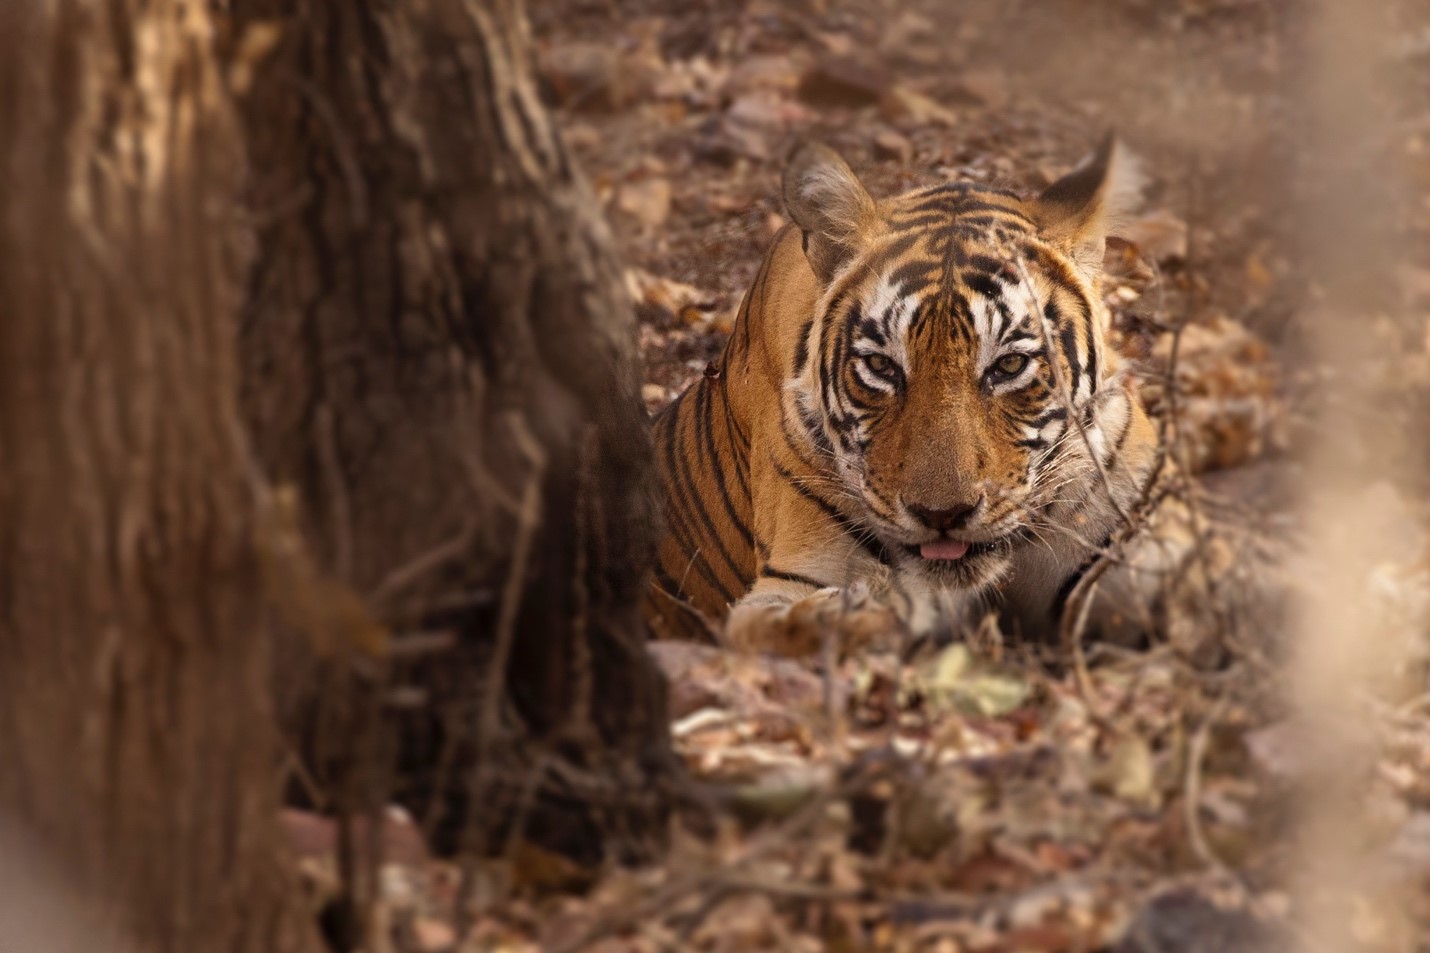
I’ve personally found that the strongest wildlife portraits I’ve taken over the years are when the eyes are either looking at you, or looking off into the distance in a pensive sort of way. Whether or not the tiger looks at you it beyond your control (please don’t make noises to coax a look), but what is under your control is your camera’s burst mode and your sense of timing. Set your camera’s drive motor on the most-shots-per-second (aka frames per second, or FPS) and be ready for these specific looks.
You can always sort through and delete photos afterwards, but if you’re shooting at 15 frames per second (or heck, even 30 frames per second, if your camera allows) there is a better chance of multiple great shots than if you were to try and time it to just that one split second of a head on look.
(also, keep an eye out for ‘catch light’ like in the below photo–when the sun makes a slight reflection in the eye to give it that glimmer)
Think About Composition but Shoot Wider to Hedge Bets
Composition is always king, but we have more than one chance to nail it. We can crop on the computer afterwards to place the animal in the dead center, or off center, depending on the vibe and artistry you’re going for. I’m not advocating for heavy crops, as this reduces resolution and can quickly turn a 45mp photo into a 10mp one that can no longer be printed on large format or displayed on a large screen. However, shooting 10, 20, 50, 100mm wider than you think gives you a little room to play and the resulting crop isn’t that much. This wiggle room is always a very welcome realization to me when I review and edit my photos and am SO happy I thought to do this with at least a few shots in my sequence.

In Summary
Wildlife portraiture is an elegant, simple, and powerful way to showcase the beauty of a subject–and there is no subject quite as magnificent as a wild tiger! But don’t let the simplicity of the end product distract you–there are indeed key steps to consider when setting up for the shot.
Going to a place where wild tigers are more likely is an essential starting point (so that you hopefully have multiple chances over the course of a photo trip), but it’s equally essential to maximize background separation and be able to fill the frame with the tiger to the degree that you want. Then, by paying particular attention to where you focus, the timing of your photos, and hedging your bets with different compositions will get you to the finish line and hopefully to the end of your trip with a treasure trove of fabulous shots.
Get out there and enjoy it!

Court
Leave a reply